20. Sovereignty Part 4/4 - Setting up sovereignty demo on GCP - Google cloud EKM + Confidential Computing + Ubiquitous Data Encryption/UDE + Thales CKM

While I worked at Google during the publishing of this post / video, the views expressed here are my own and may not reflect those of my employer. Only publicly available material is used to put together the content of this article and video. The website and the Youtube videos are NOT monetized.
This is part 4 of the (4 part) sovereignty series. Please checkout previous posts before you continue -
- What is sovereignty and why it can be the next big trend in cloud computing?
- Encryption to power data sovereignty on Google Cloud (Demo GCP EKM + KAJ and Confidential computing)
- Practical sovereignty - Sovereign solutions on Public Cloud
- ▶ Setting up sovereignty demo on GCP - Google cloud EKM + Confidential Computing + Ubiquitous Data Encryption/UDE + Thales CKM
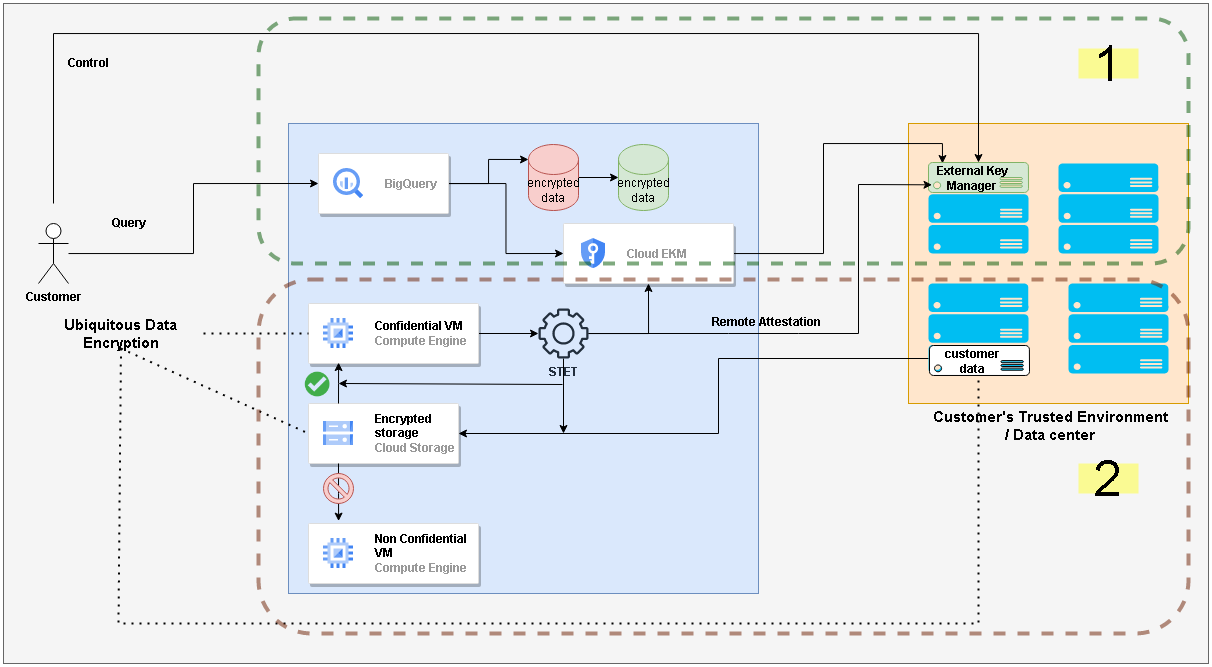
In this part we are going to create the setup used in the data sovereignty video demo from part 2 of this sovereignty series.
Here’s that video again. I highly recommend you to check out that post.
Here’s what we are setting up. We are simulating customer’s DC in AWS.
💡 The setup involves standing up infrastructure on GCP as well as AWS. Basic knowledge of both platforms is expected. Also, you already need to have AWS and GCP accounts. And this demo may not run in the free tier. Please be mindful of the costs. You also need to have a DNS domain or subdomain available for this setup. It is highly recommended that you go through the part 2 before attempting this setup
In the screenshots below ARROW ➡ denotes something to notice / click, NUMBER 1️⃣ denote order of clicks and the ⬜ denote some important or updated field.
Setup Steps
1. Subscribing to Thales CKM on AWS Marketplace
Login into your AWS account. I am using Mumbai region. You can use a region that is common between AWS and GCP (e.g. Singapore)
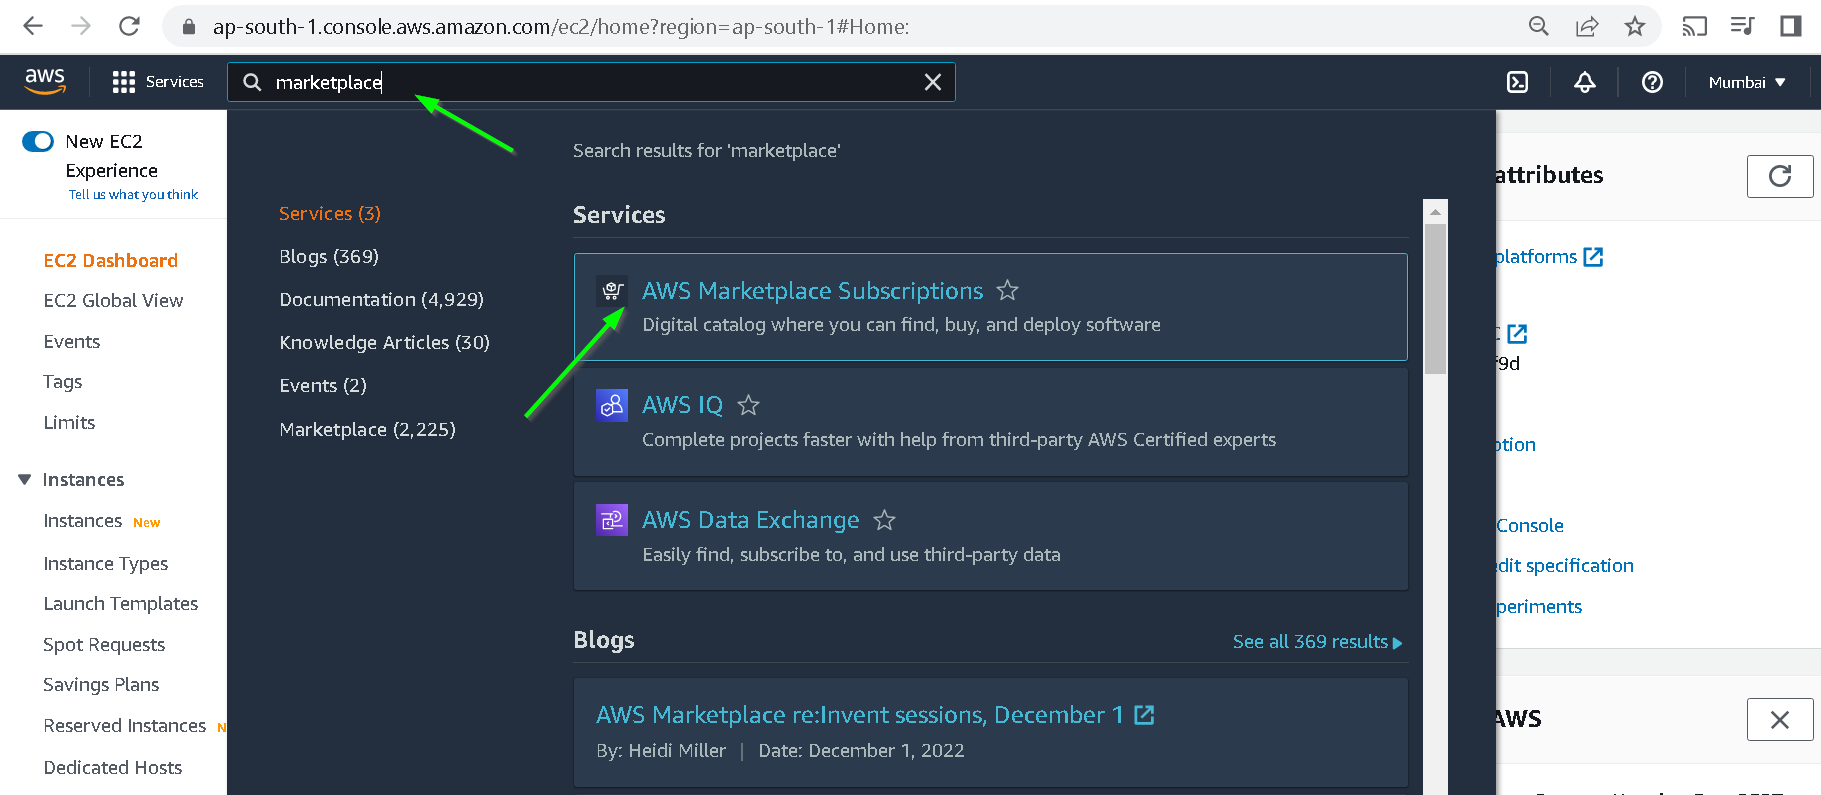
Click to go to marketplace
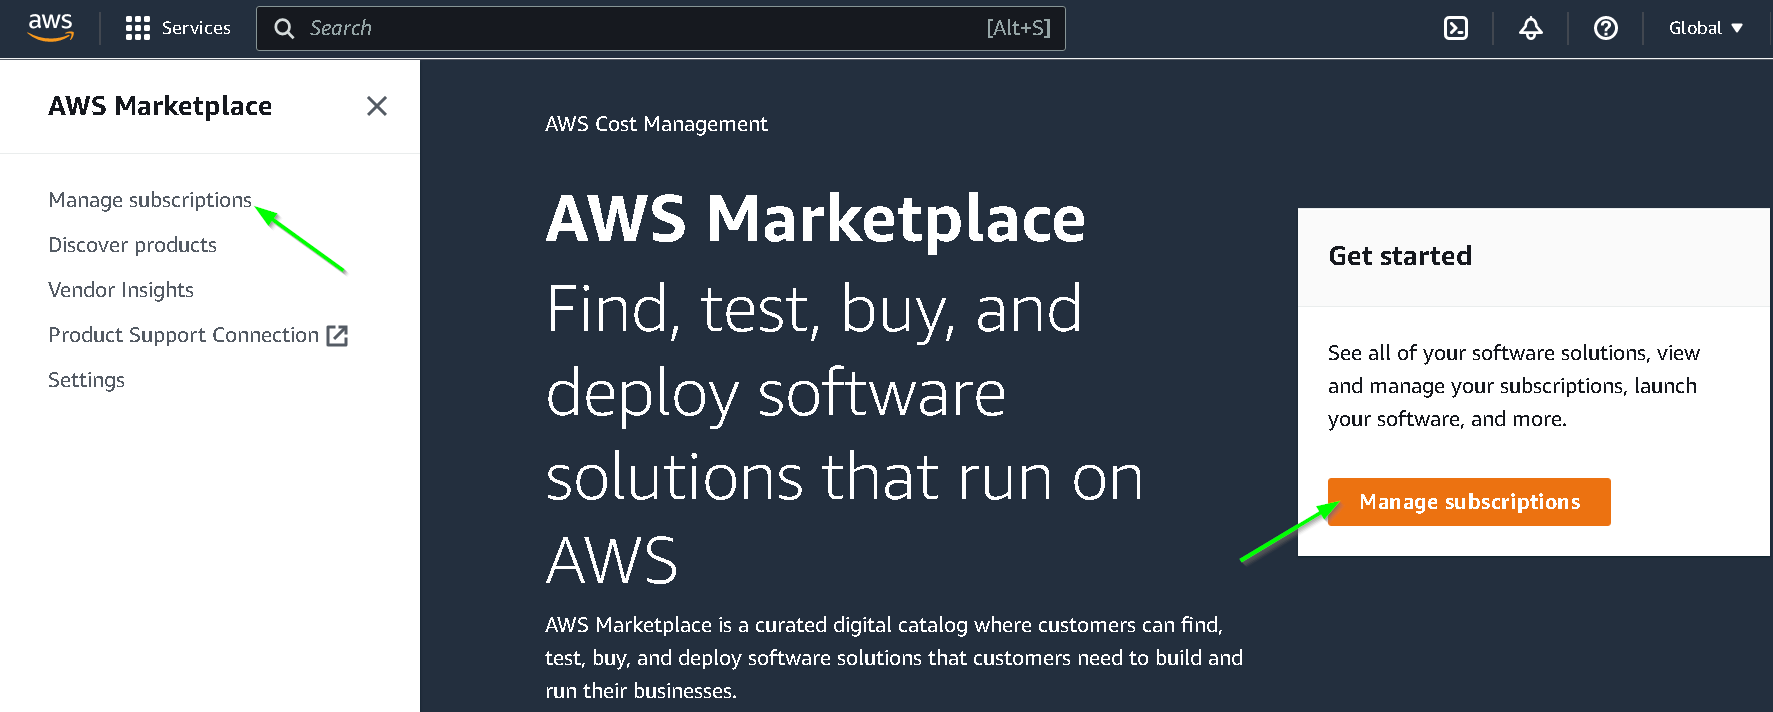
Click Manage subscriptions
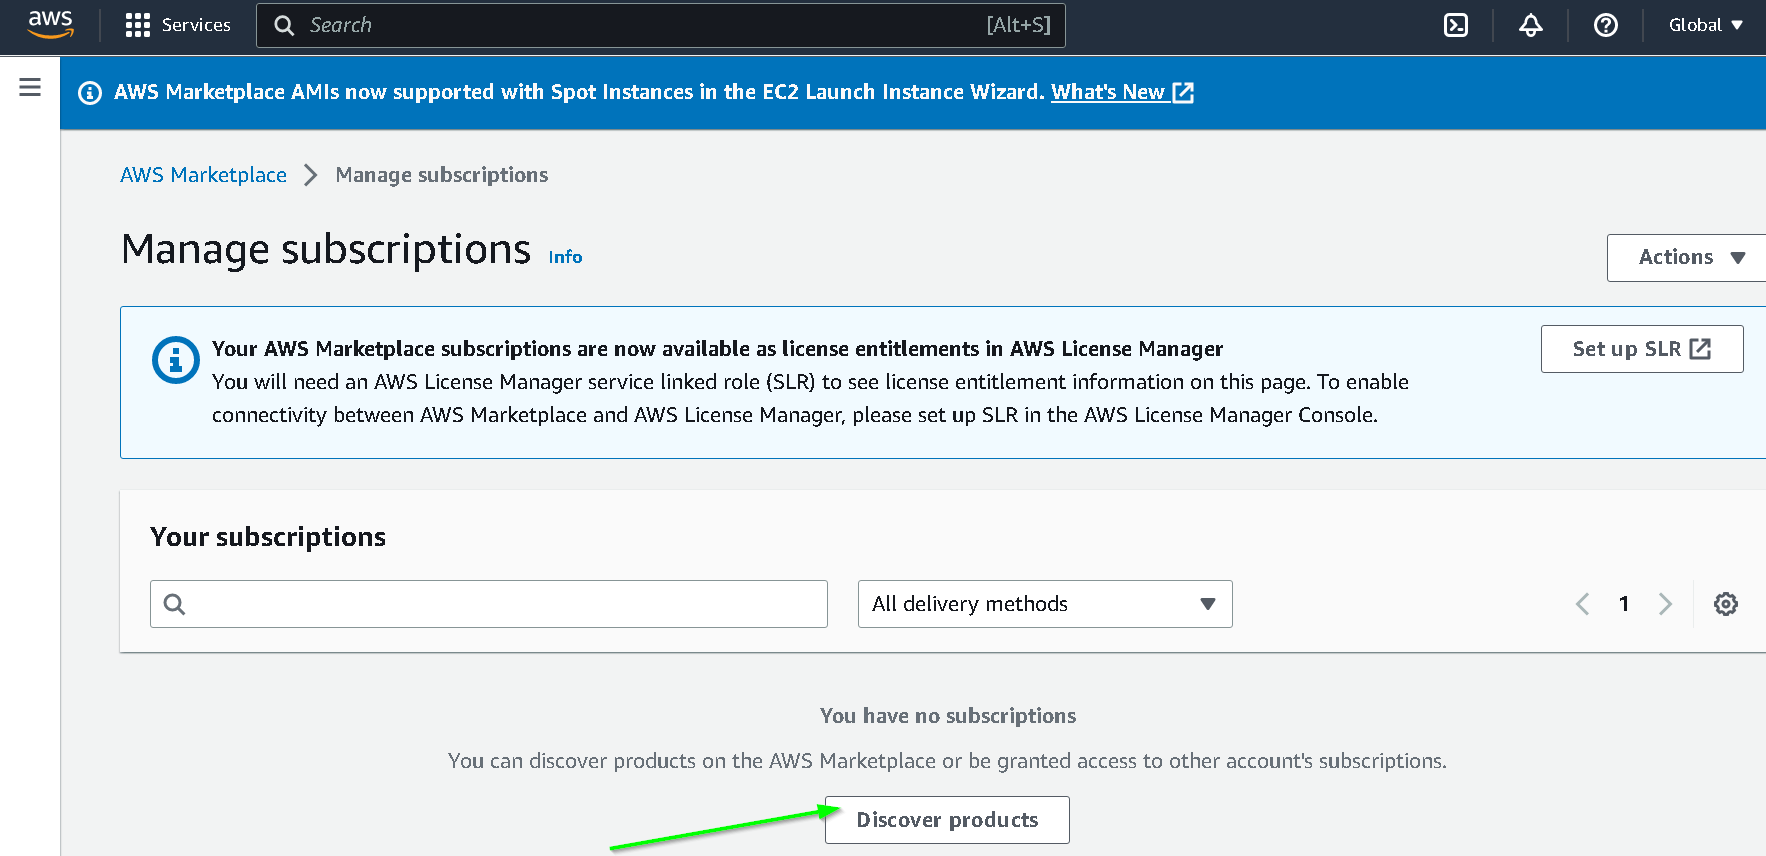
Discover Products
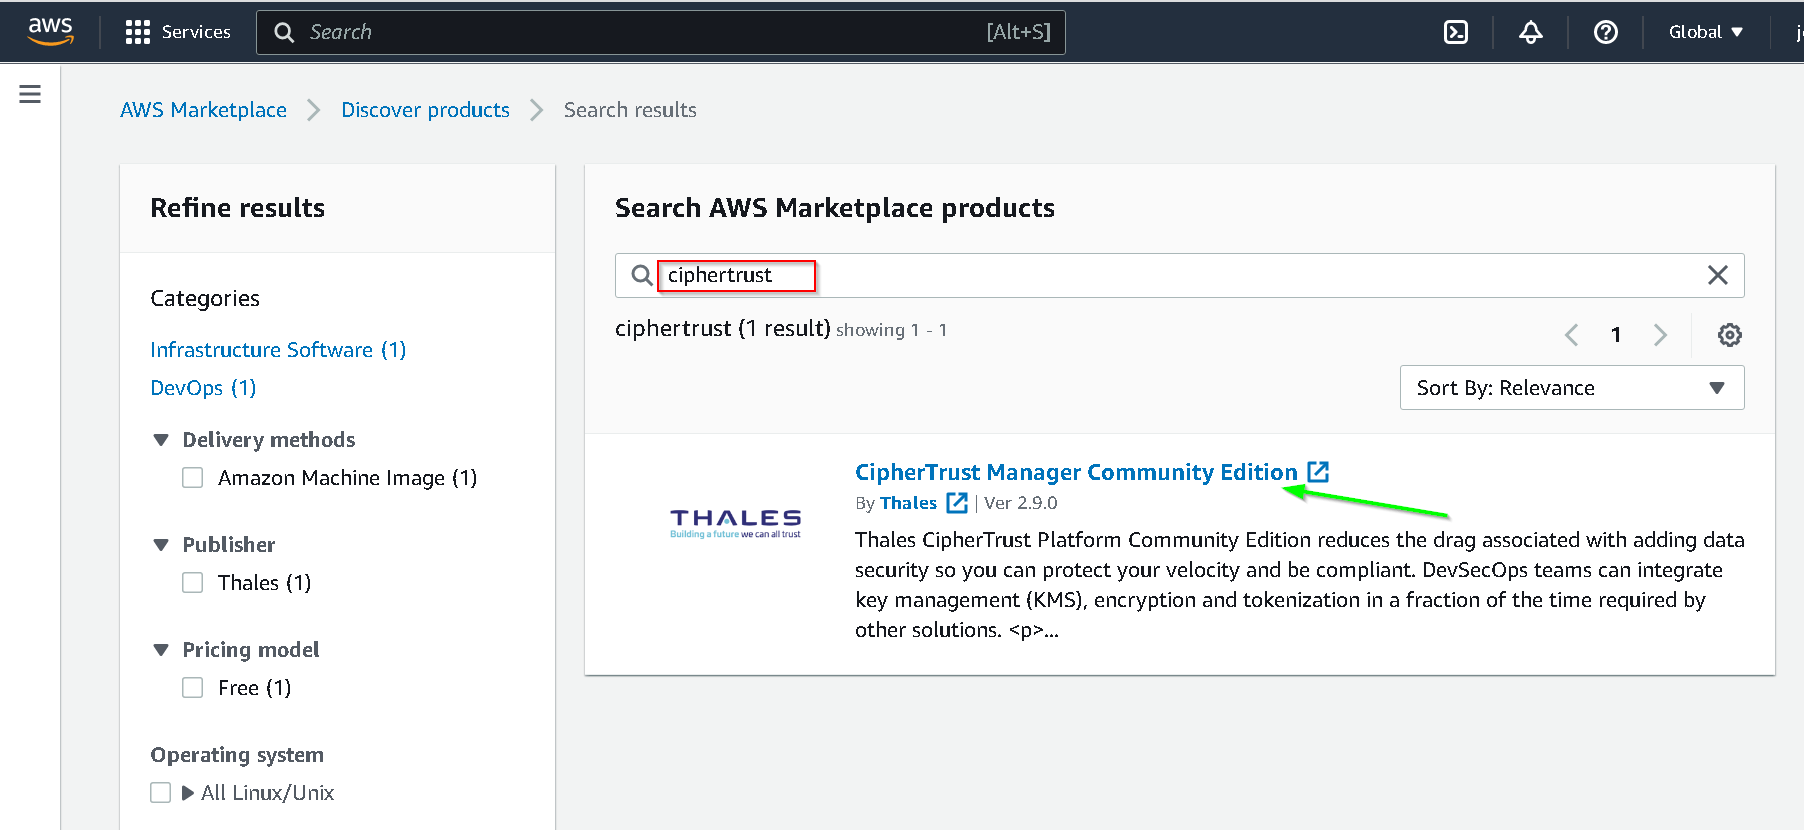
Search for ciphertrust and click the search result for Ciphertrust Manager Community Edition
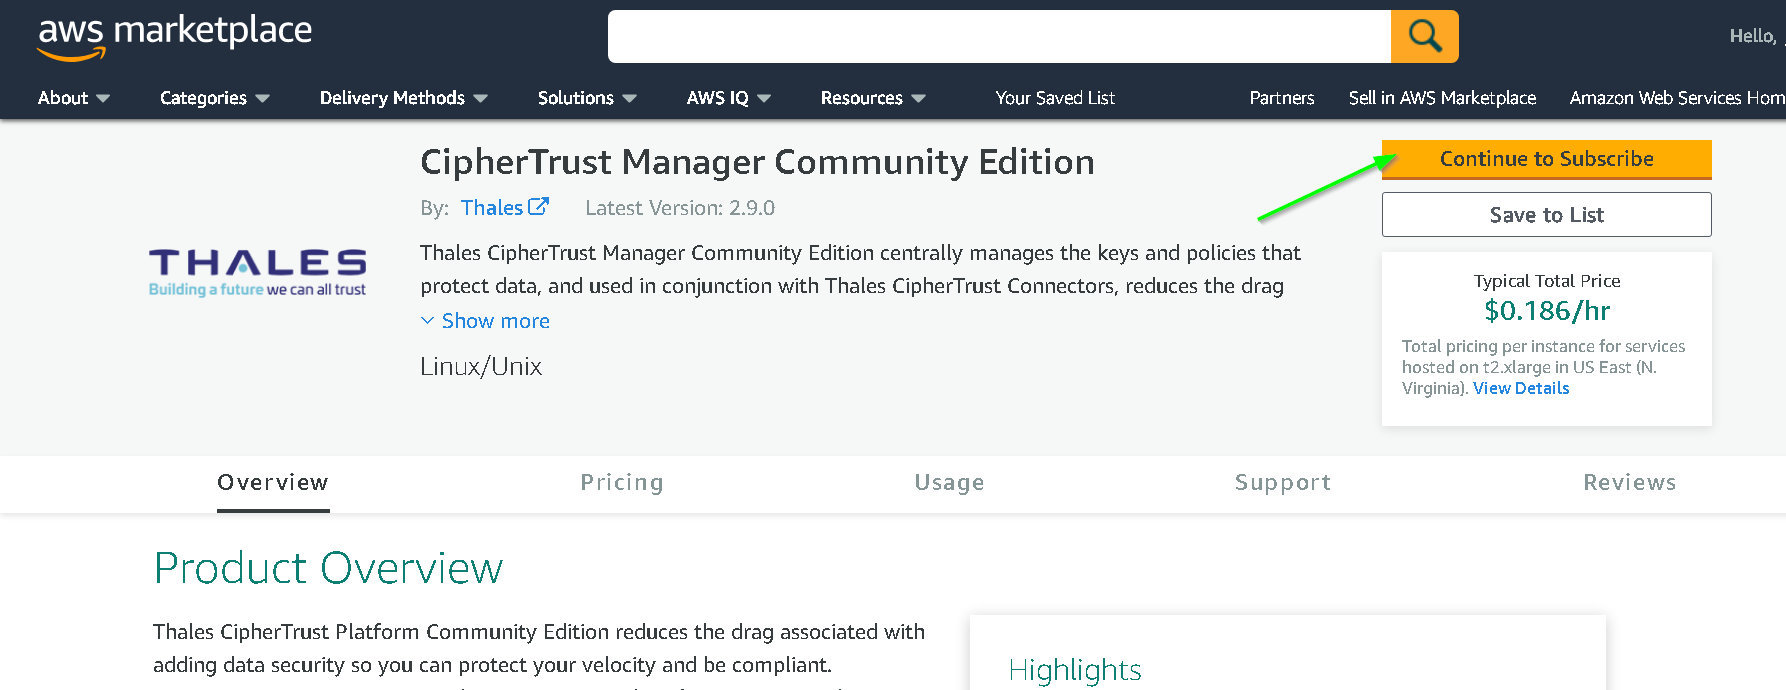
Click Continue to Subscribe
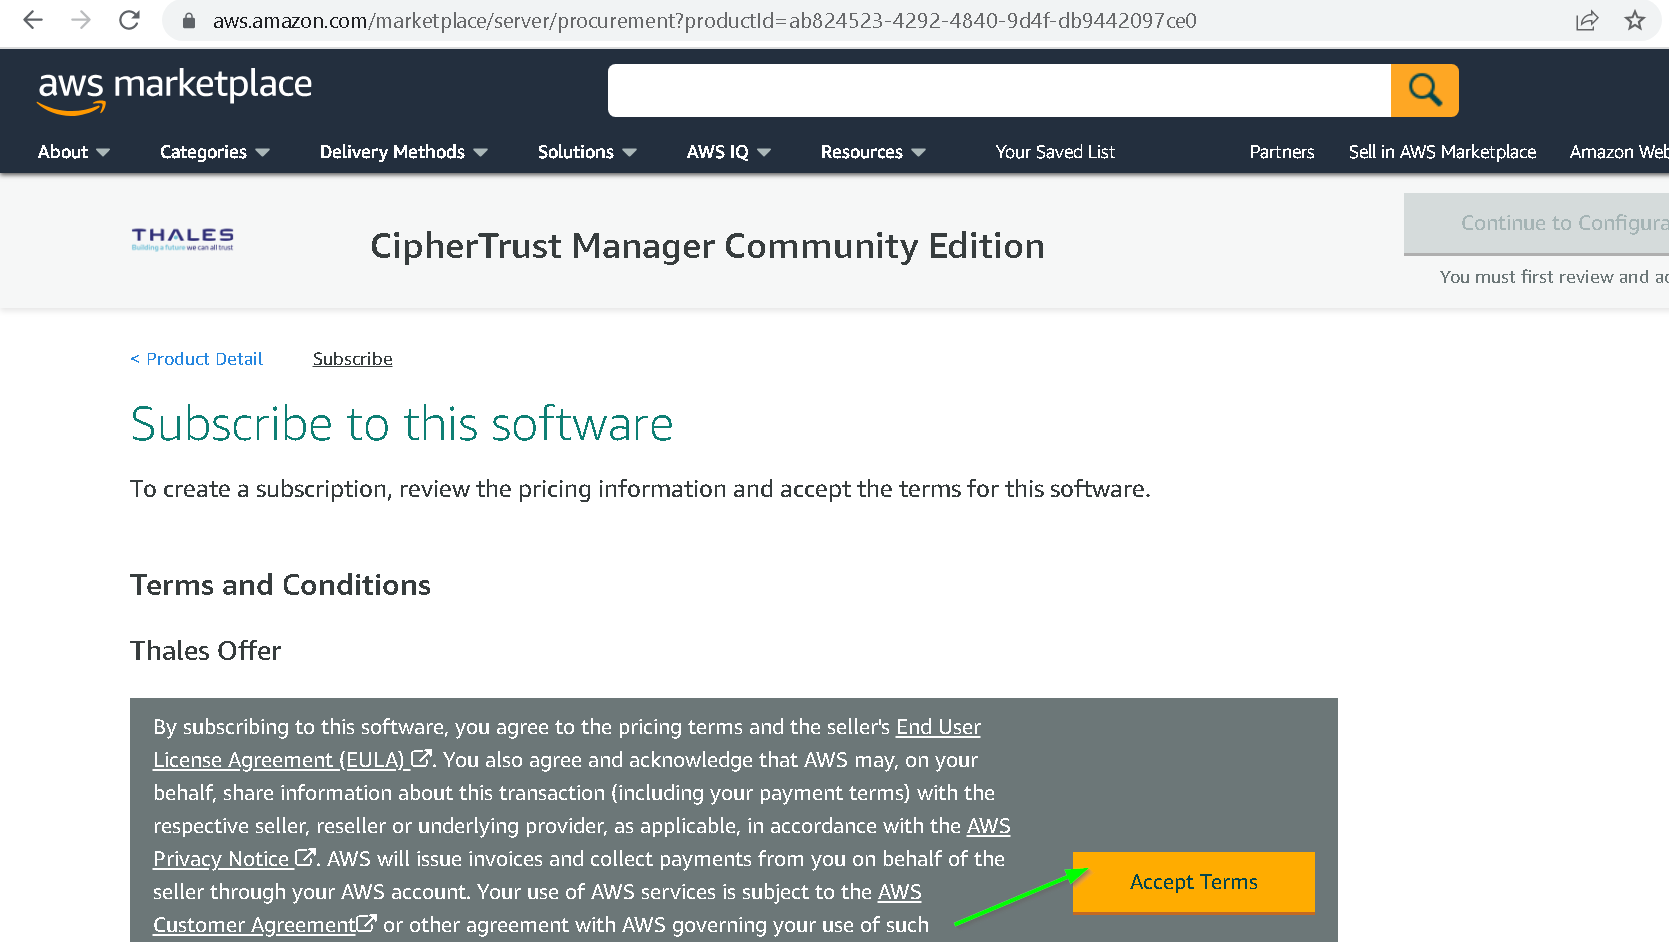
Accept Terms
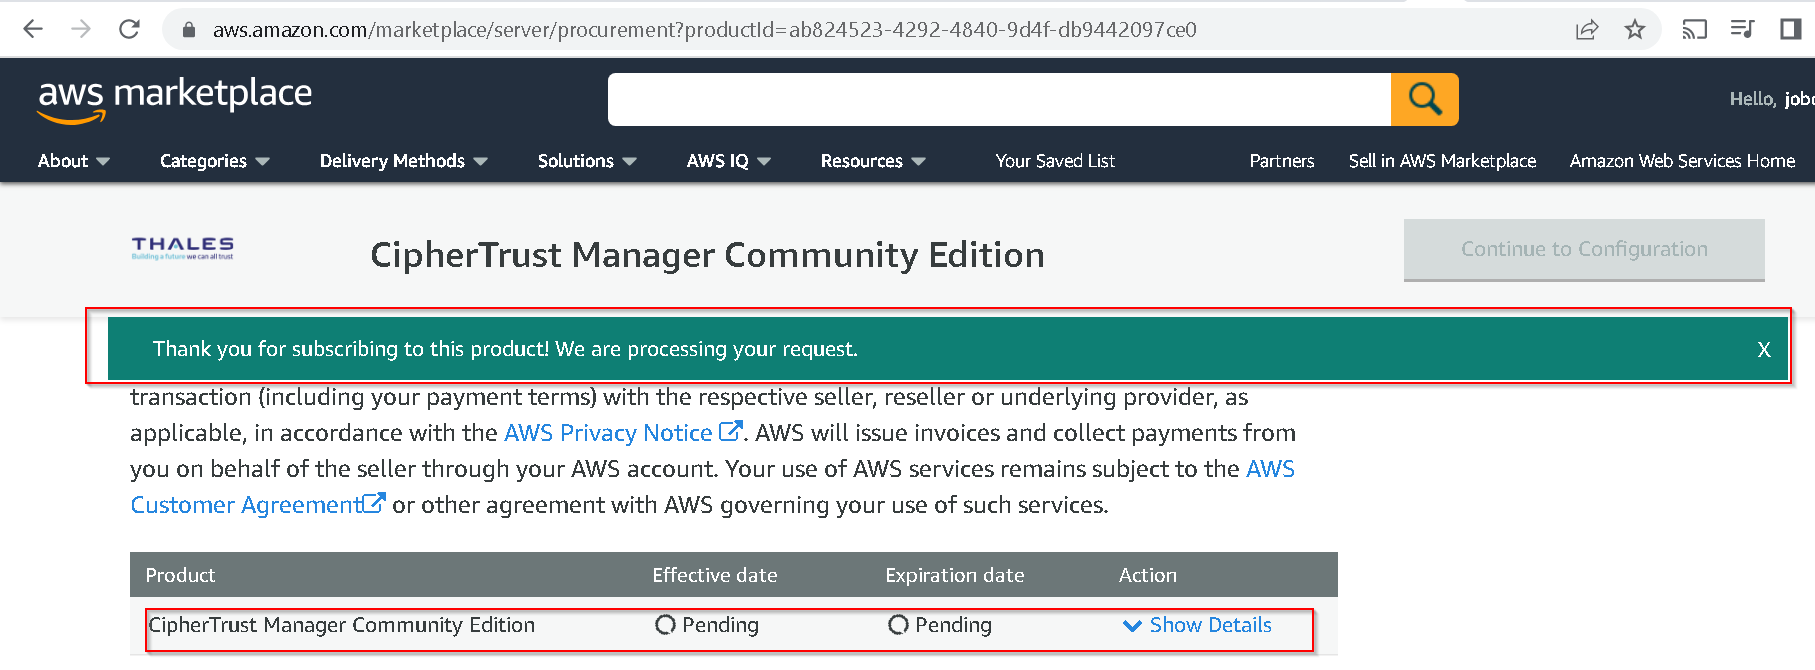
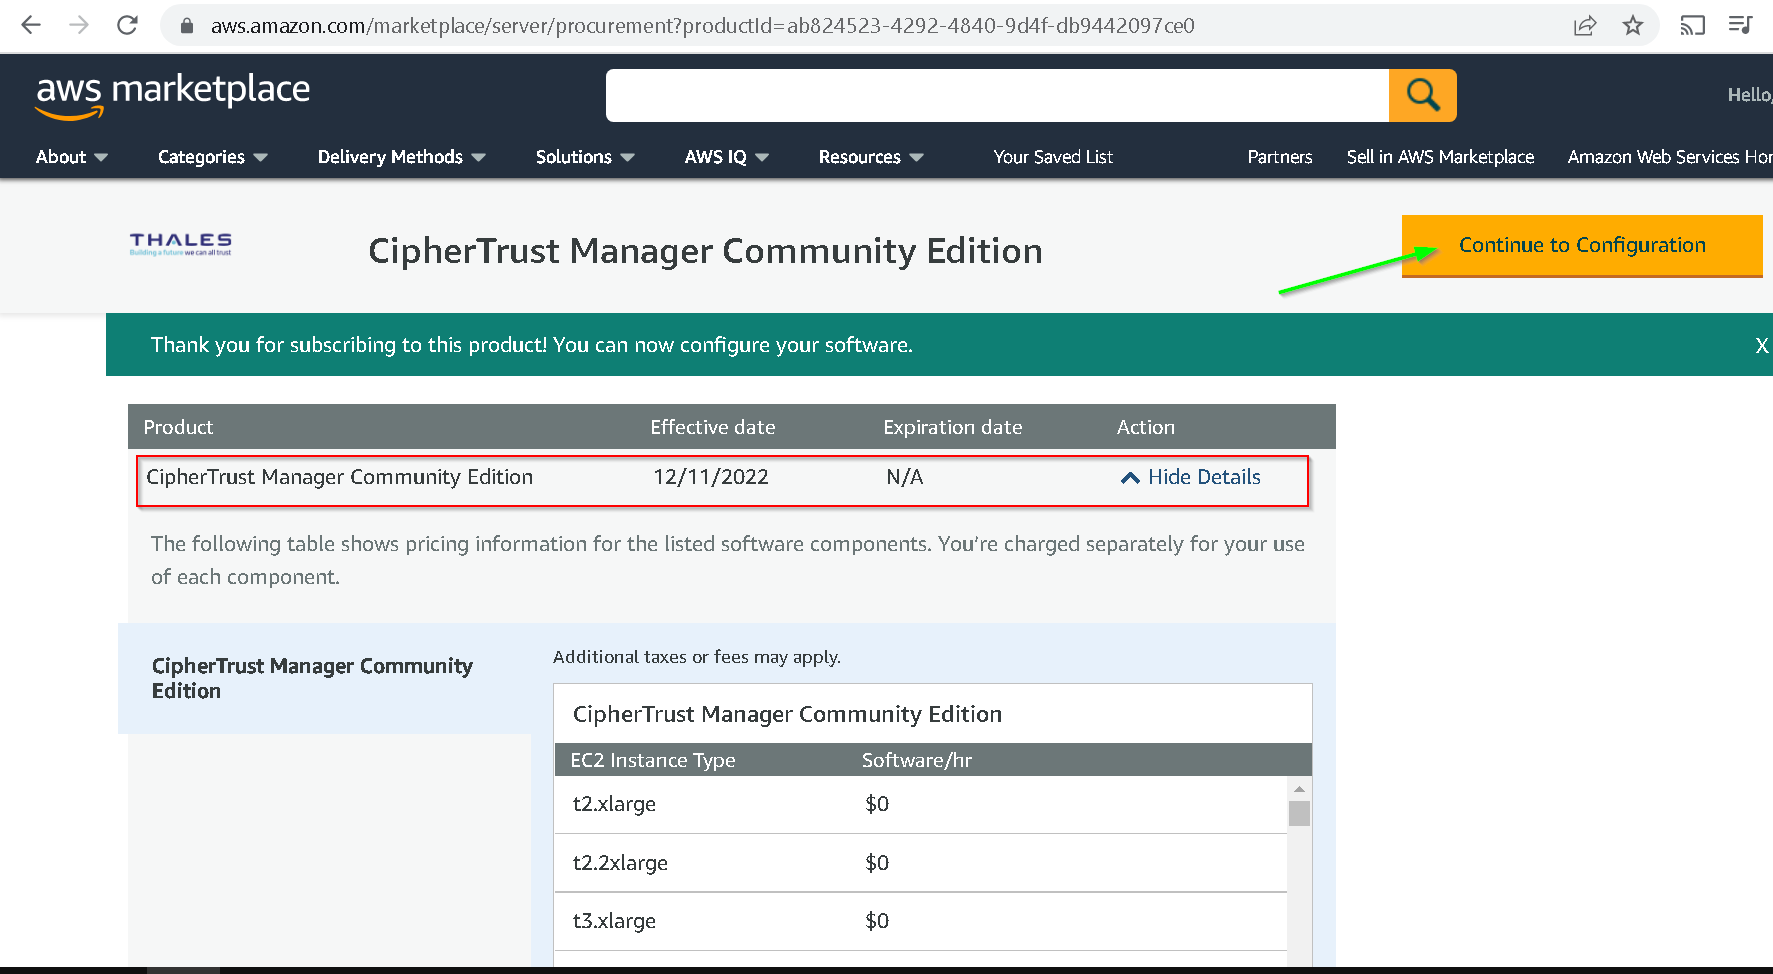
After some time, you will be subscribed and Continue to Configuration option will be enabled. Click that.
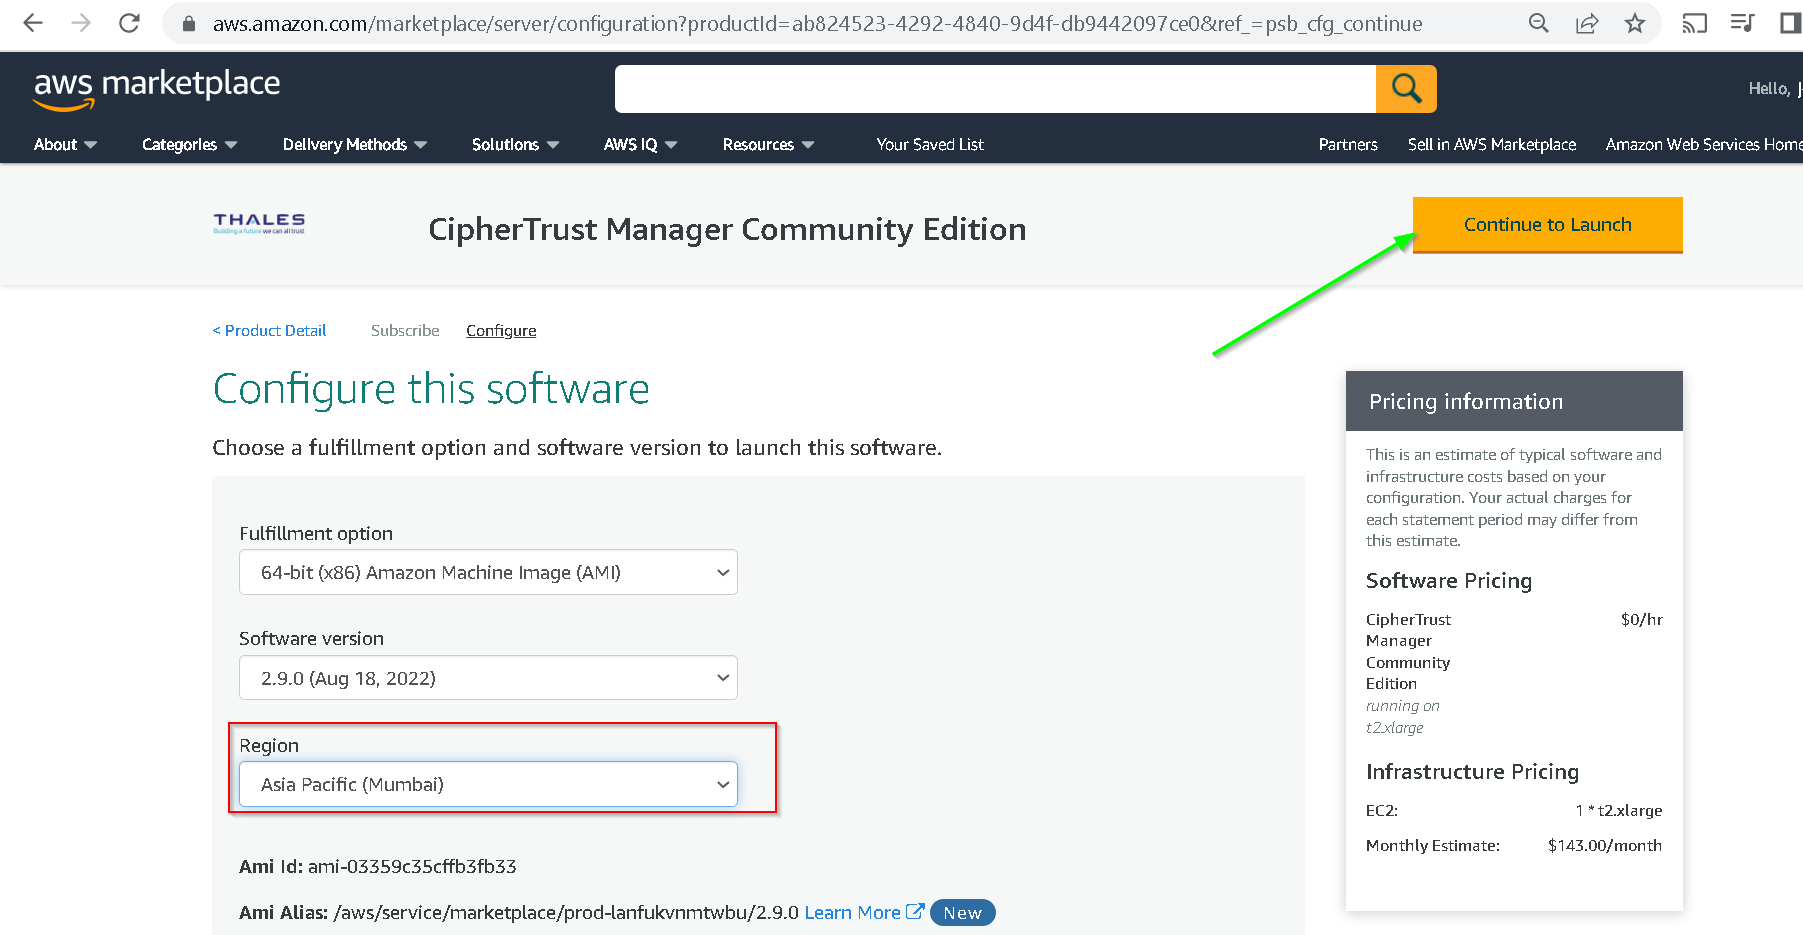
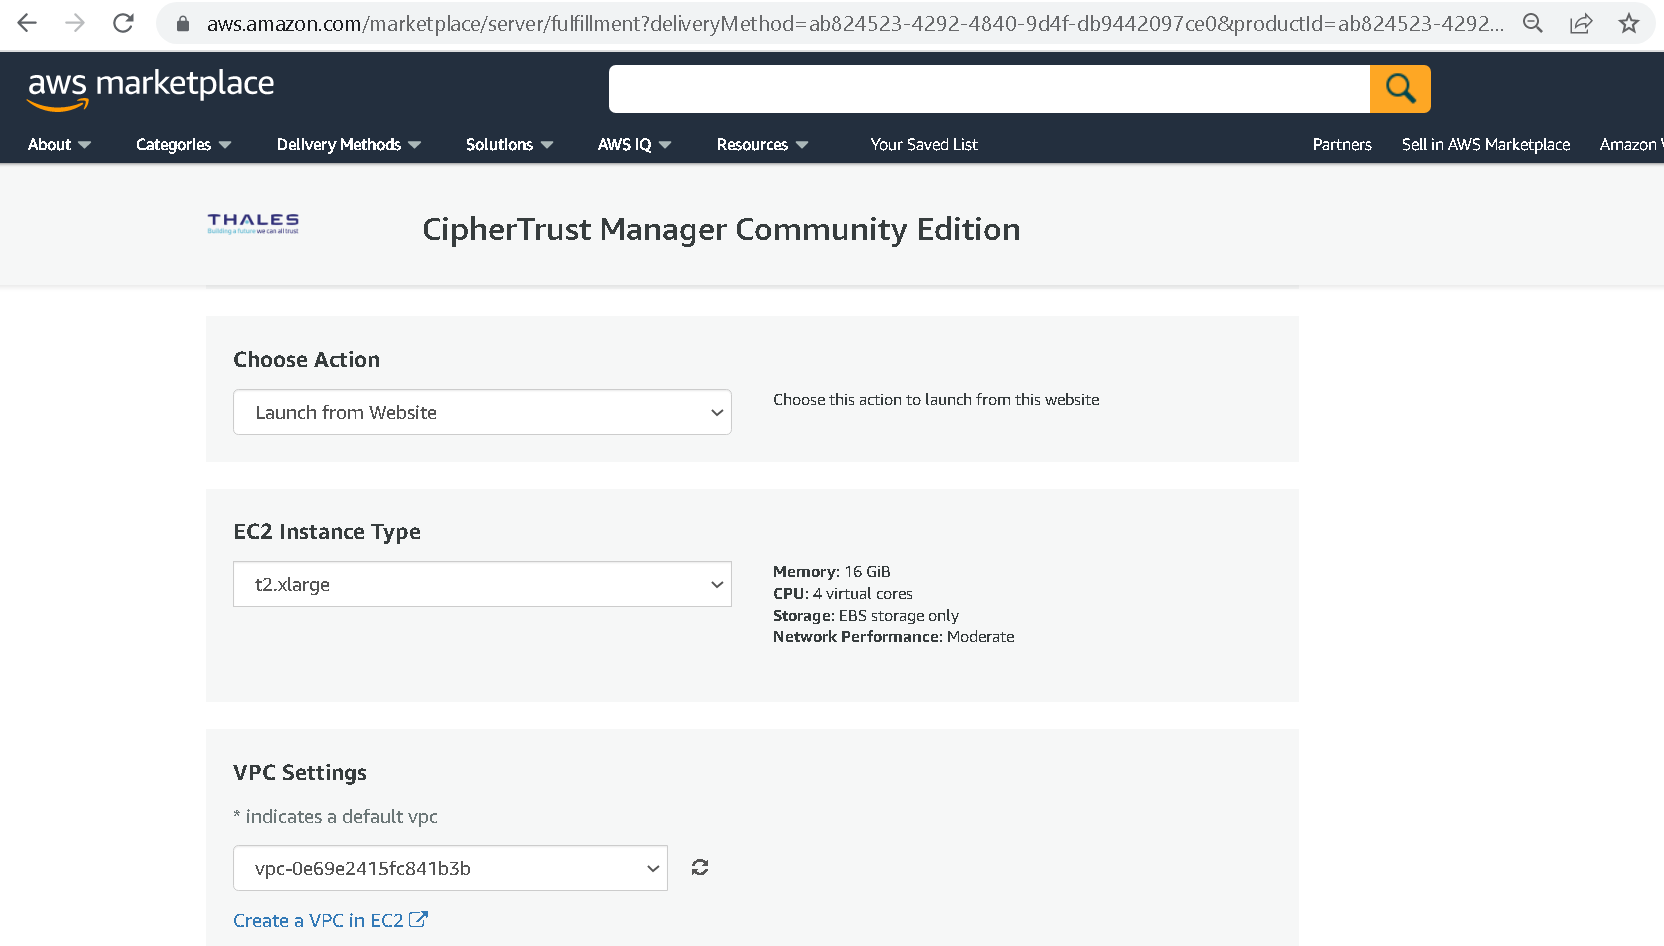
I chose region as Mumbai and clicked Continue to Launch
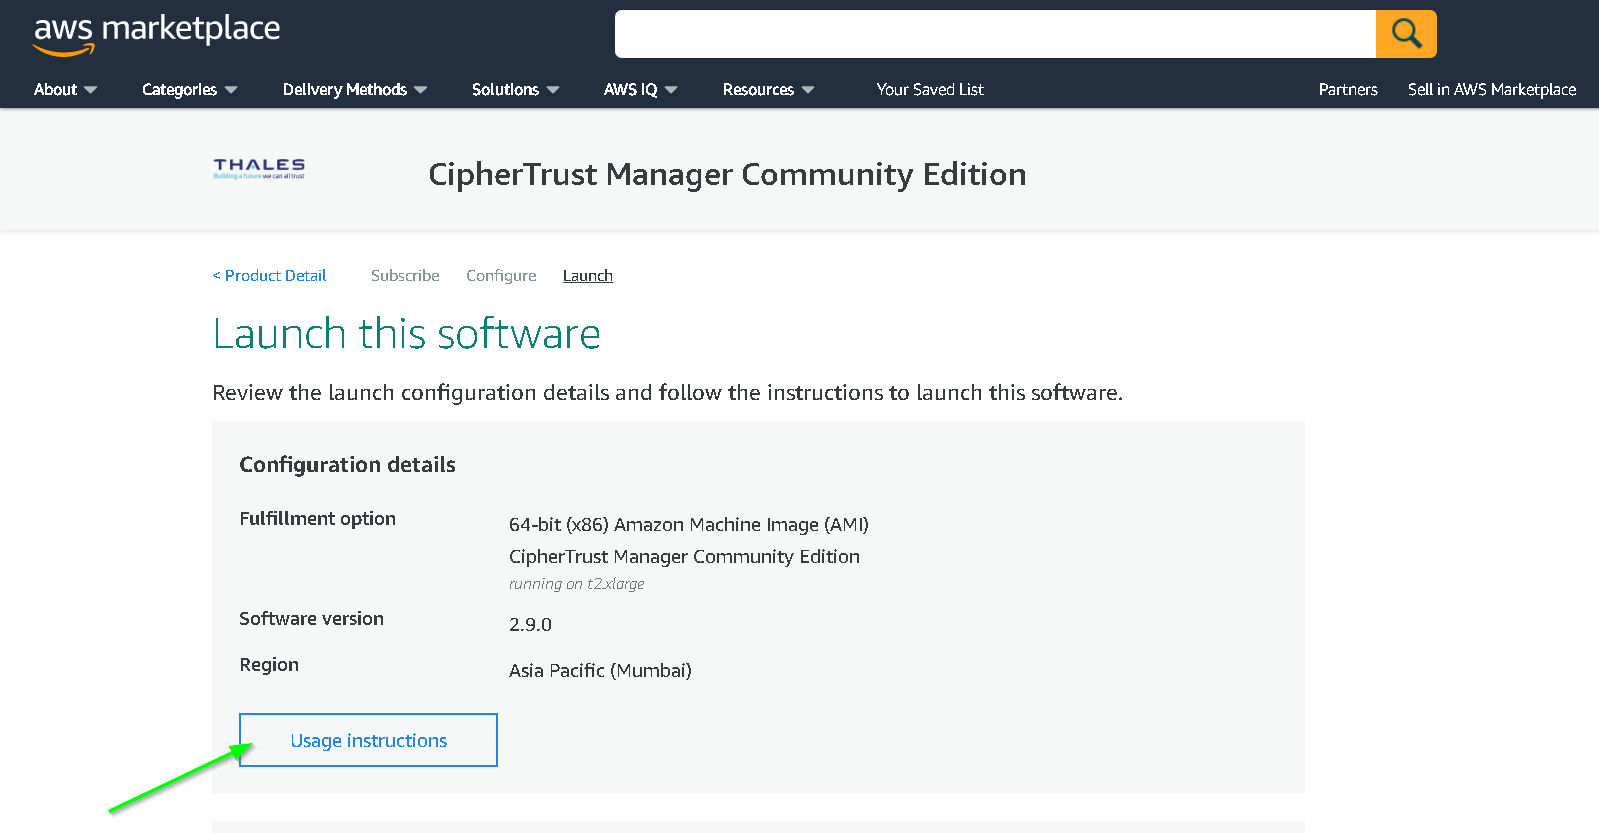
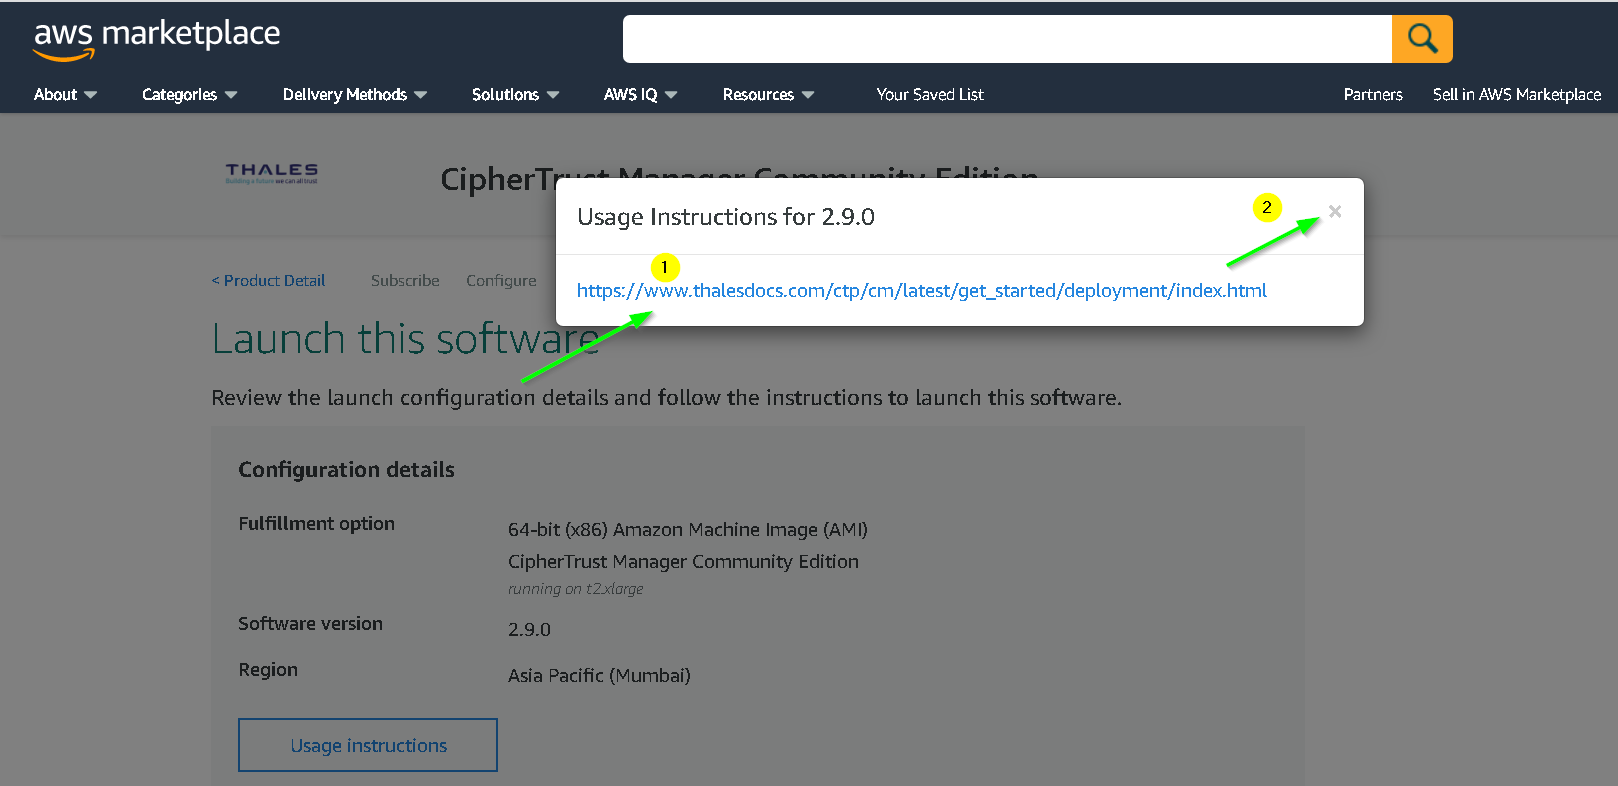
You can read the usage instructions by following actions from these 2 screenshots
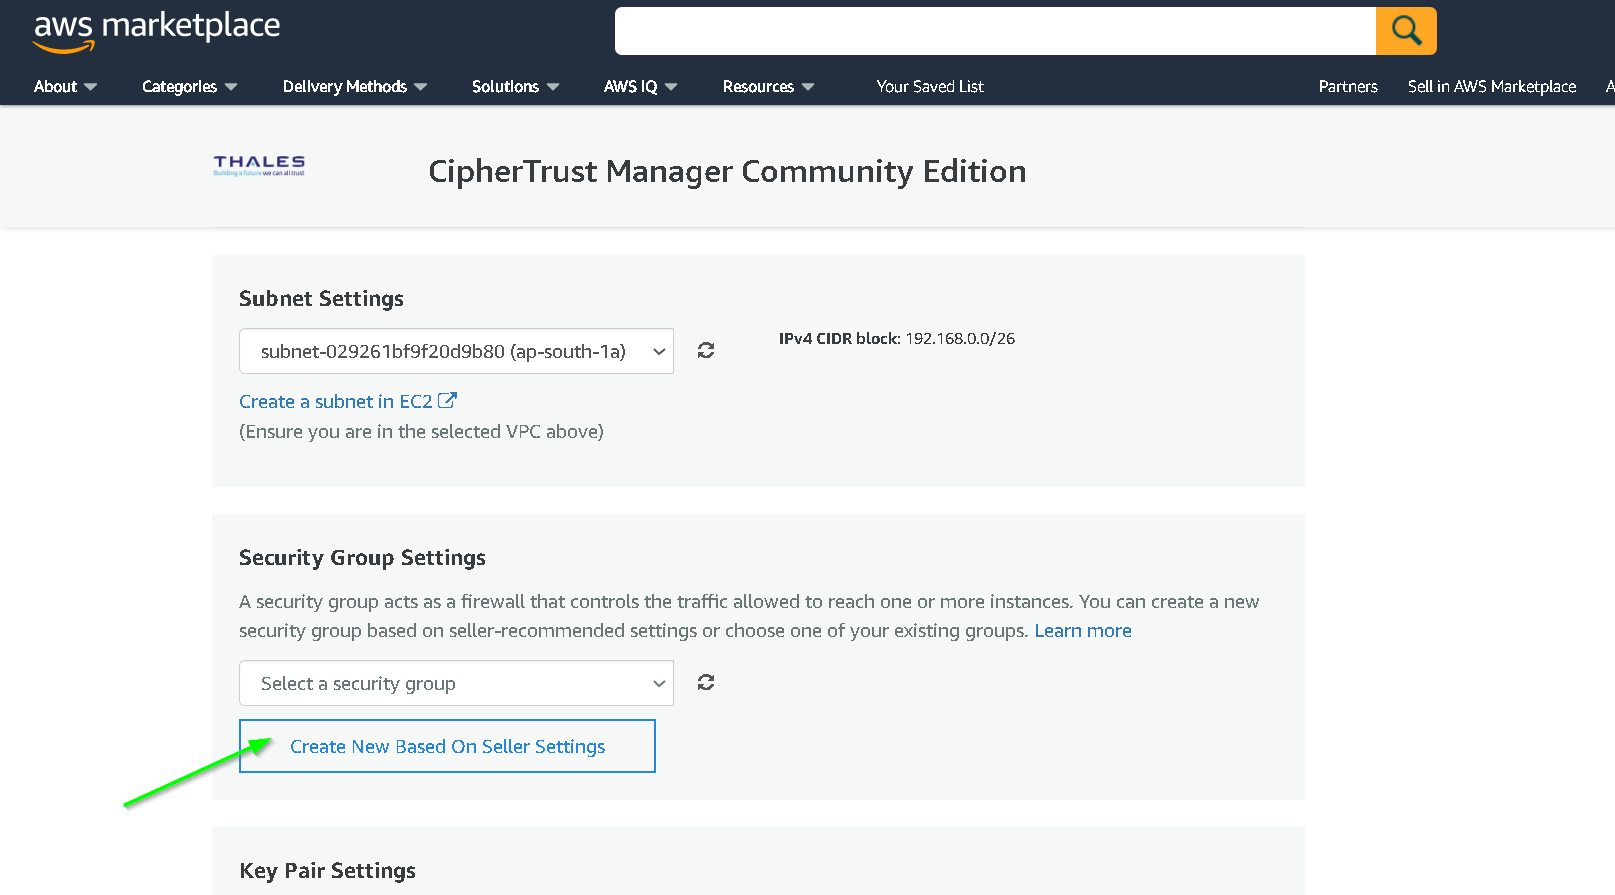
Keep the default options for other fields and then choose the right VPC
Create new Security Group
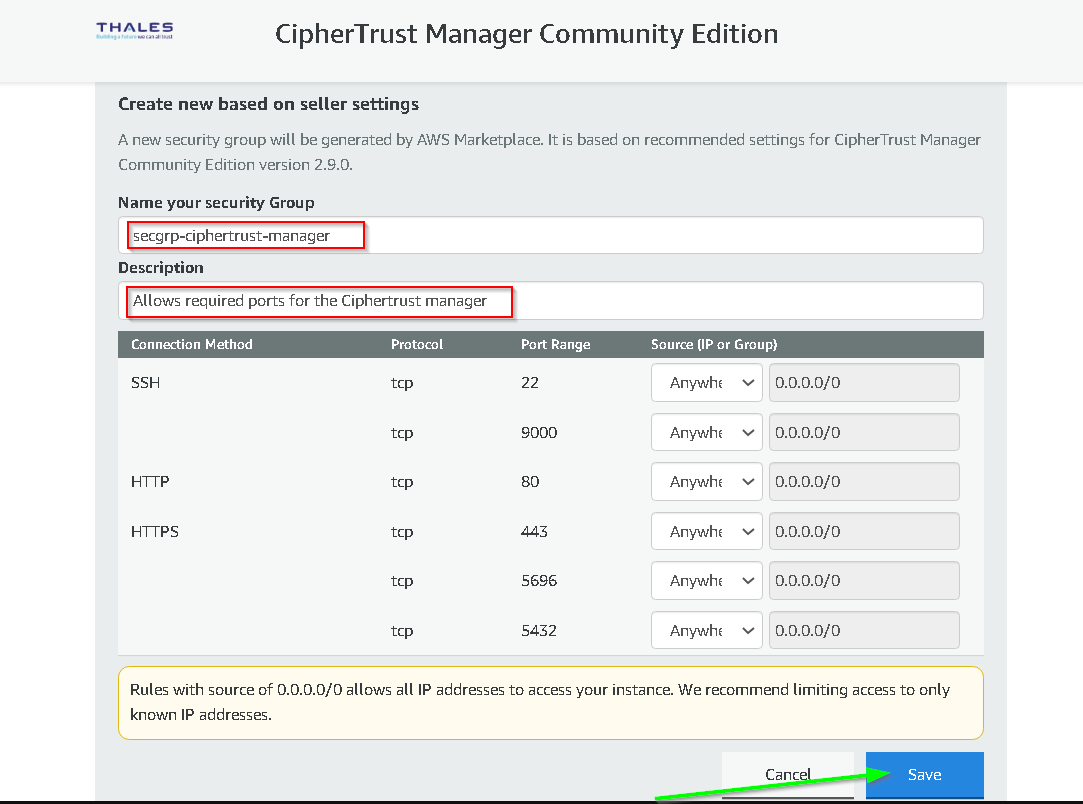
Update name and description for the security group
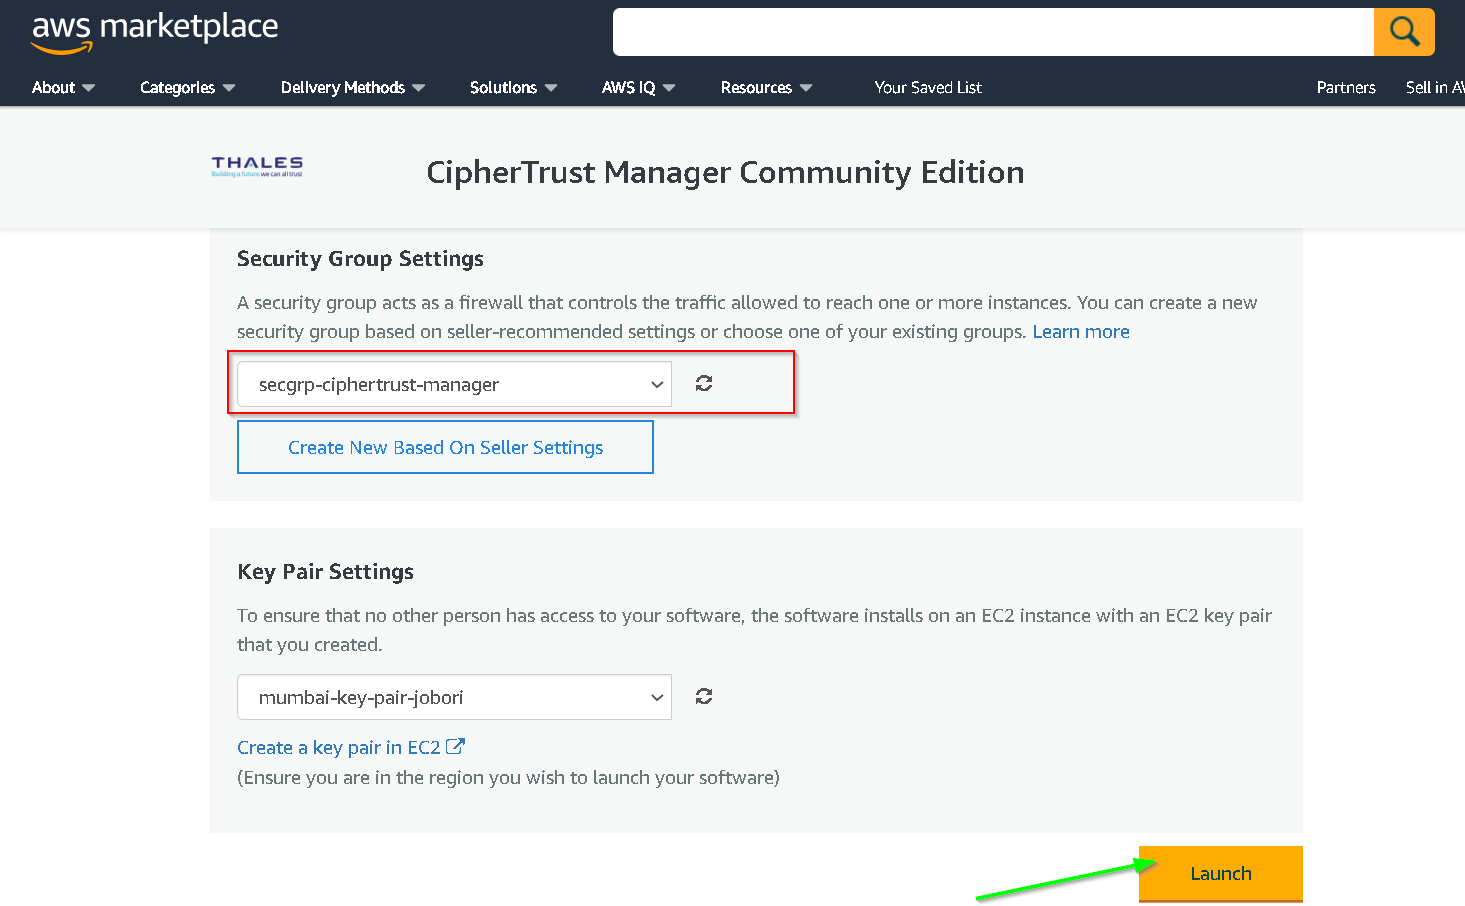
Click Launch
Deployment complete
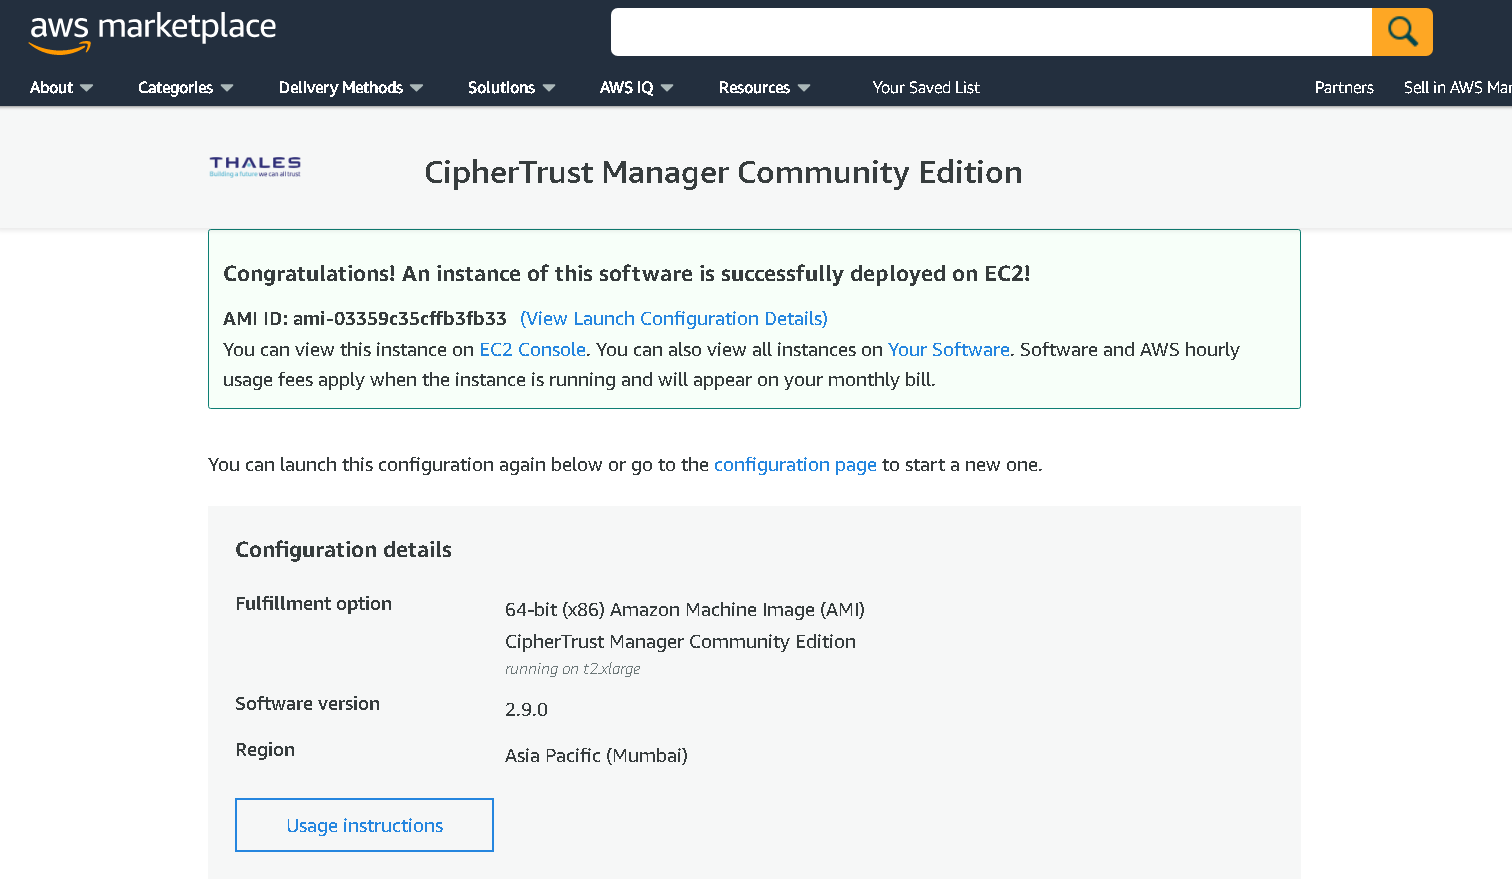
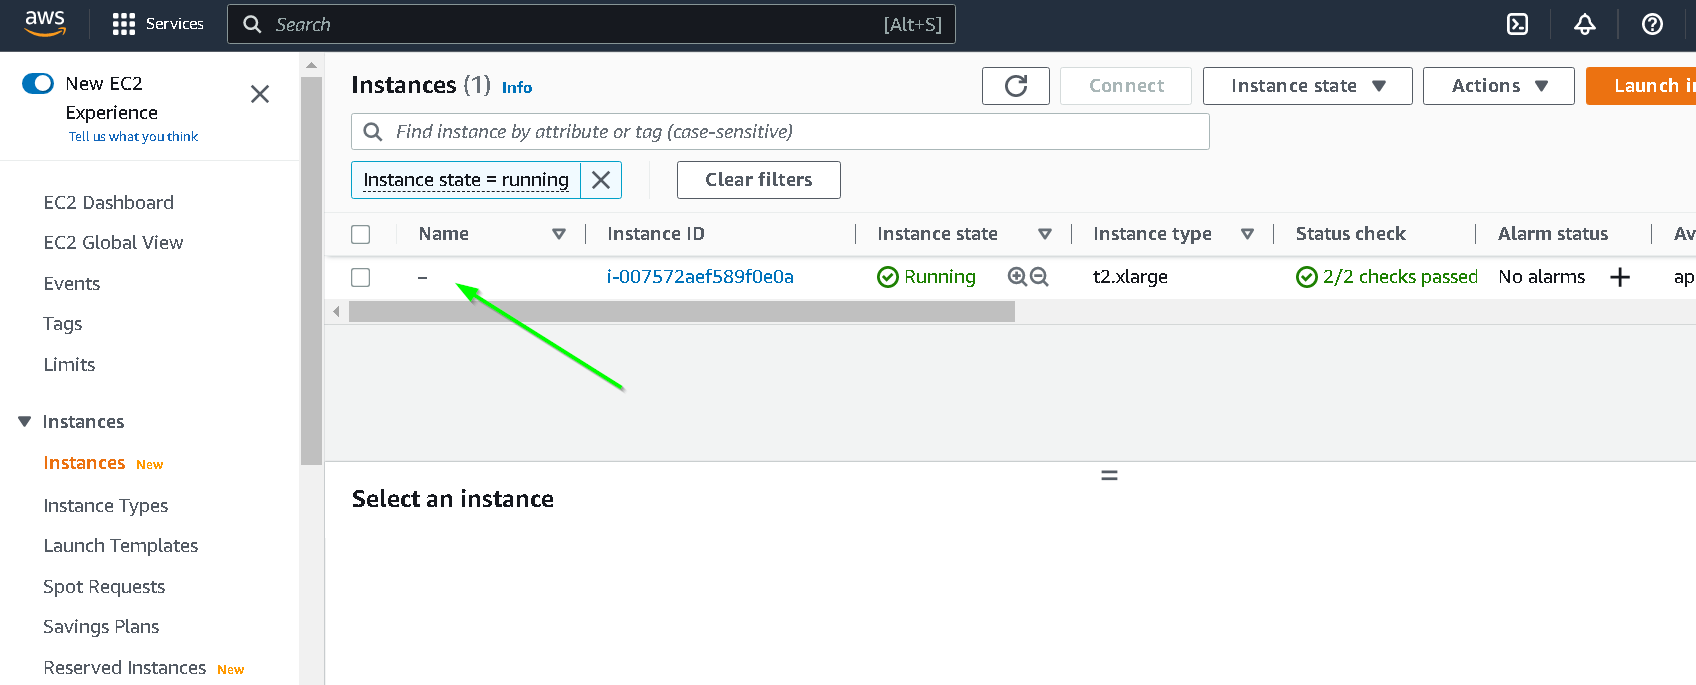
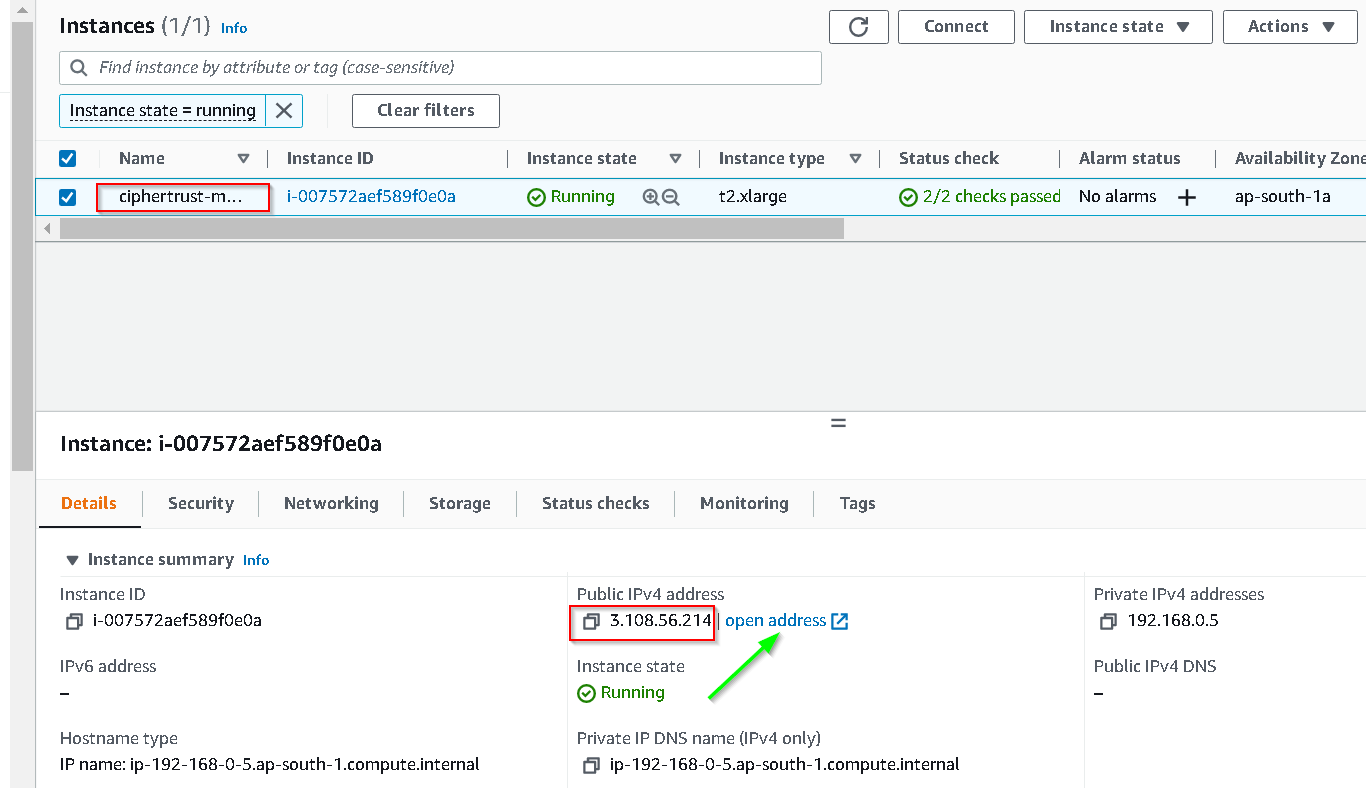
Go to EC2 console, verify the instance is running
Click Launch
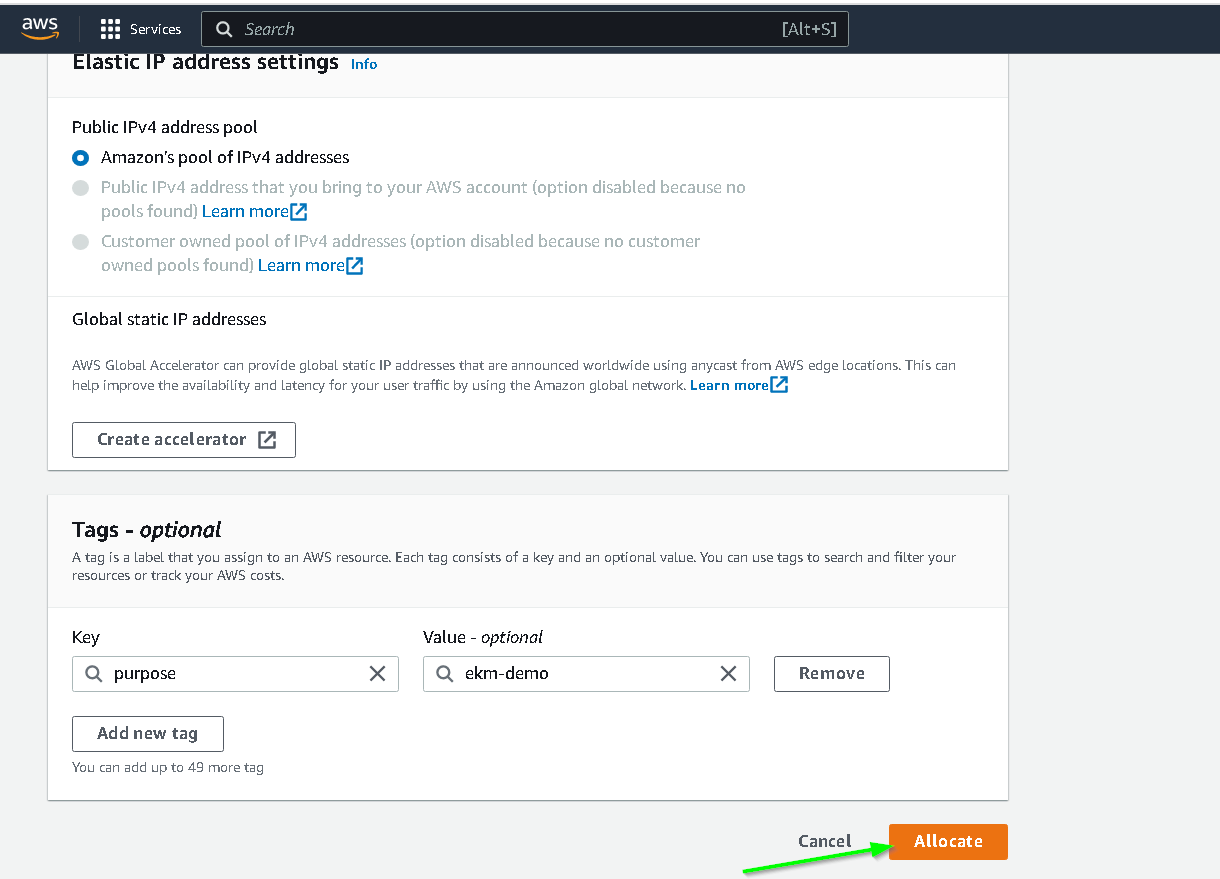
Click Elastic IP (we want to assign an elastic IP so that the instance retains the IP address between shutdowns)

You can add a tag for usability (optional) and click Launch
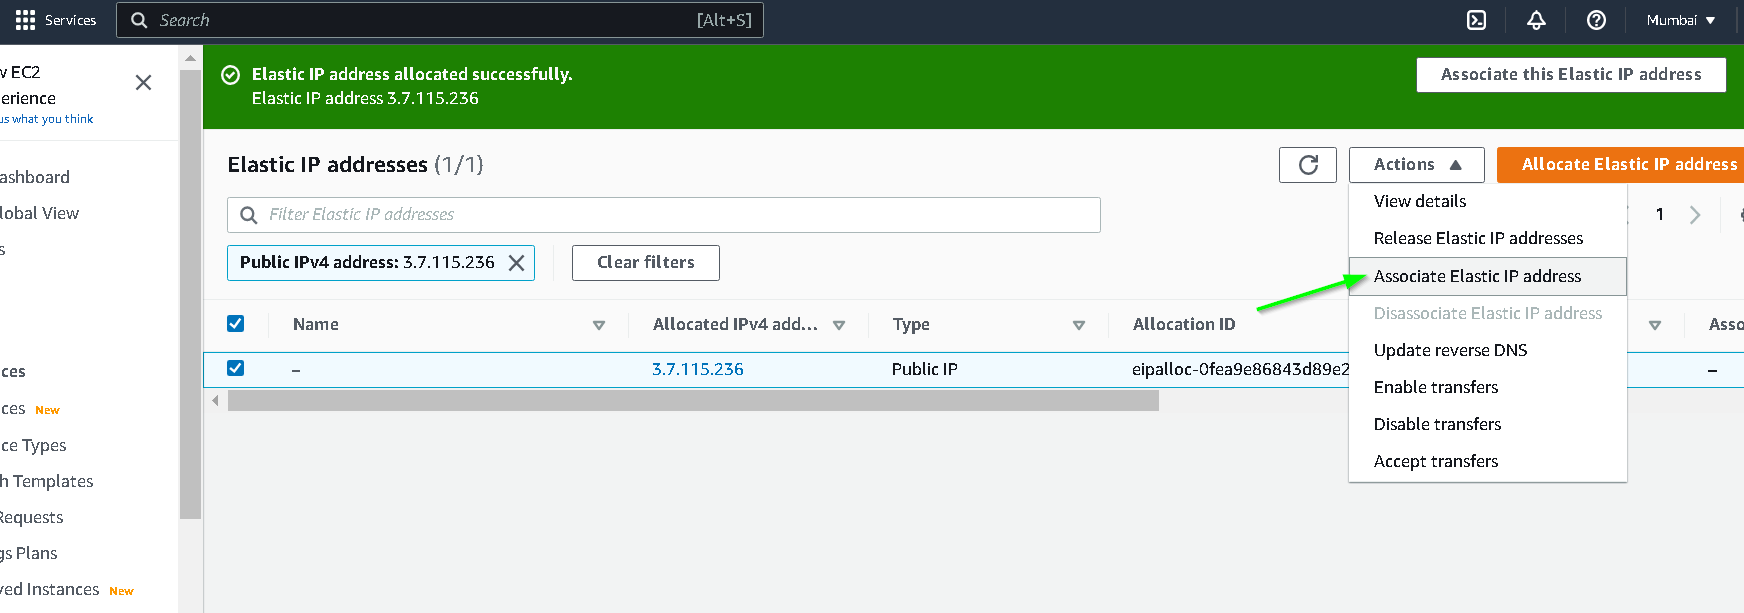
Associate this elastic IP address with the instance
Update the name of the instance by clicking where shown in the screenshot. I have named it ciphertrust-manager
Click open address
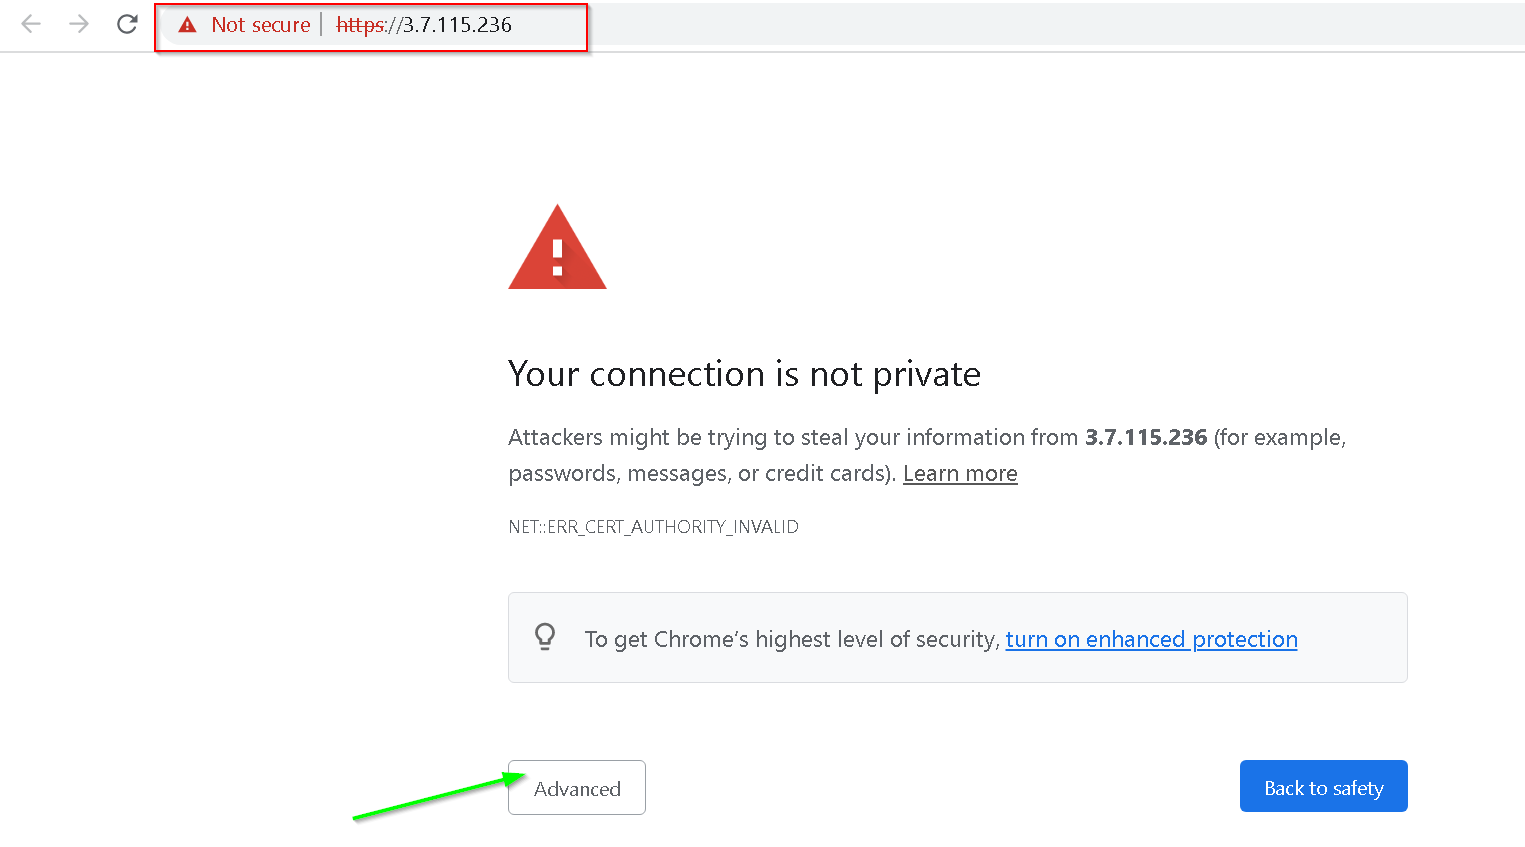
Since we have not installed a valid SSL cert on the instance we are shown an error, click Advanced
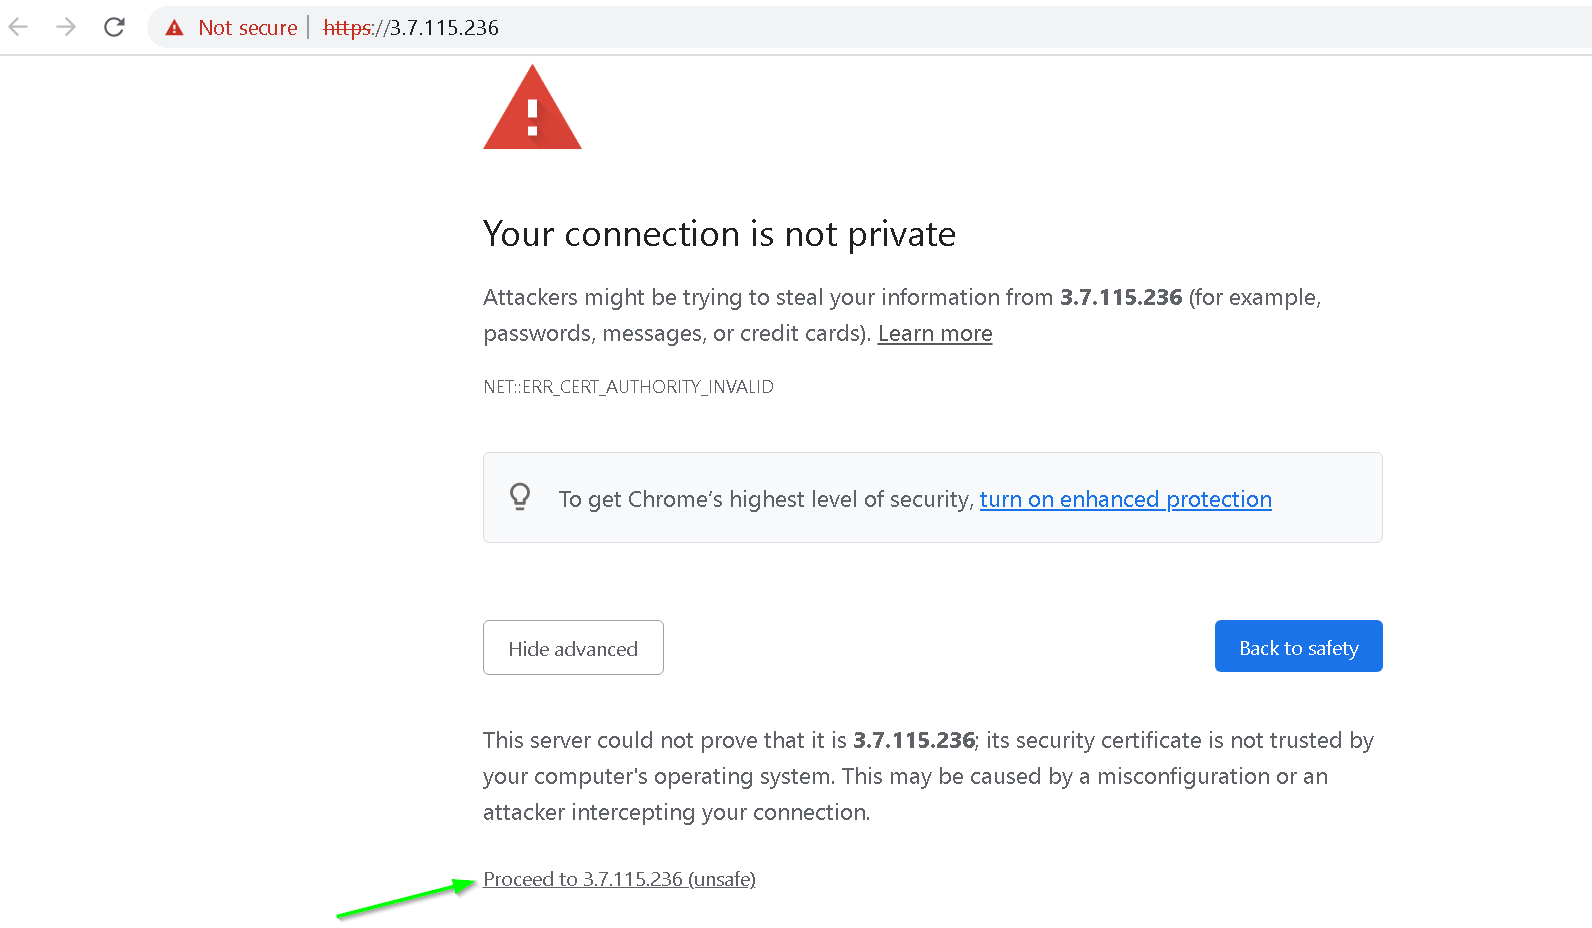
Click Proceed to your IP address link as shown
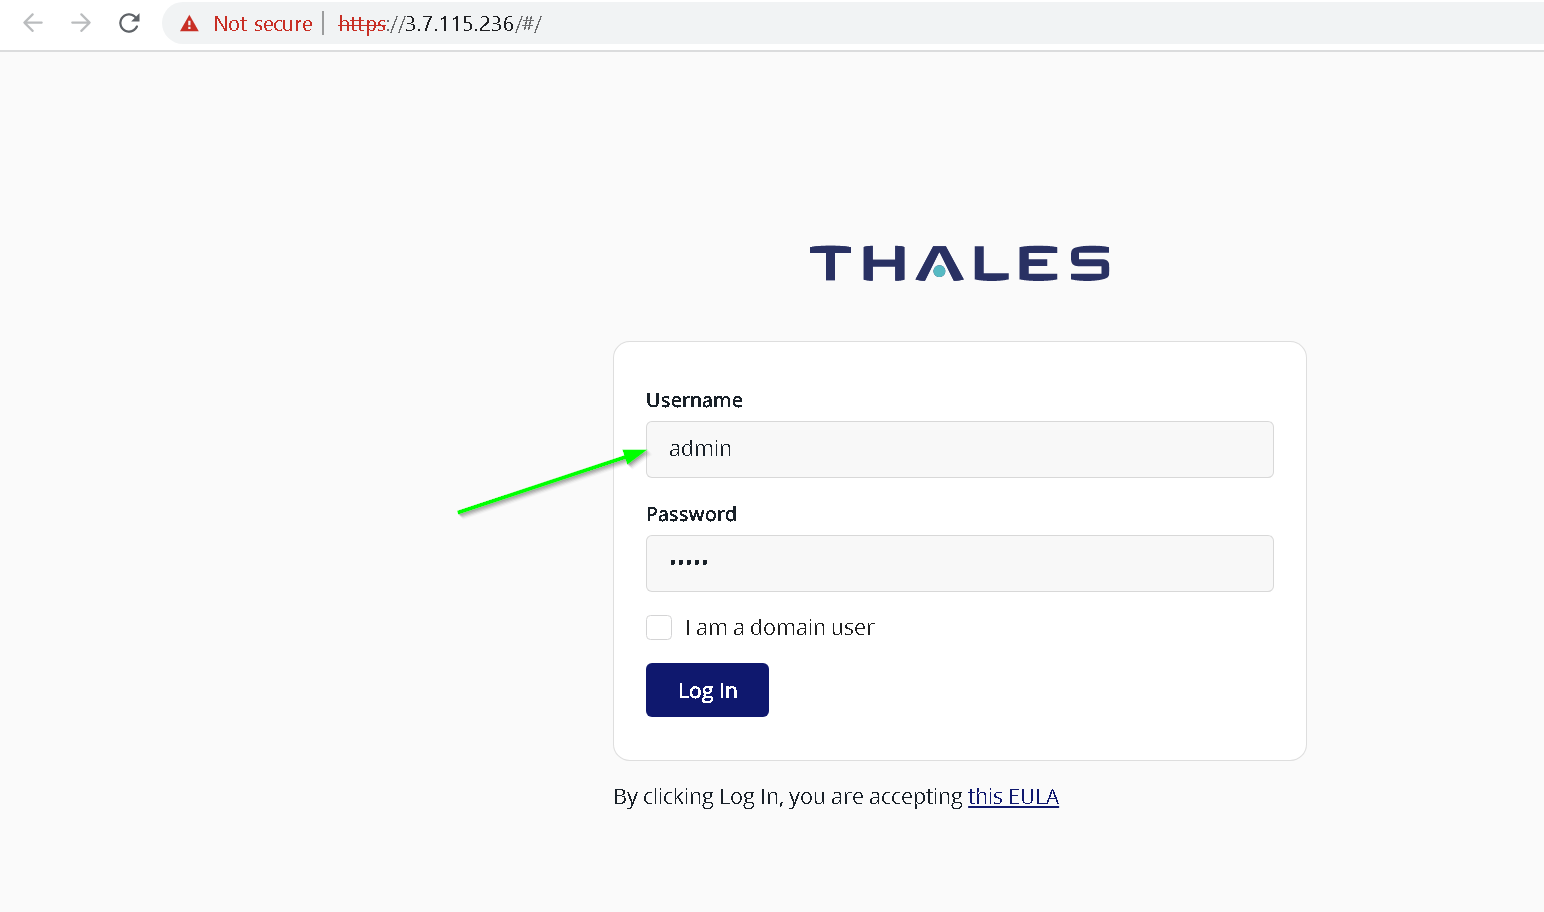
Use admin as username and password
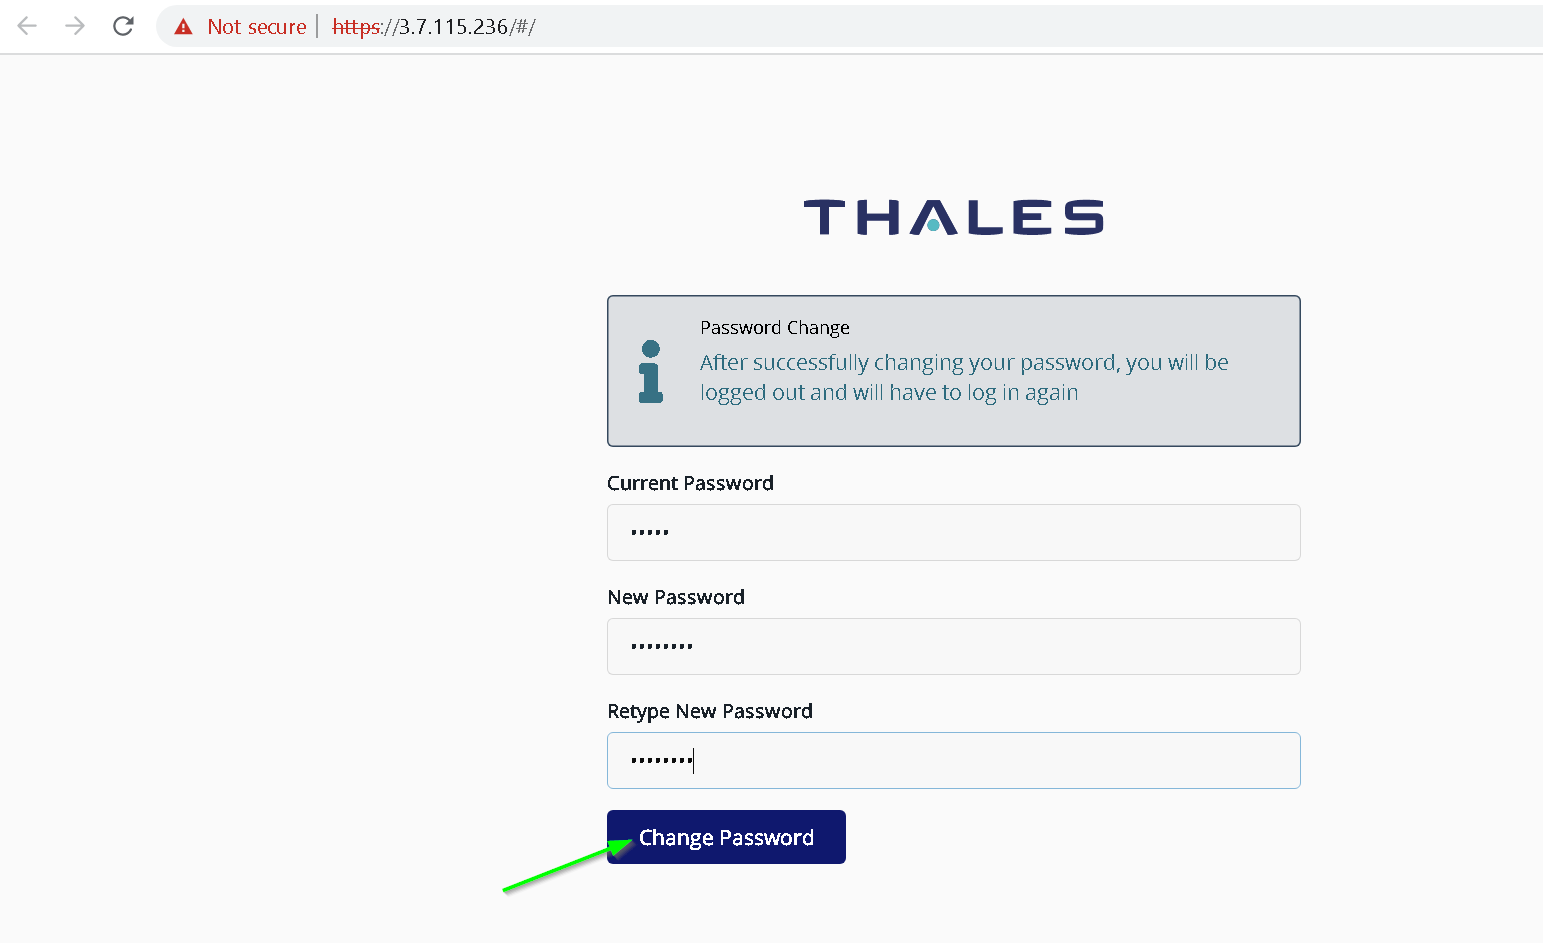
Change password
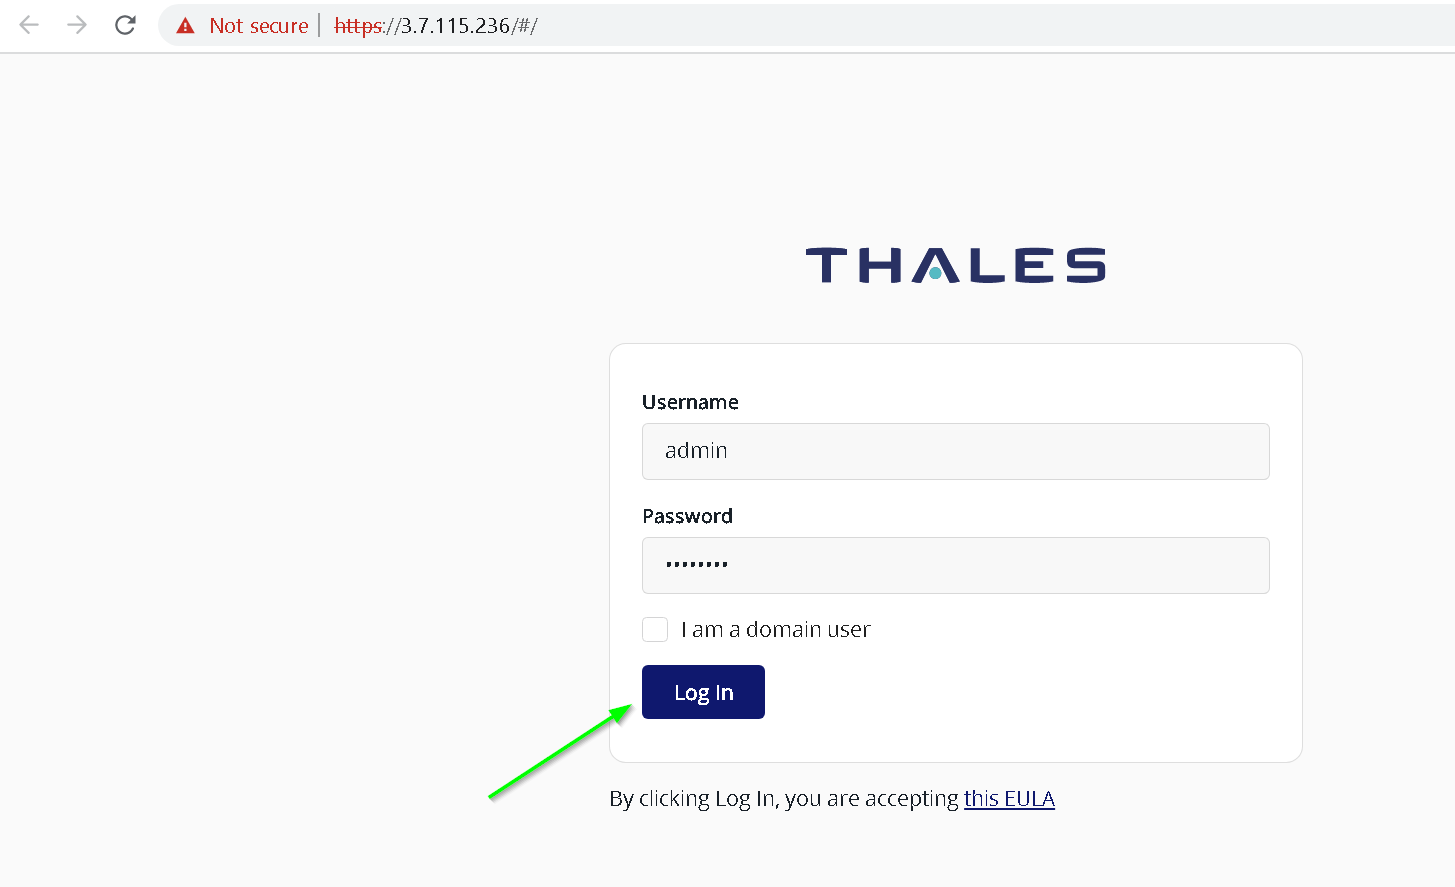
Now login with new password
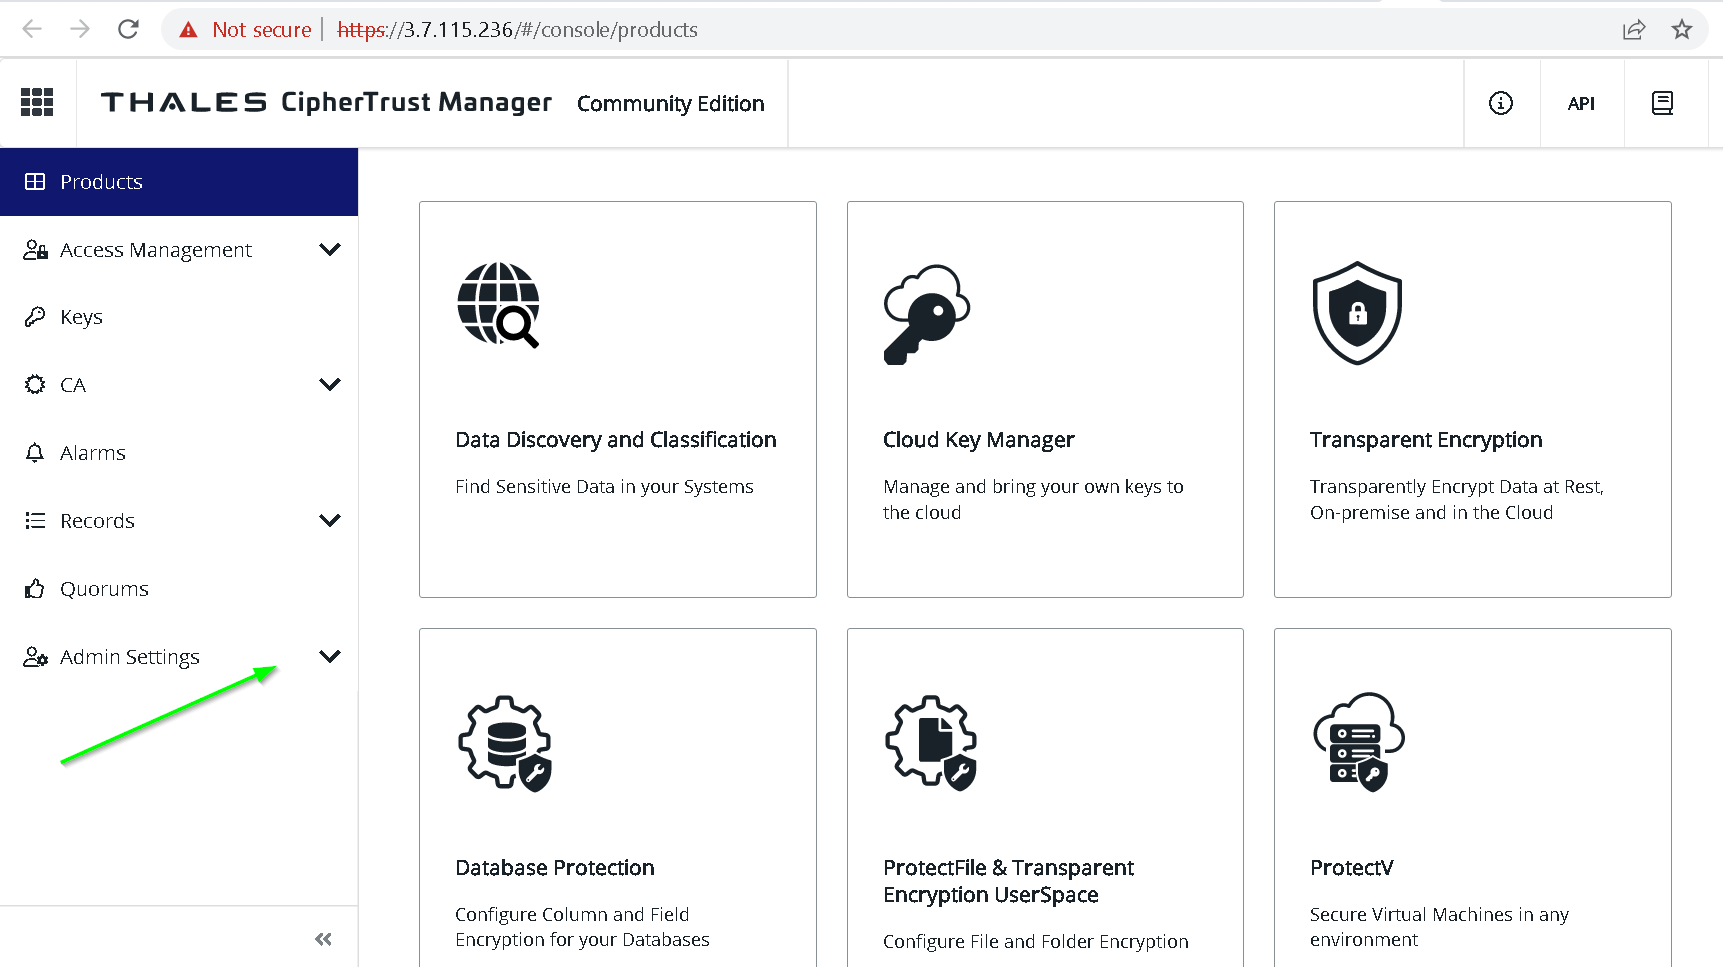
Let’s start the ciphertrust platform evaluation by performing steps from following screenshots
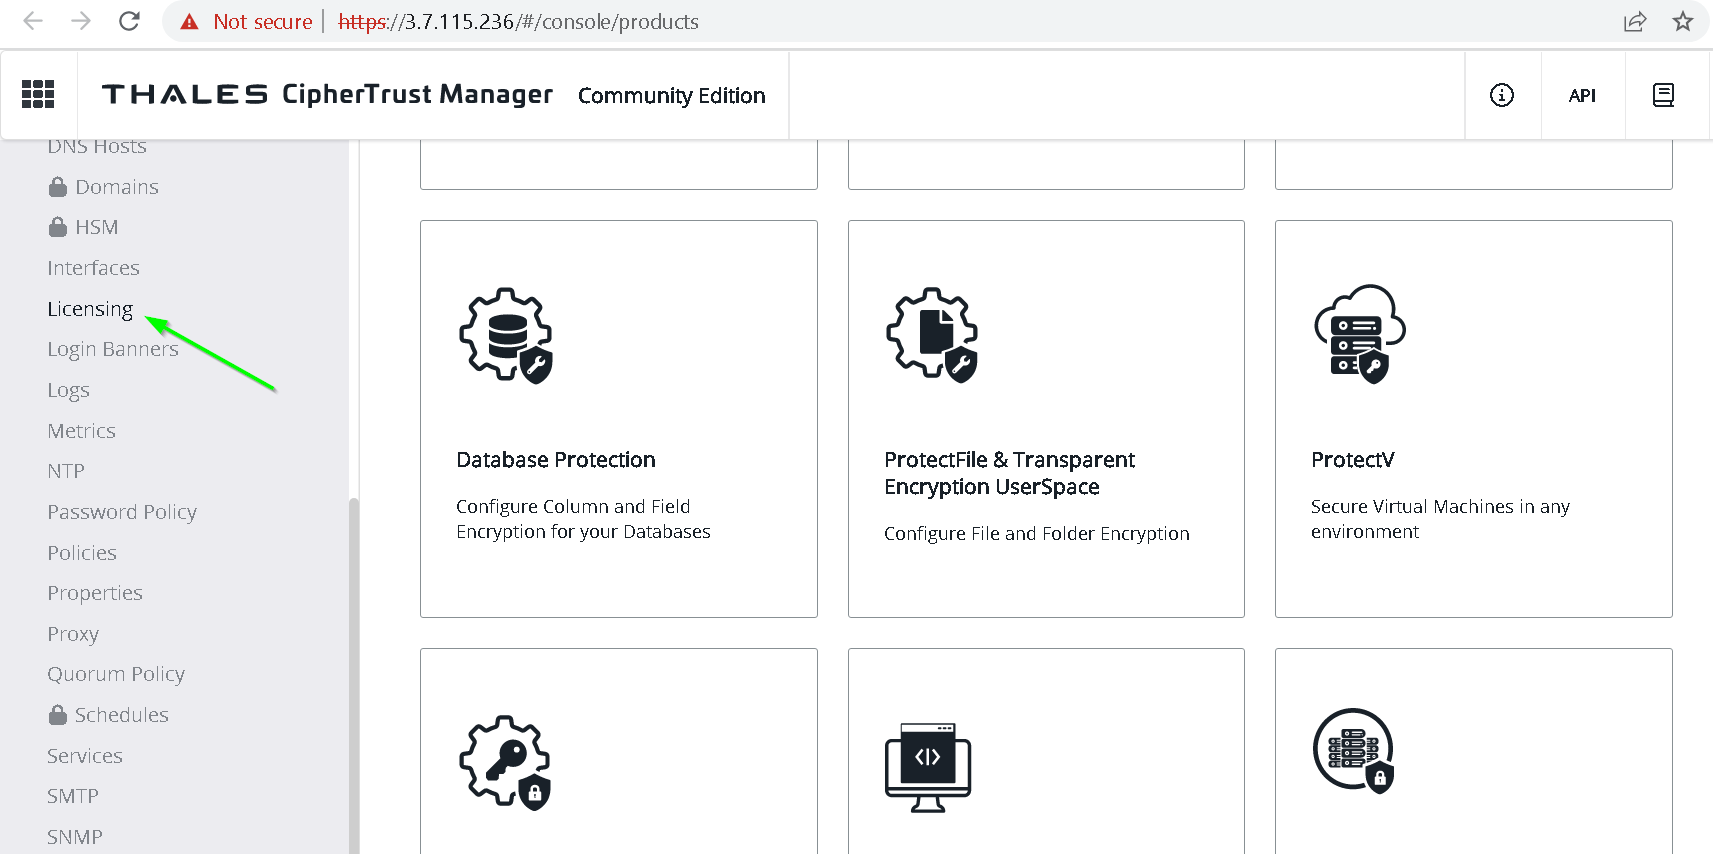
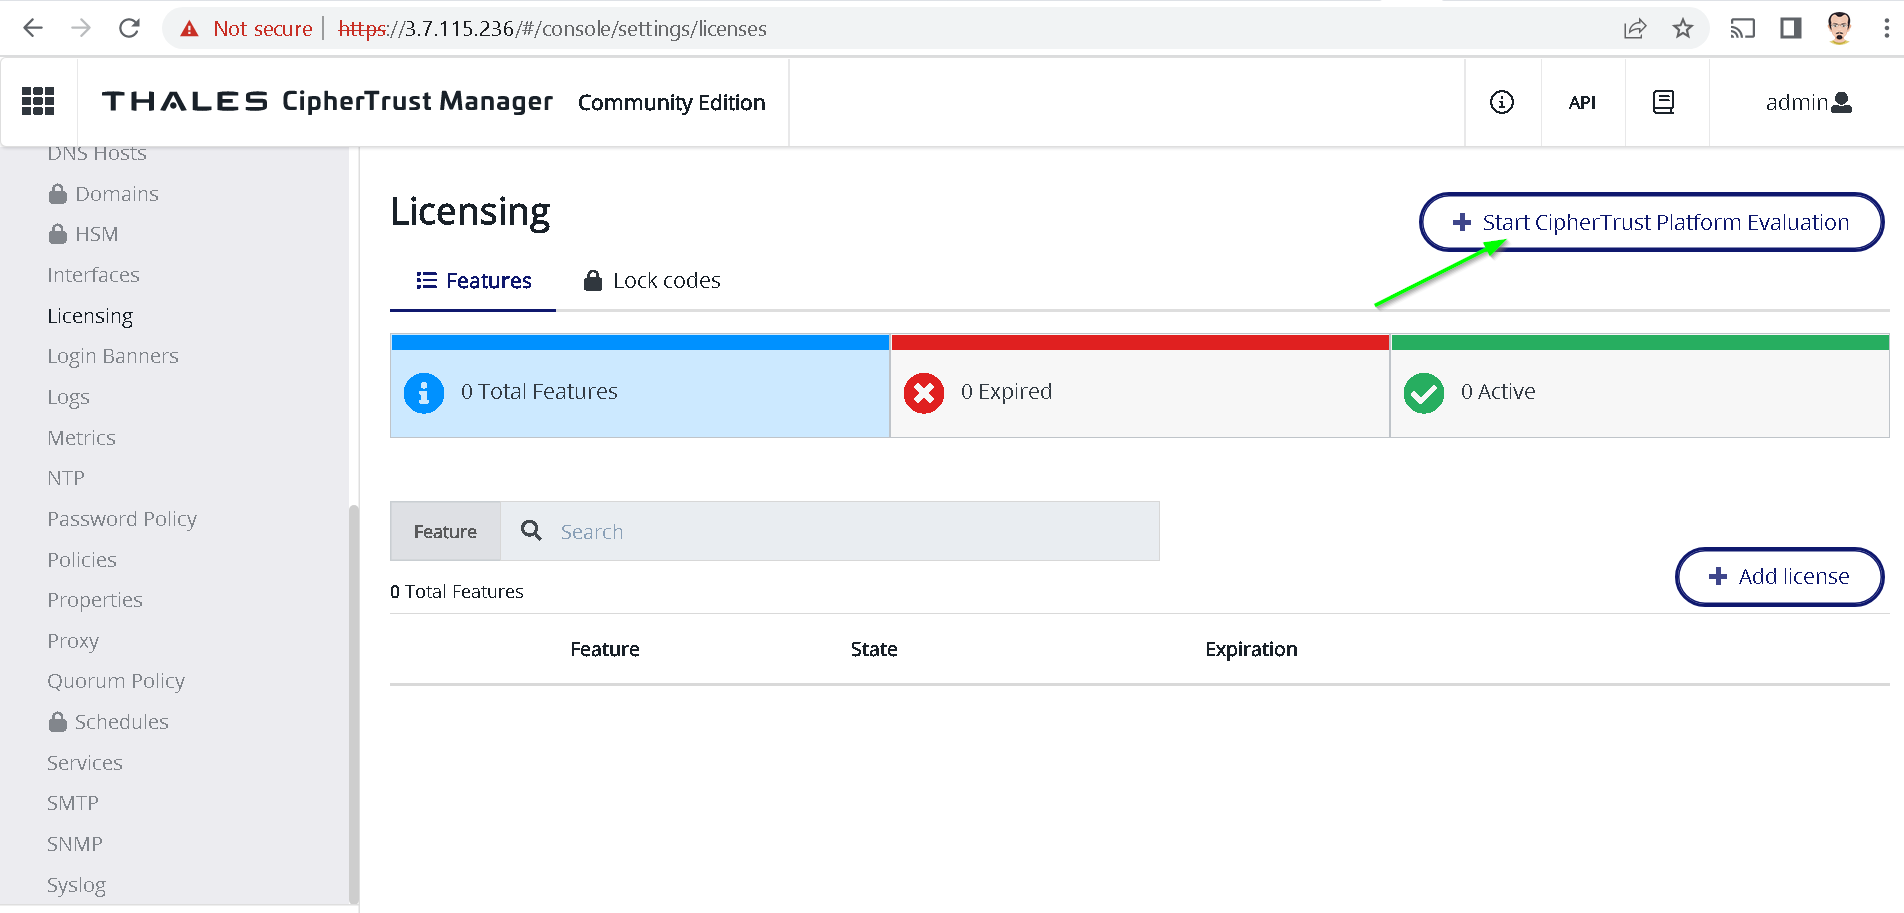
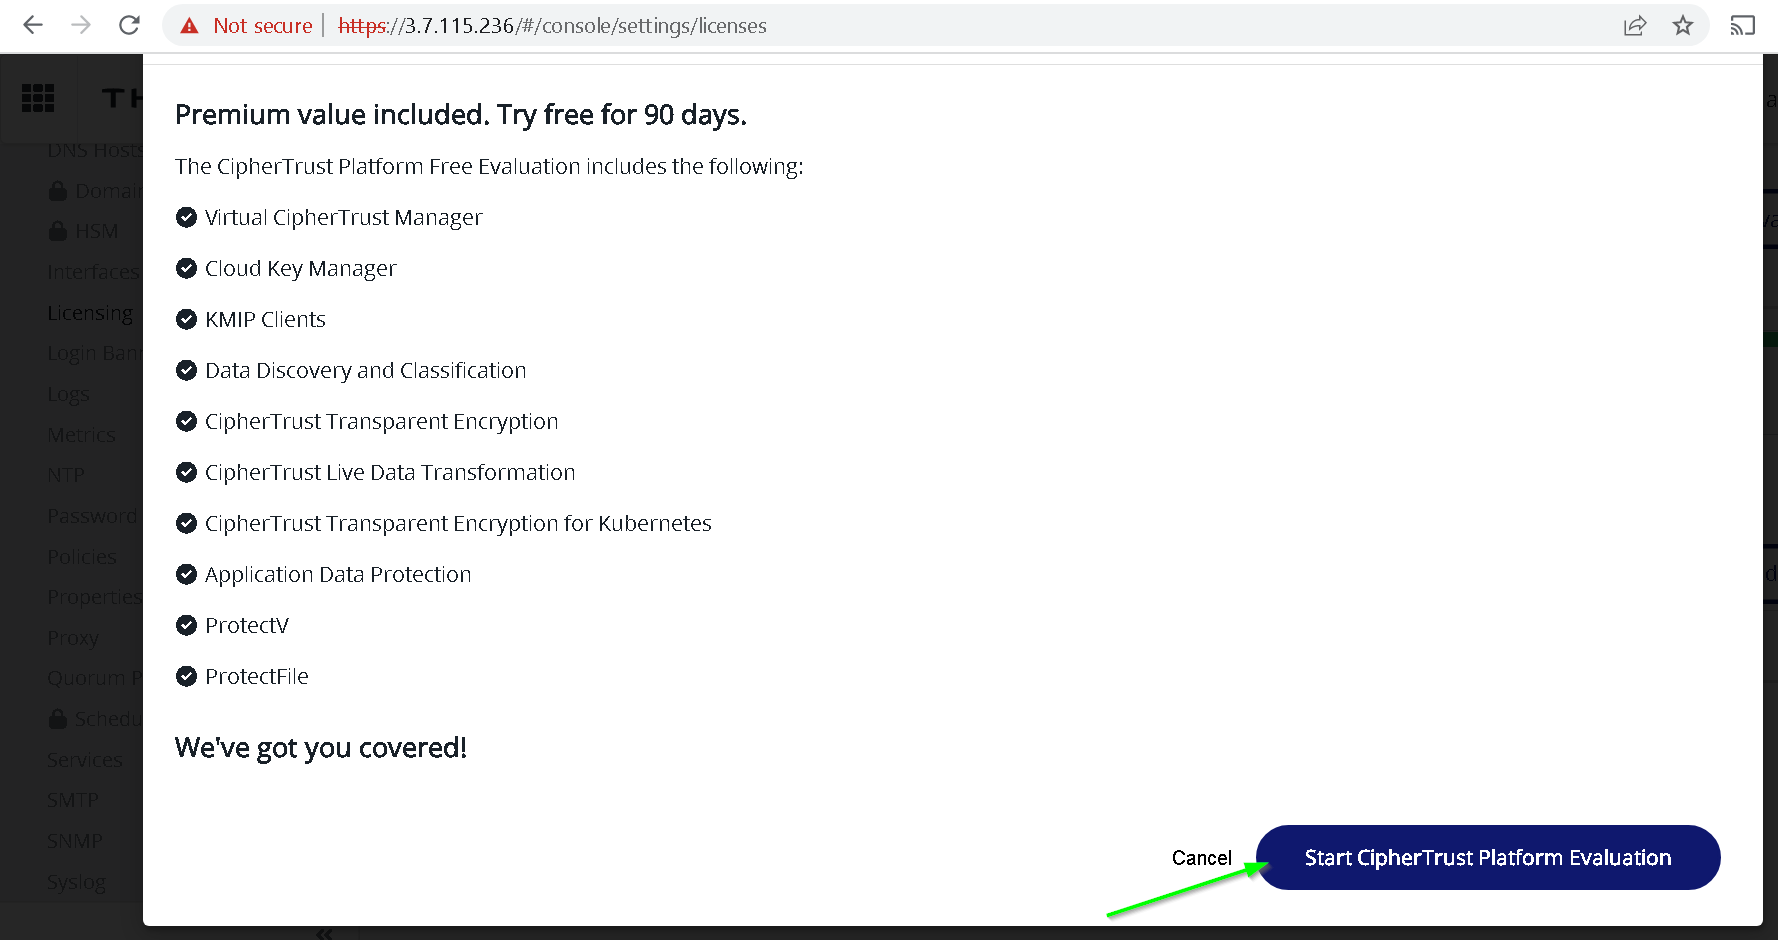
Licenses are now activated for next 90 days.

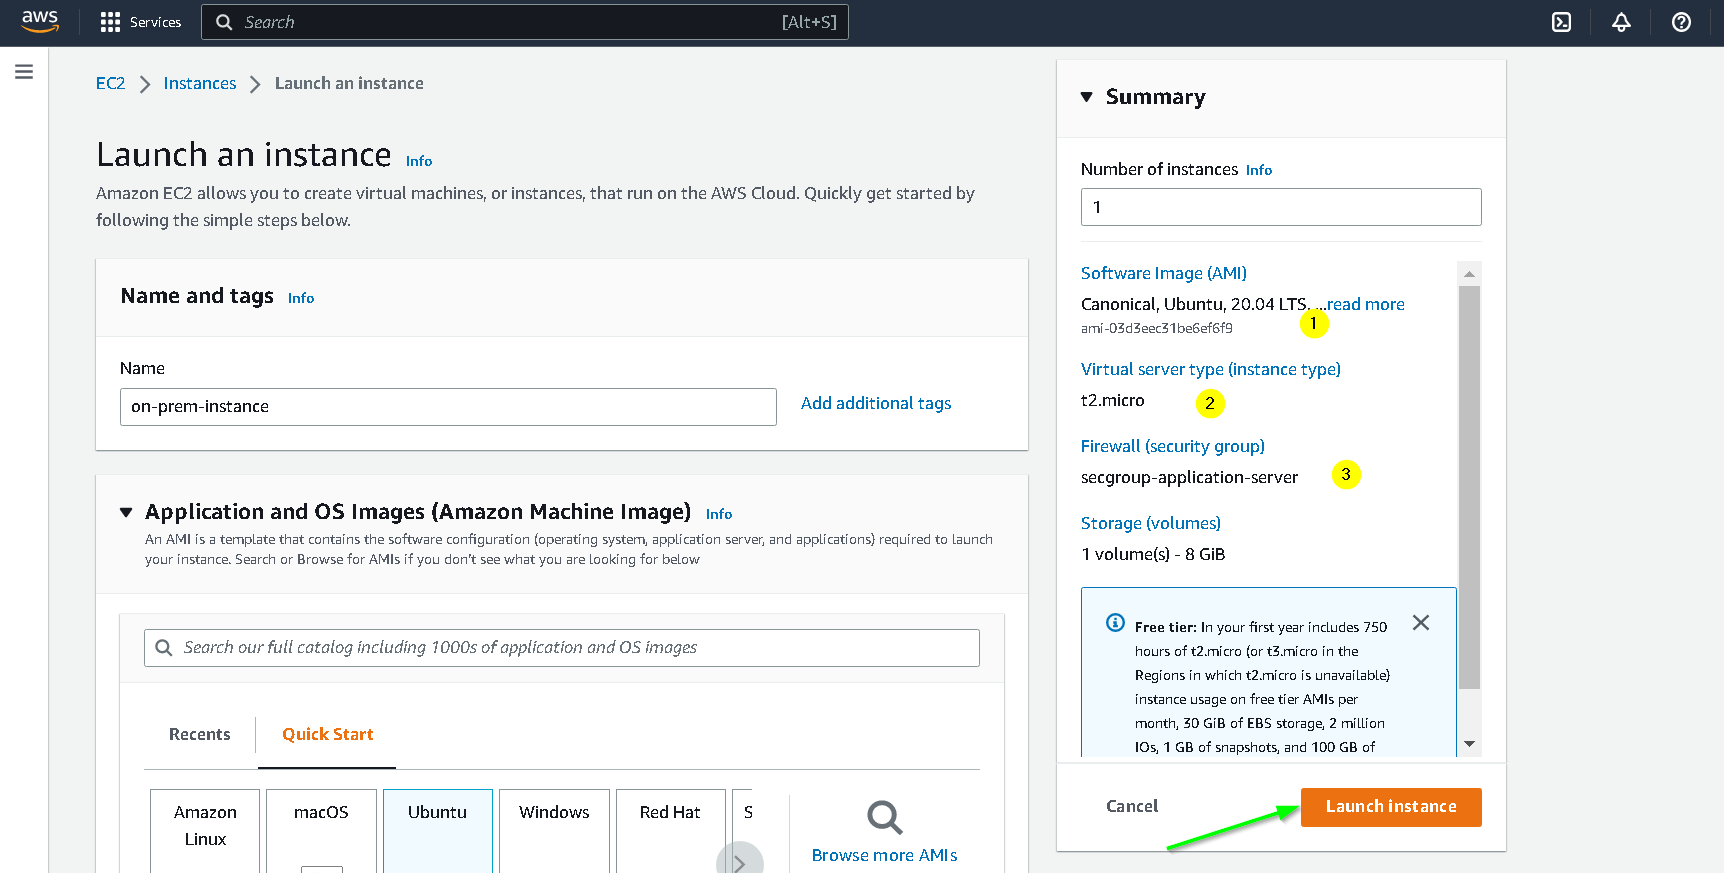
2. Creating an EC2 instance
In this step we create an EC2 instance that will be used for
- Issuing an SSL certificate to the Thales Ciphertrust Manager Instance
- As an on premises instance for the Ubiquitous Data Encryption Demo
Go to EC2 console and create an instance with following configuration
🎯 Make sure that the security group you choose for this instance allows inbound traffic on port 22 from your IP and all outbound traffic is allowed.
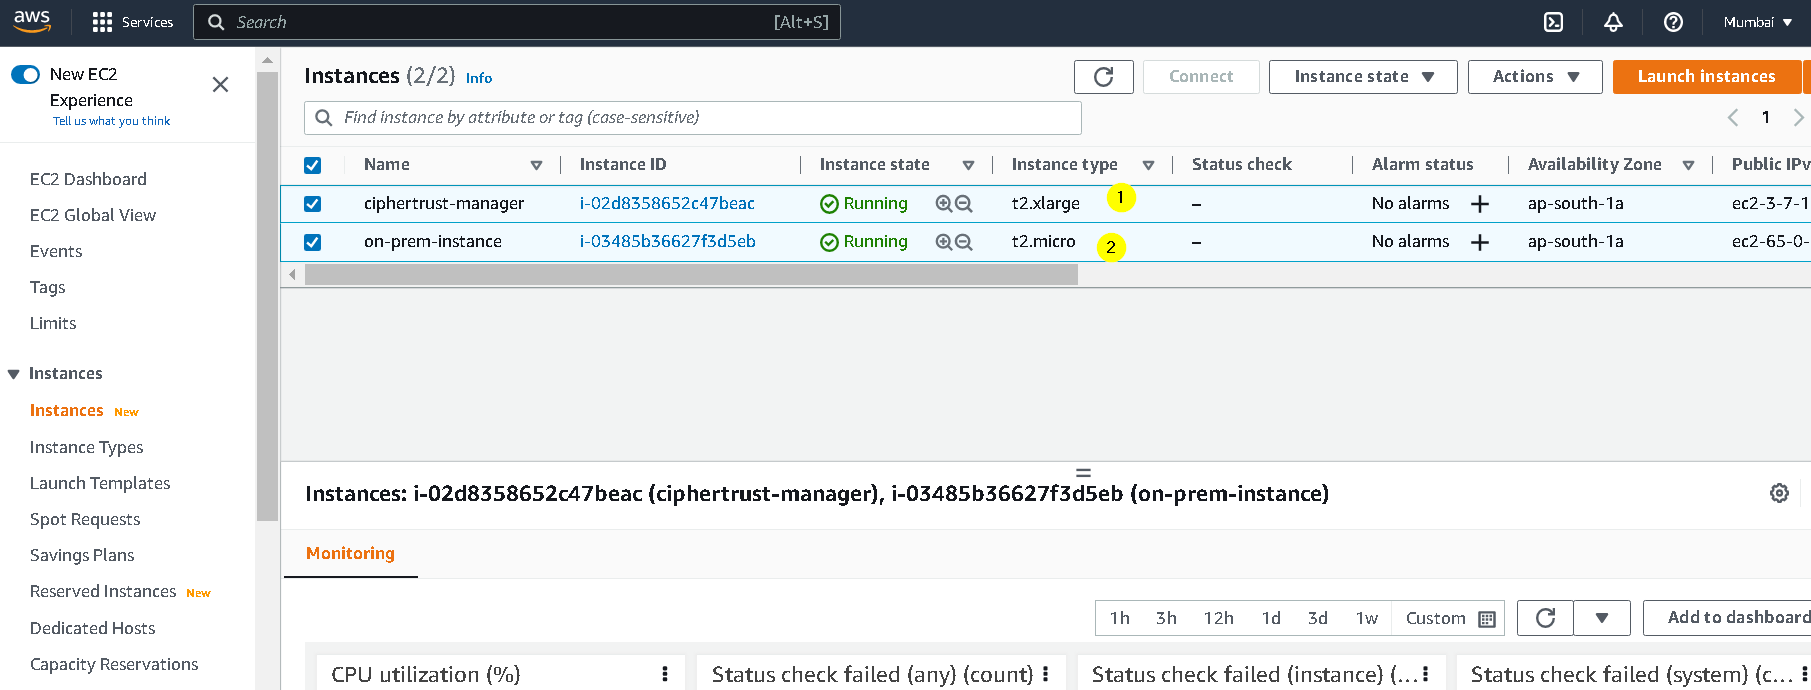
If we go to the EC2 console now, we should have 2 instances. One running the Thales Ciphertrust Manager and the newly created on-prem-instance
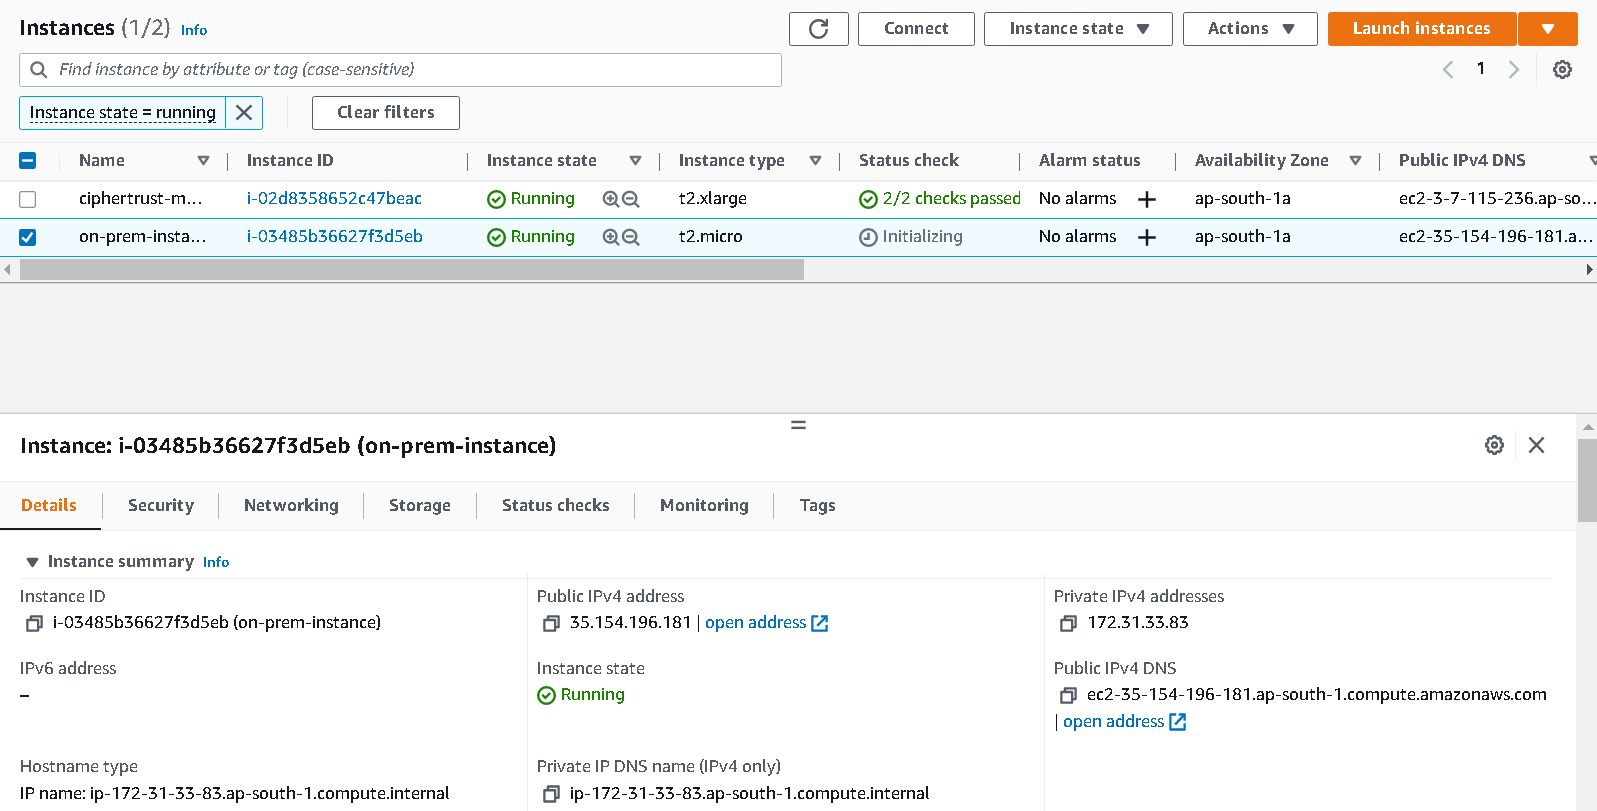
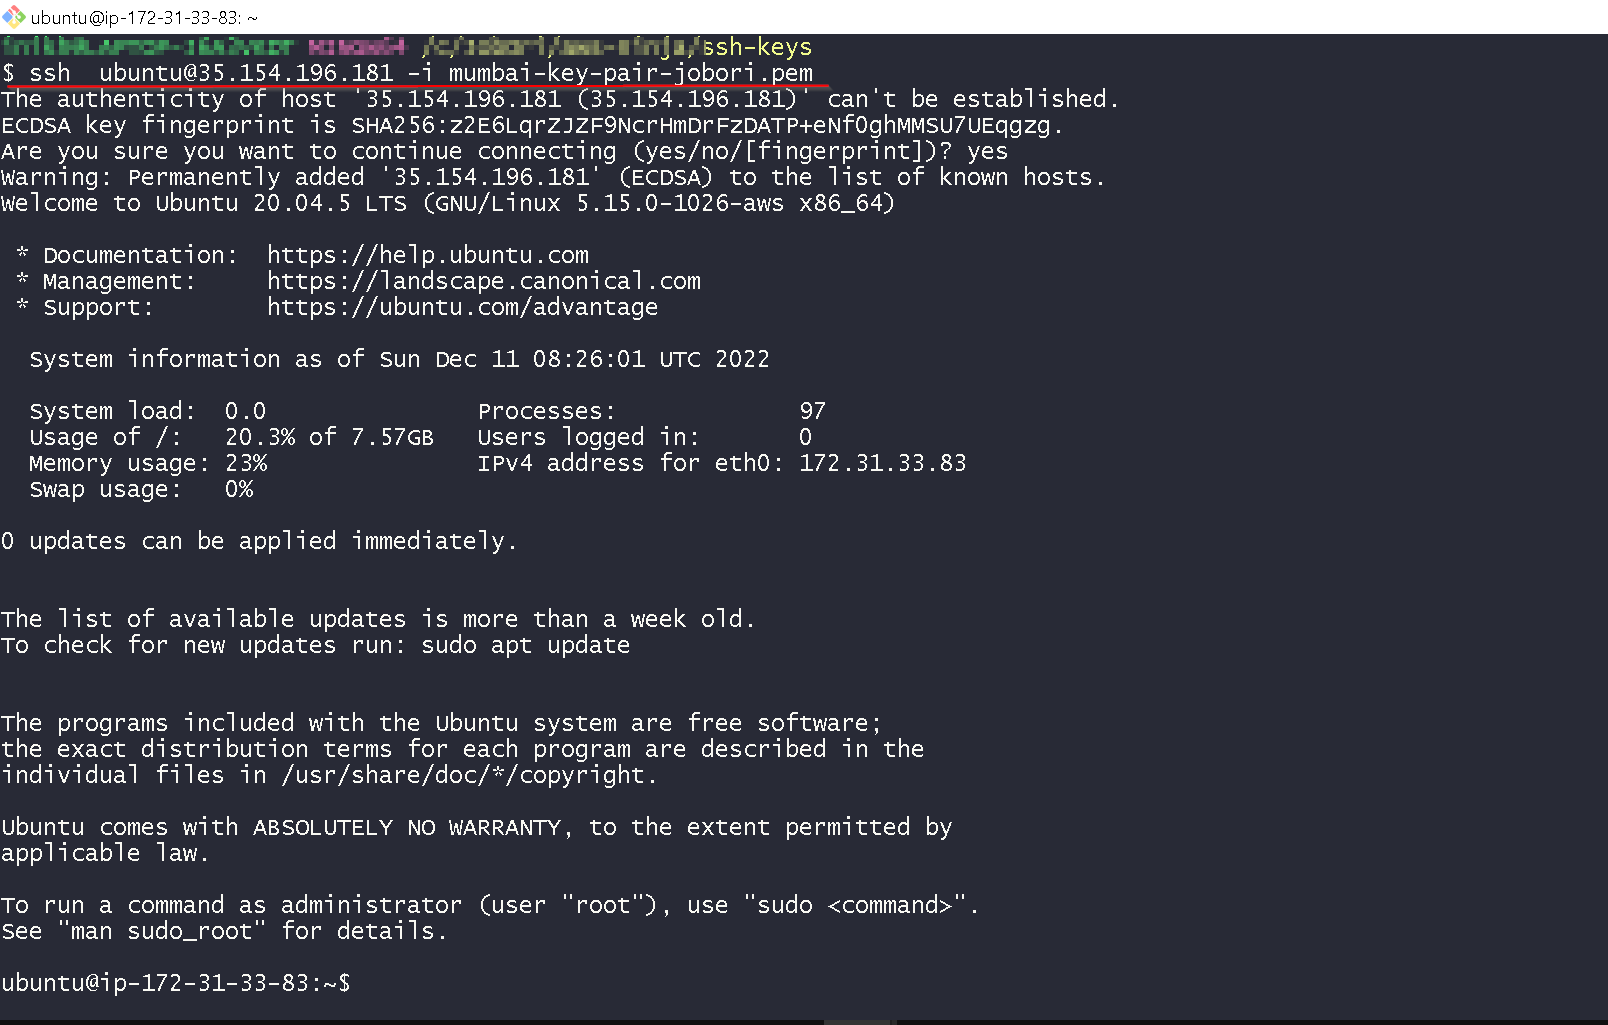
Check if you are able to login to the instance with ssh, I am using git bash but you could use Putty.
3. Issuing and deploying SSL certificate onto the Thales CKM instance
The Thales CKM needs to have a valid SSL certificate to work with GCP Cloud EKM and STET (Split Trust Encryption Tool) - Please check the part 2 for more details.
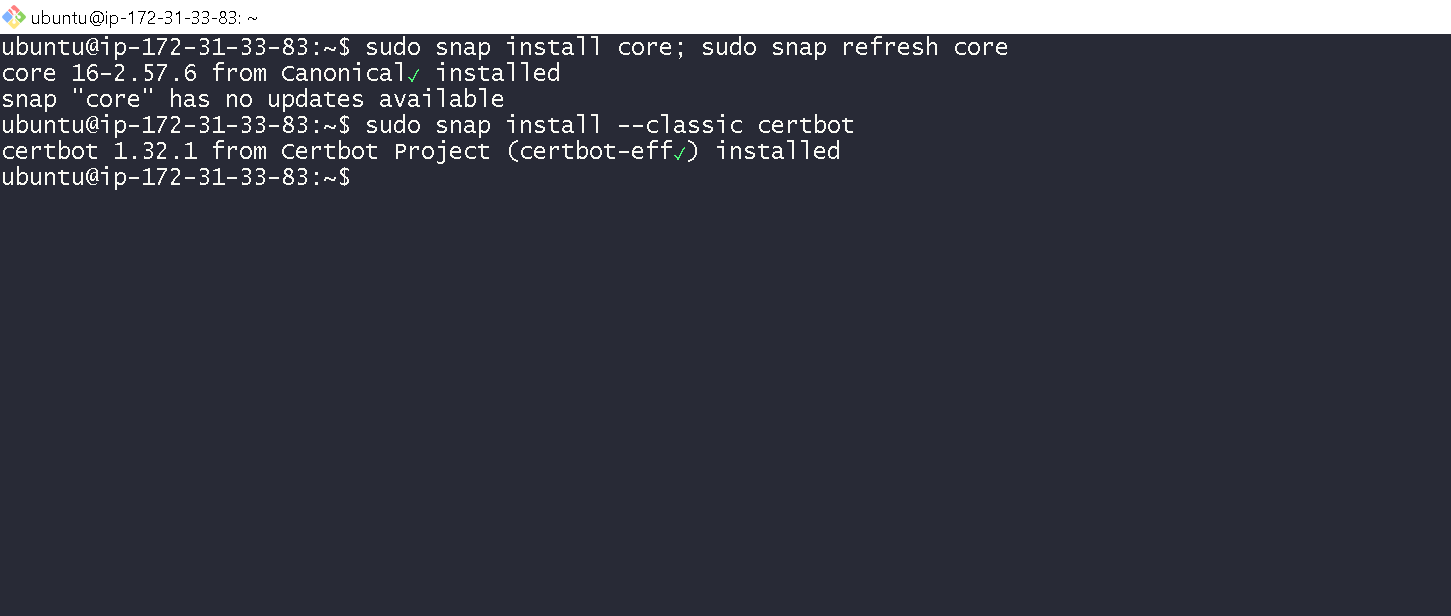
On the on-prem-instance install certbot by running following commands.
$ sudo snap install core; sudo snap refresh core

$ sudo snap install --classic certbot
Here’s the output
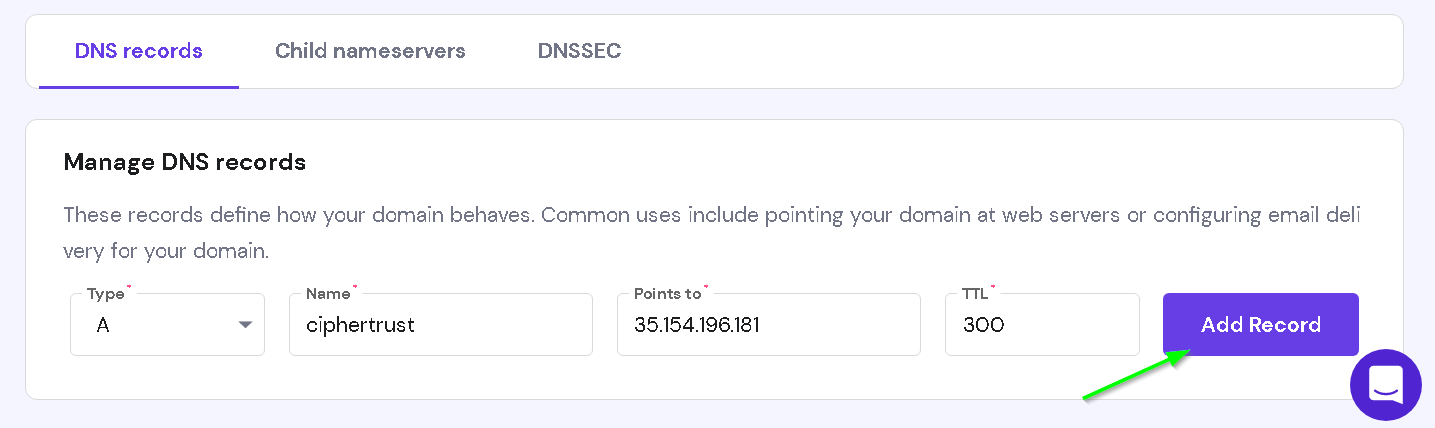
Now go ahead and create an A record on your DNS registrar. I created a record ciphertrust.jobori.com and pointed it to the ip address of the on-prem-instance. Keep the TLS to 300 seconds.
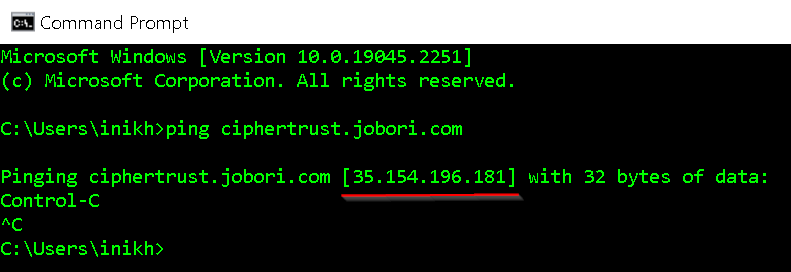
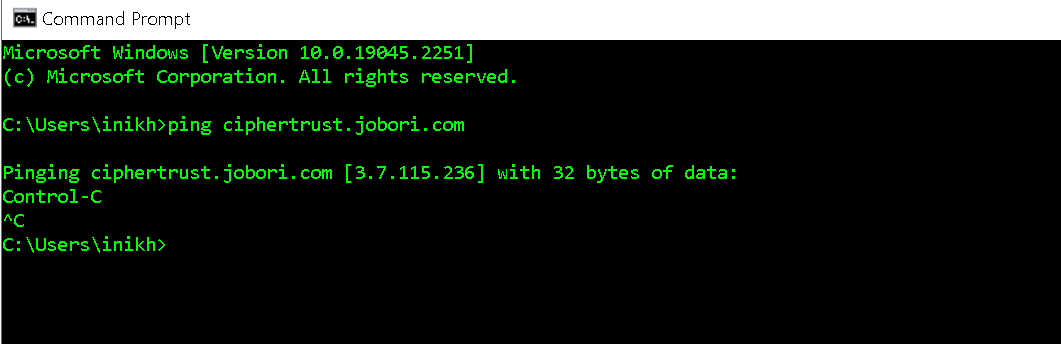
Check if the DNS is resolving for the new domain name with a ping from command prompt / shell. Note that this is just to check if the DNS name is resolved. The actual ping need not go through.
Now go back to the SSH console and execute commands from 3
sudo ln -s /snap/bin/certbot /usr/bin/certbot
sudo certbot certonly --standalone

# now provide input as shown in the screenshot below.
# please use your domain/ subdomain name in step 8
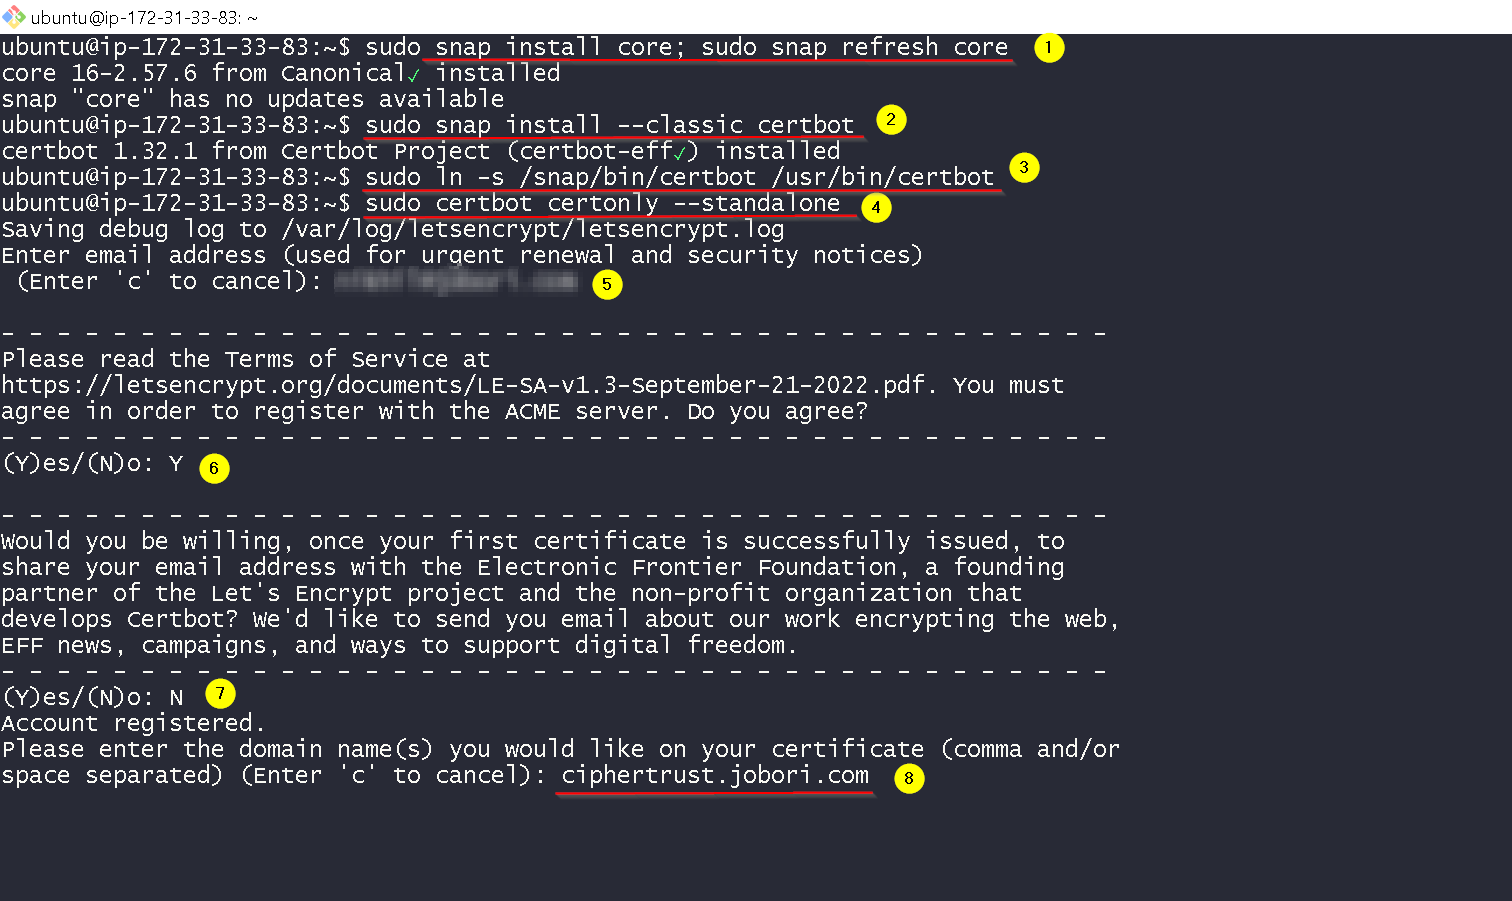
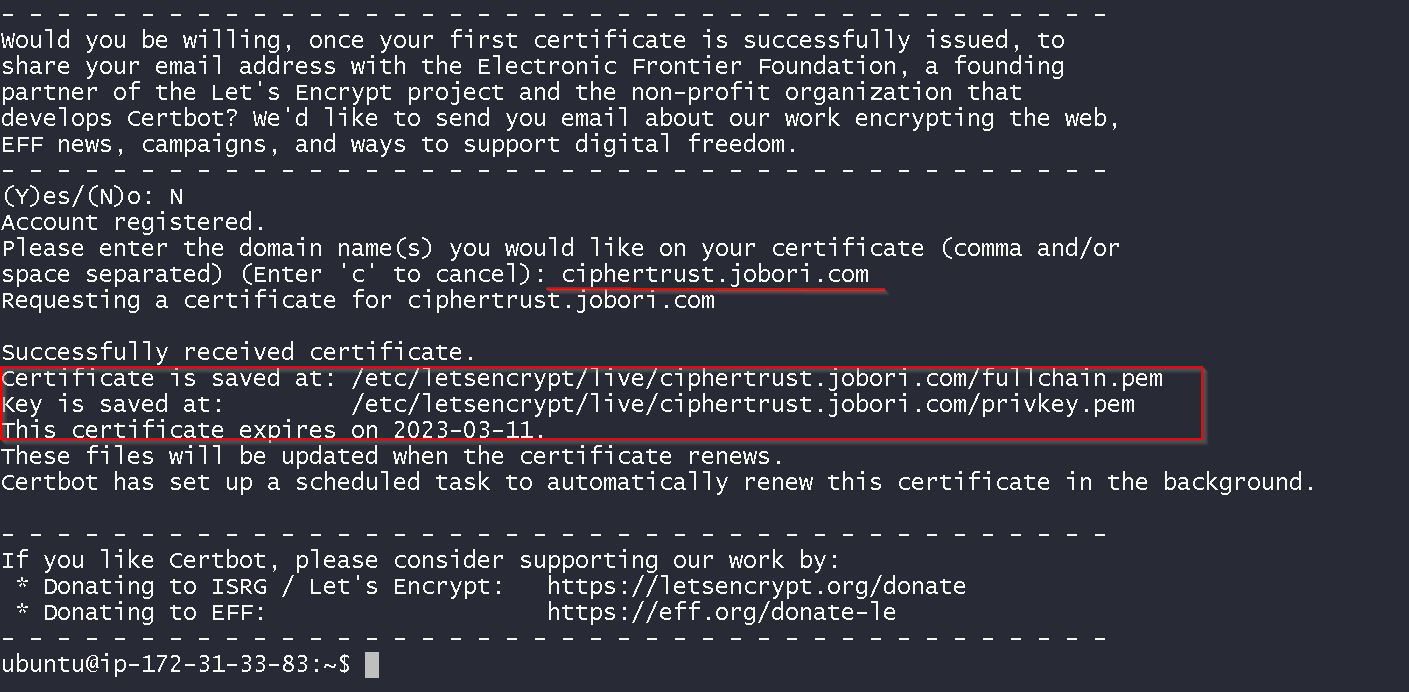
Certificate is issued
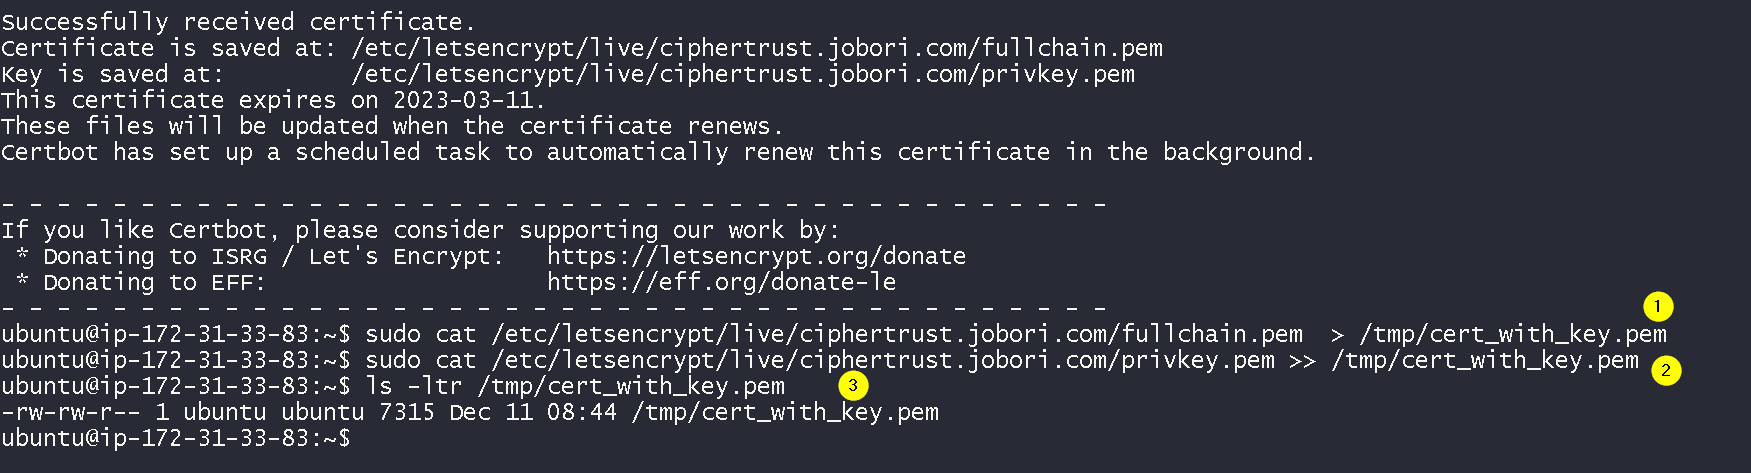
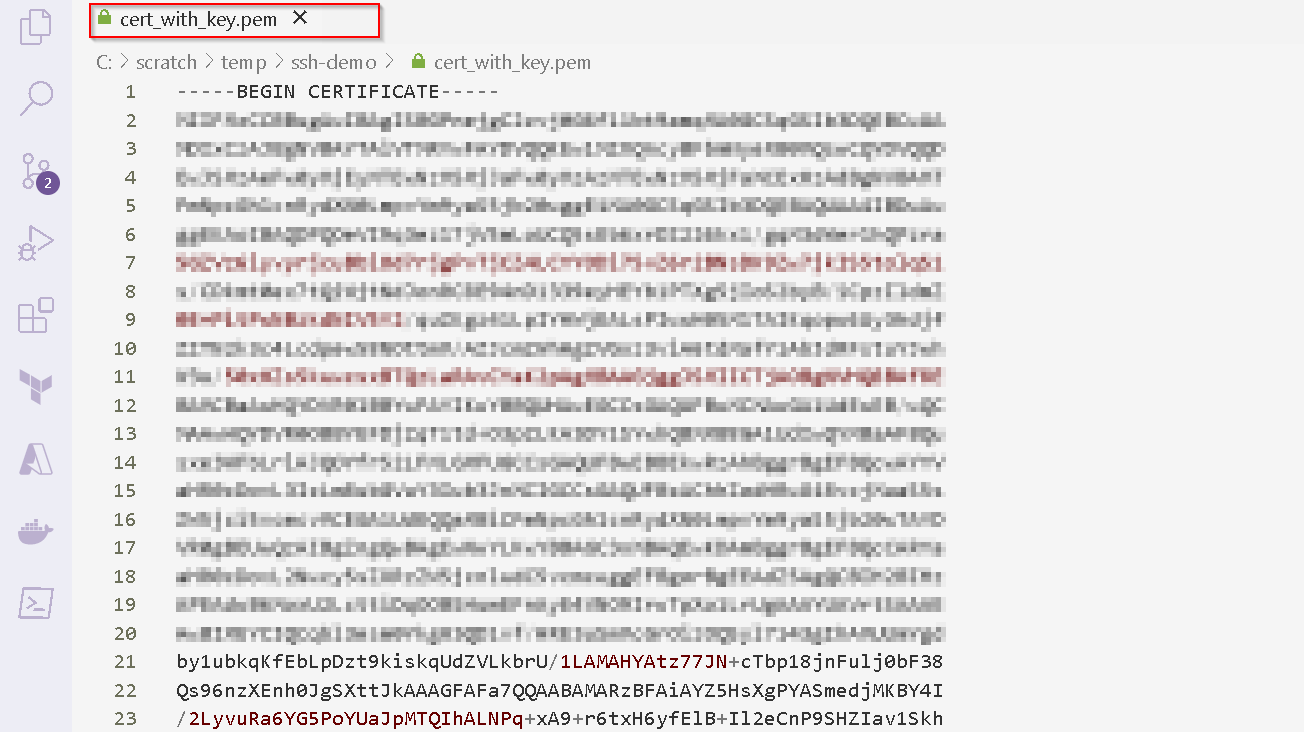
Add the certificate and the private key to a single file and download that file
Now update the DNS A record to point to the Thales CCKM / Elastic IP.

Wait 5 minutes and check if the change is effective with another ping commands.
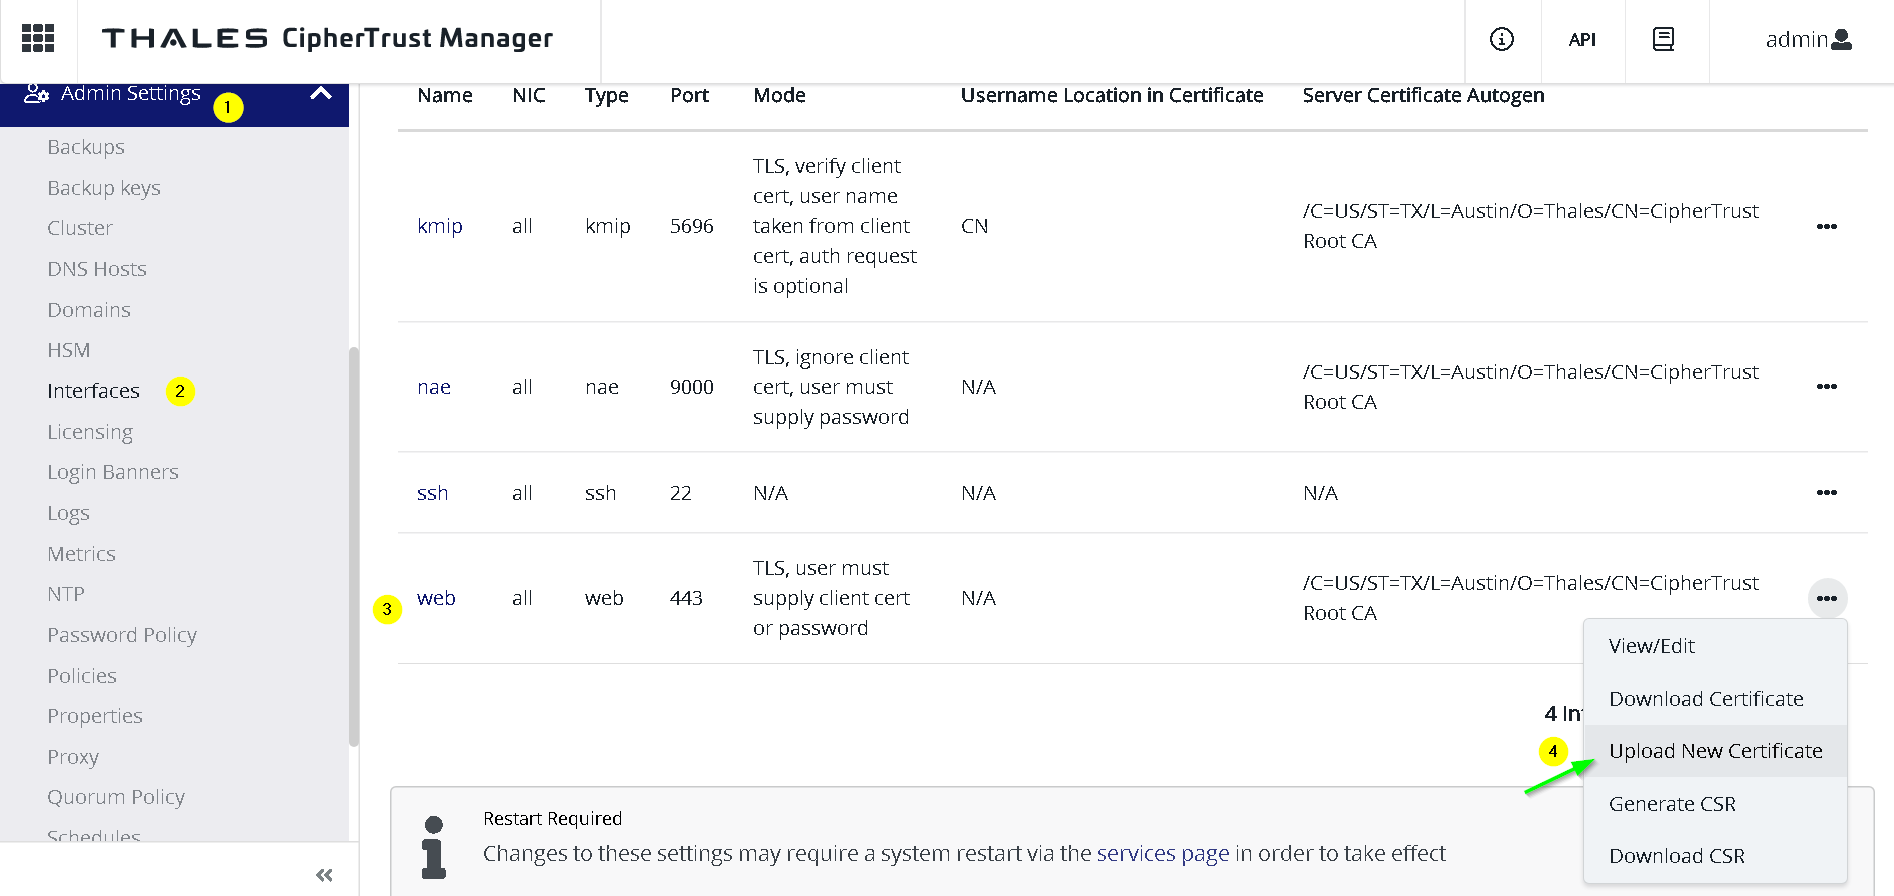
Now go back to the Thales CKM -> Admin Settings -> interfaces -> web (right click) -> upload new certificate
Shown in the screenshot
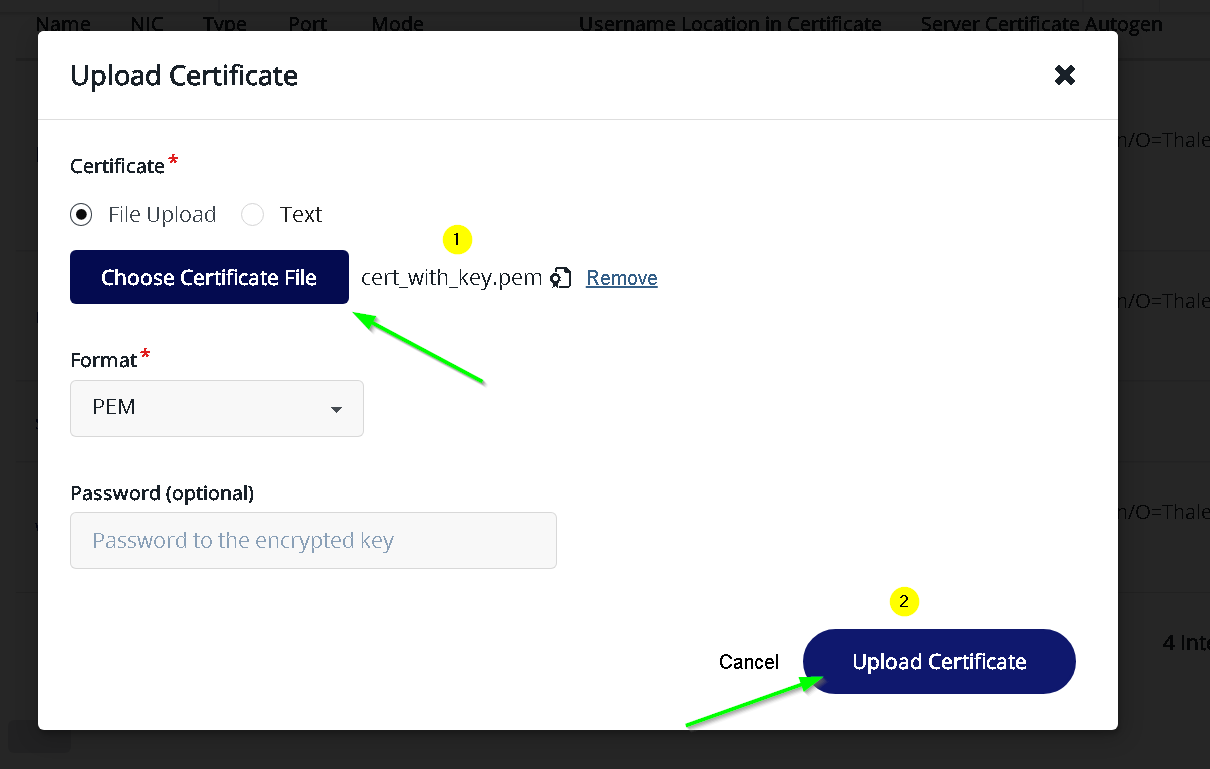
Choose and upload the certificate file (cert + private key) downloaded earlier
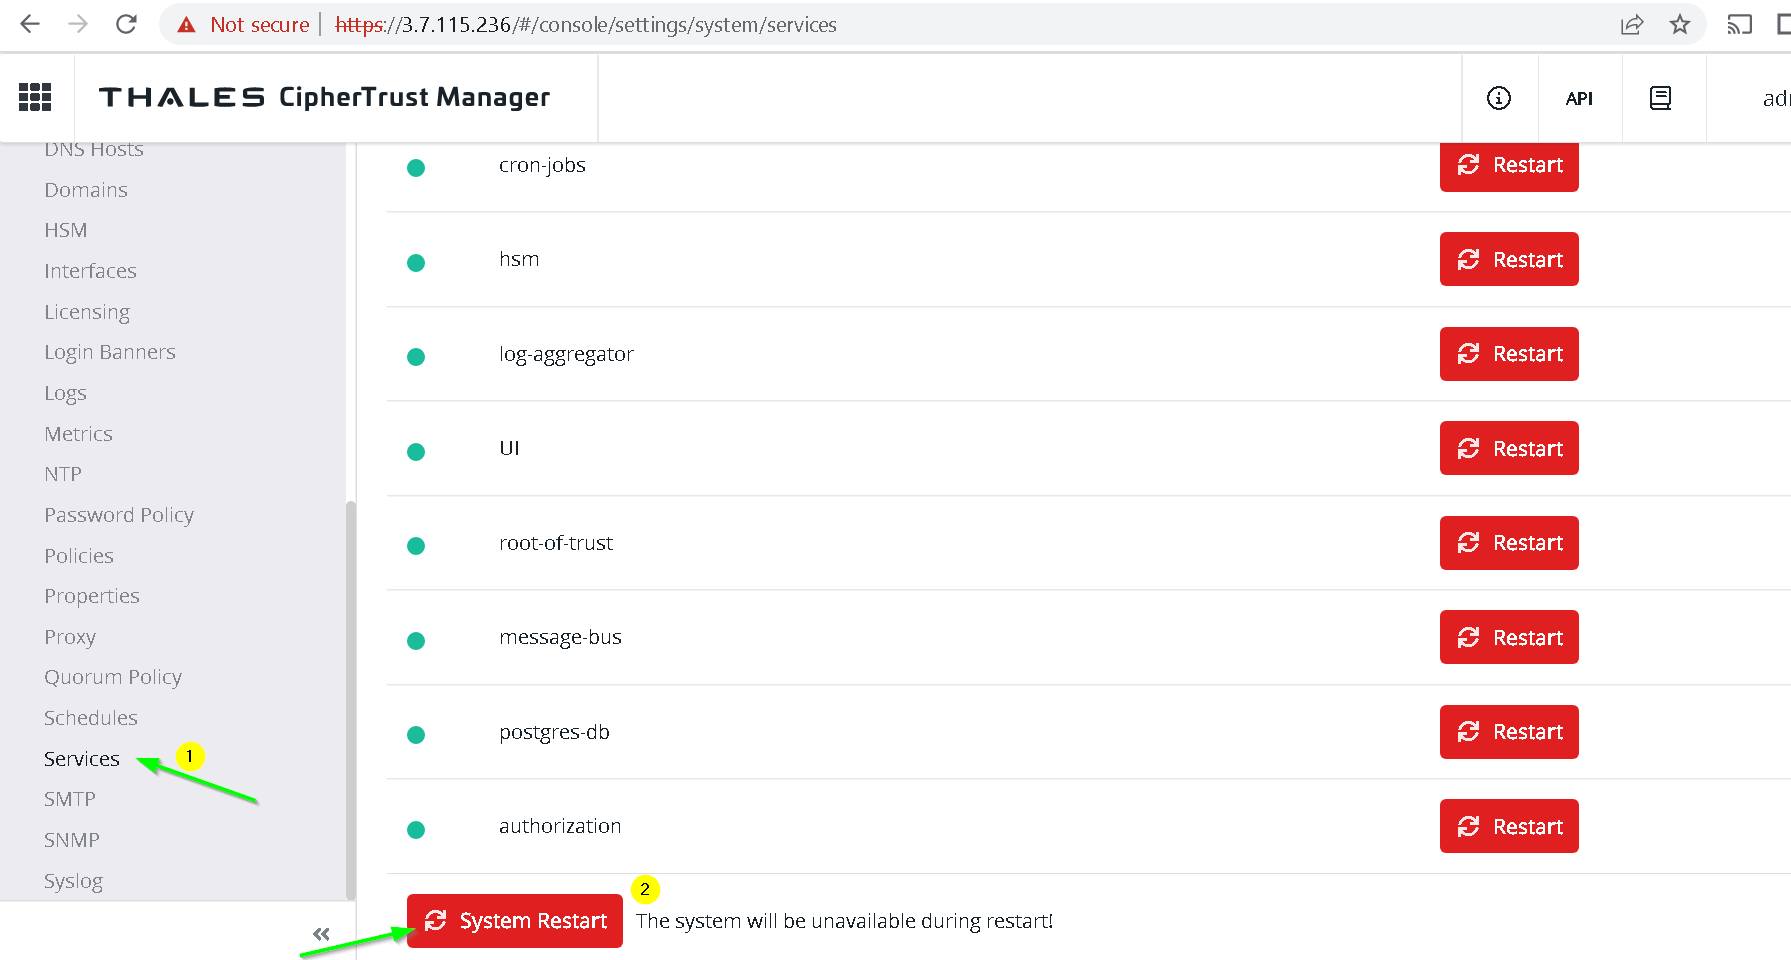
Go to Thales CKM -> Admin Settings -> Services and System Restart
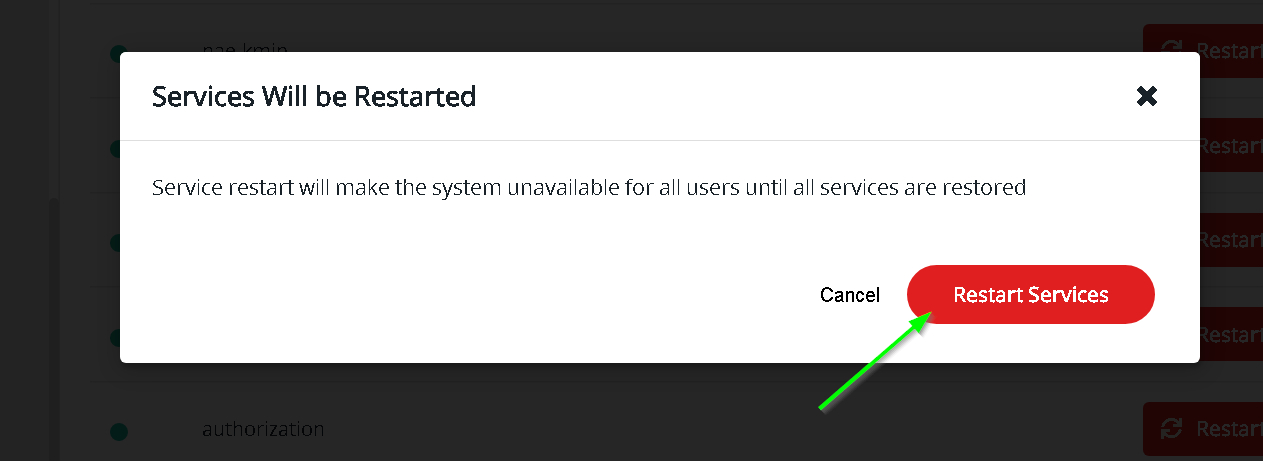
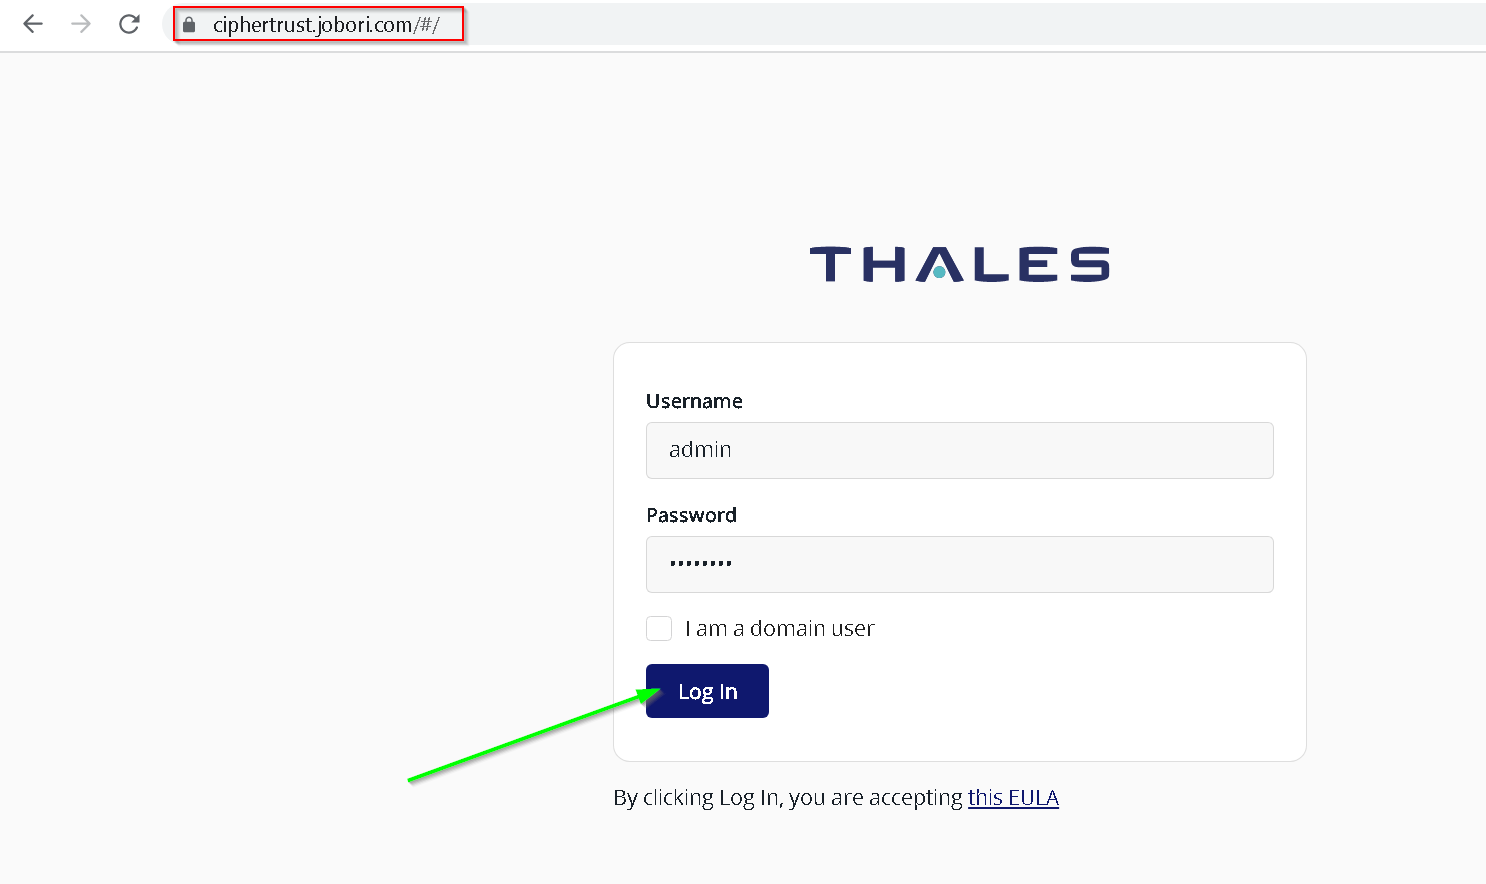
Wait for a few minutes and now visit the new domain name (ciphertrust.jobori.com in my case). Notice that we have a valid certificate now and there is no error.
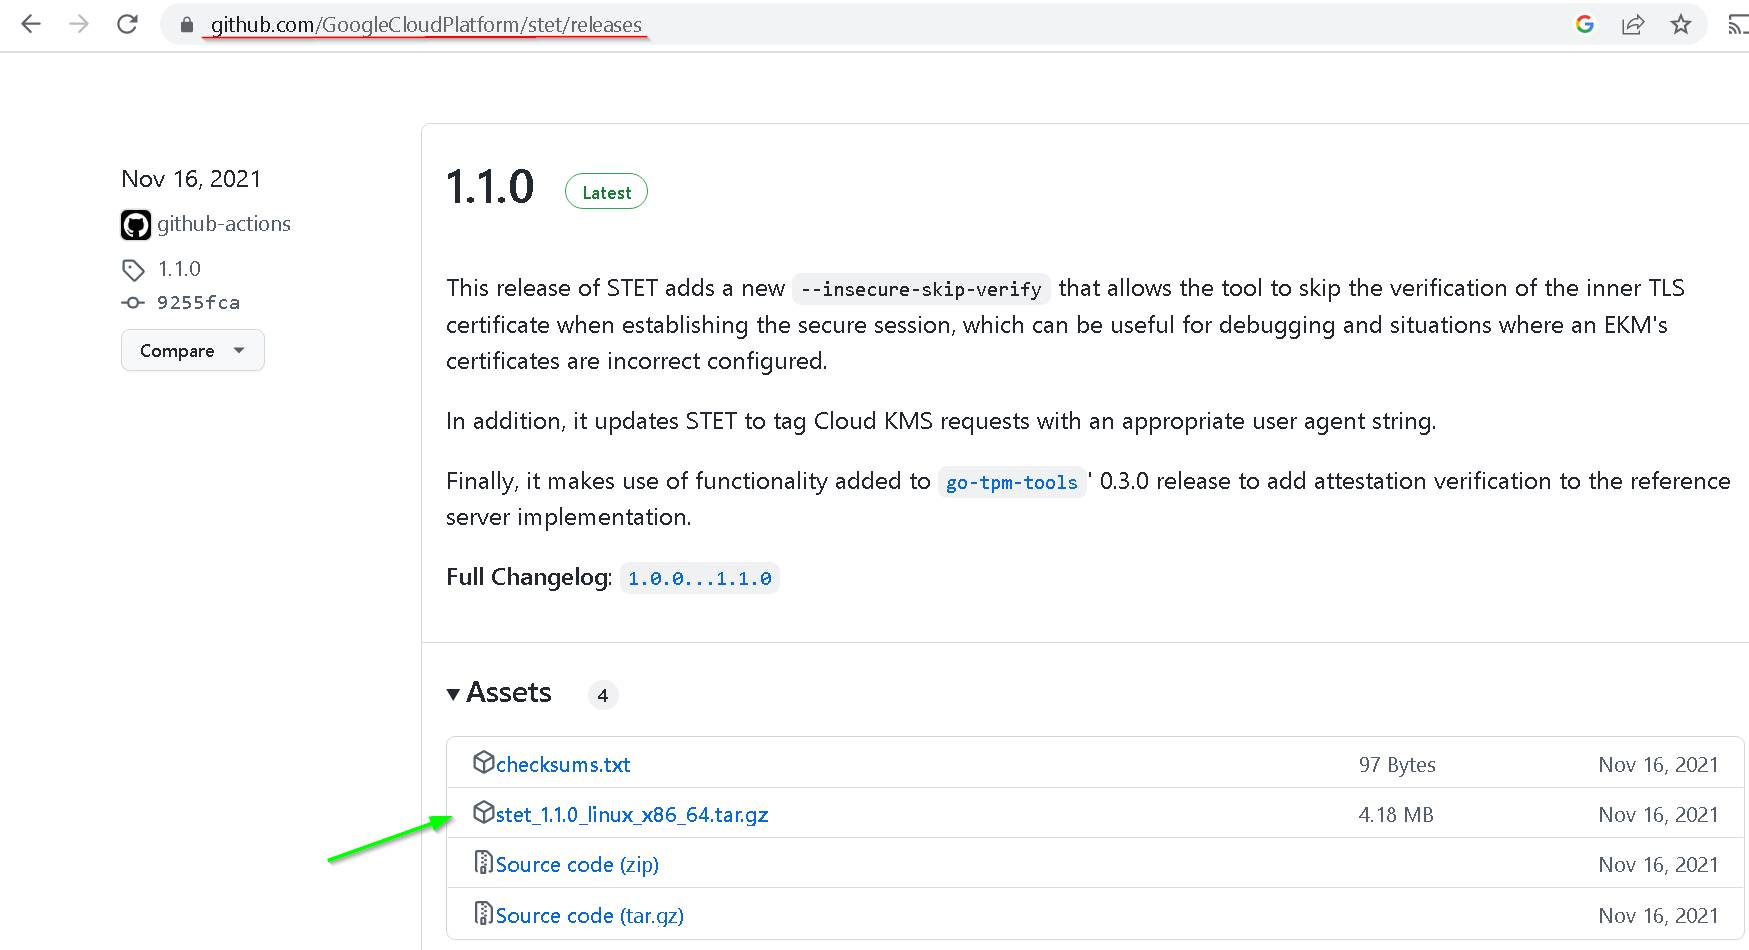
4. Install STET
go to https://github.com/GoogleCloudPlatform/stet/releases and copy the link to the latest release
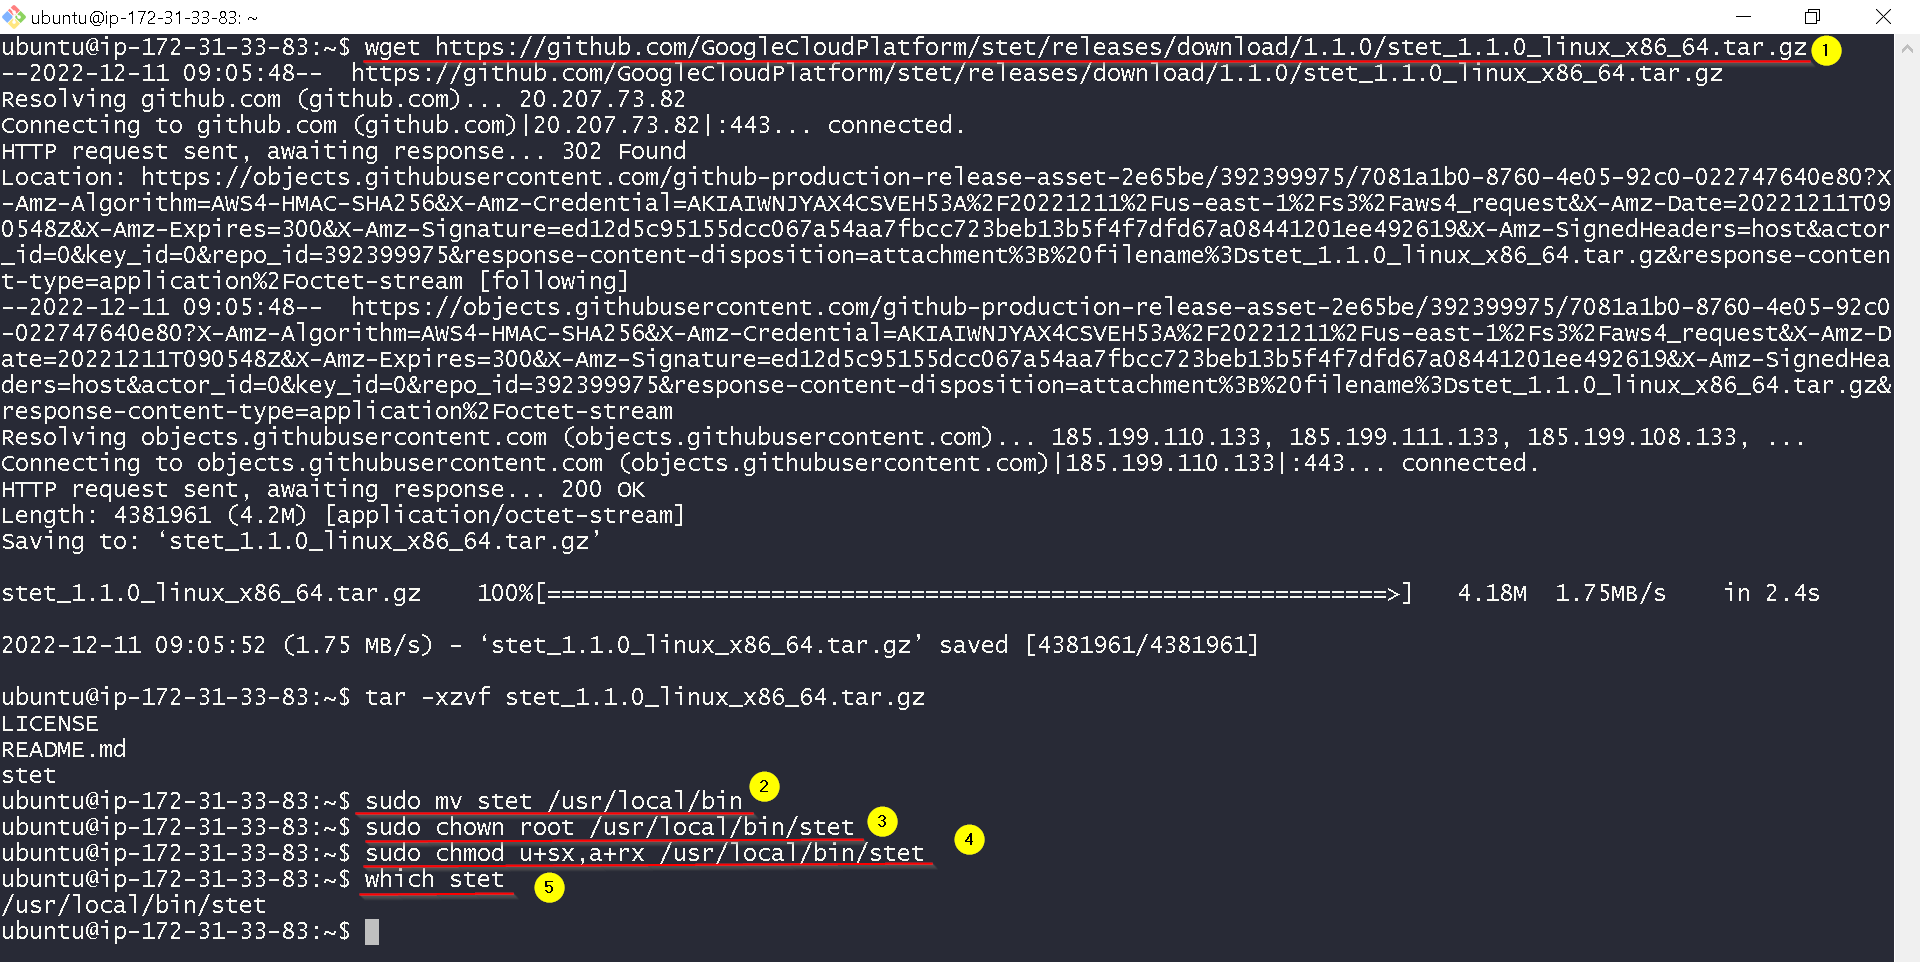
Run following commands on the on-prem-instance to install STET
These commands are from the STET github page
$ tar -zxf stet_1.0.0_linux_x86_64.tar.gz
$ sudo mv stet /usr/local/bin
$ sudo chown root /usr/local/bin/stet
$ sudo chmod u+sx,a+rx /usr/local/bin/stet
Shown in the screenshot
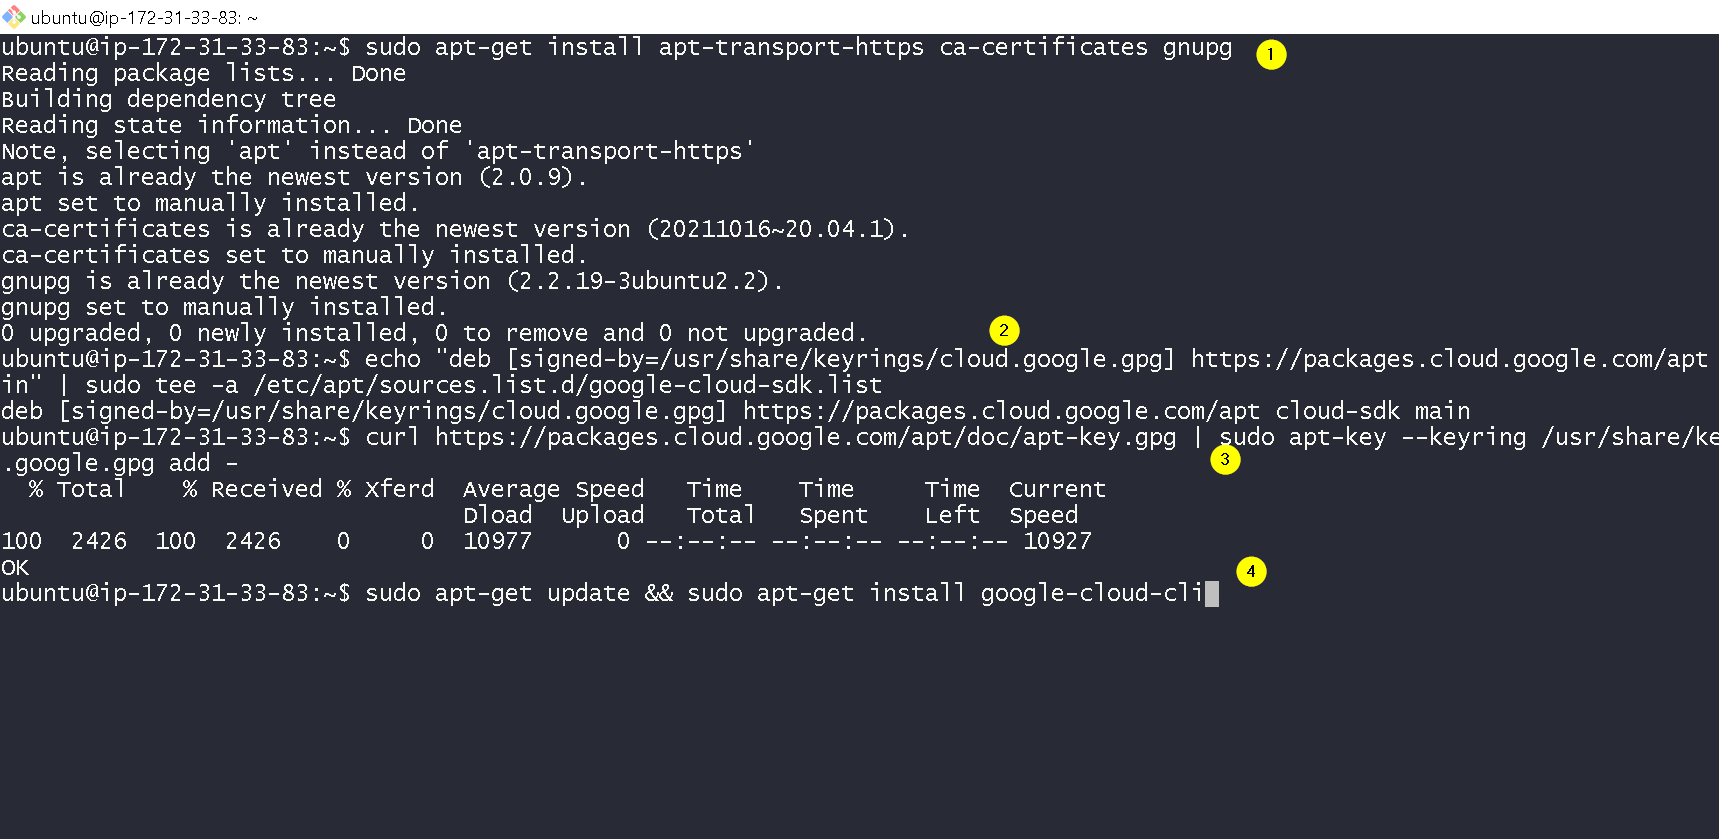
5. Install GCloud CLI
Go to https://cloud.google.com/sdk/docs/install#deb
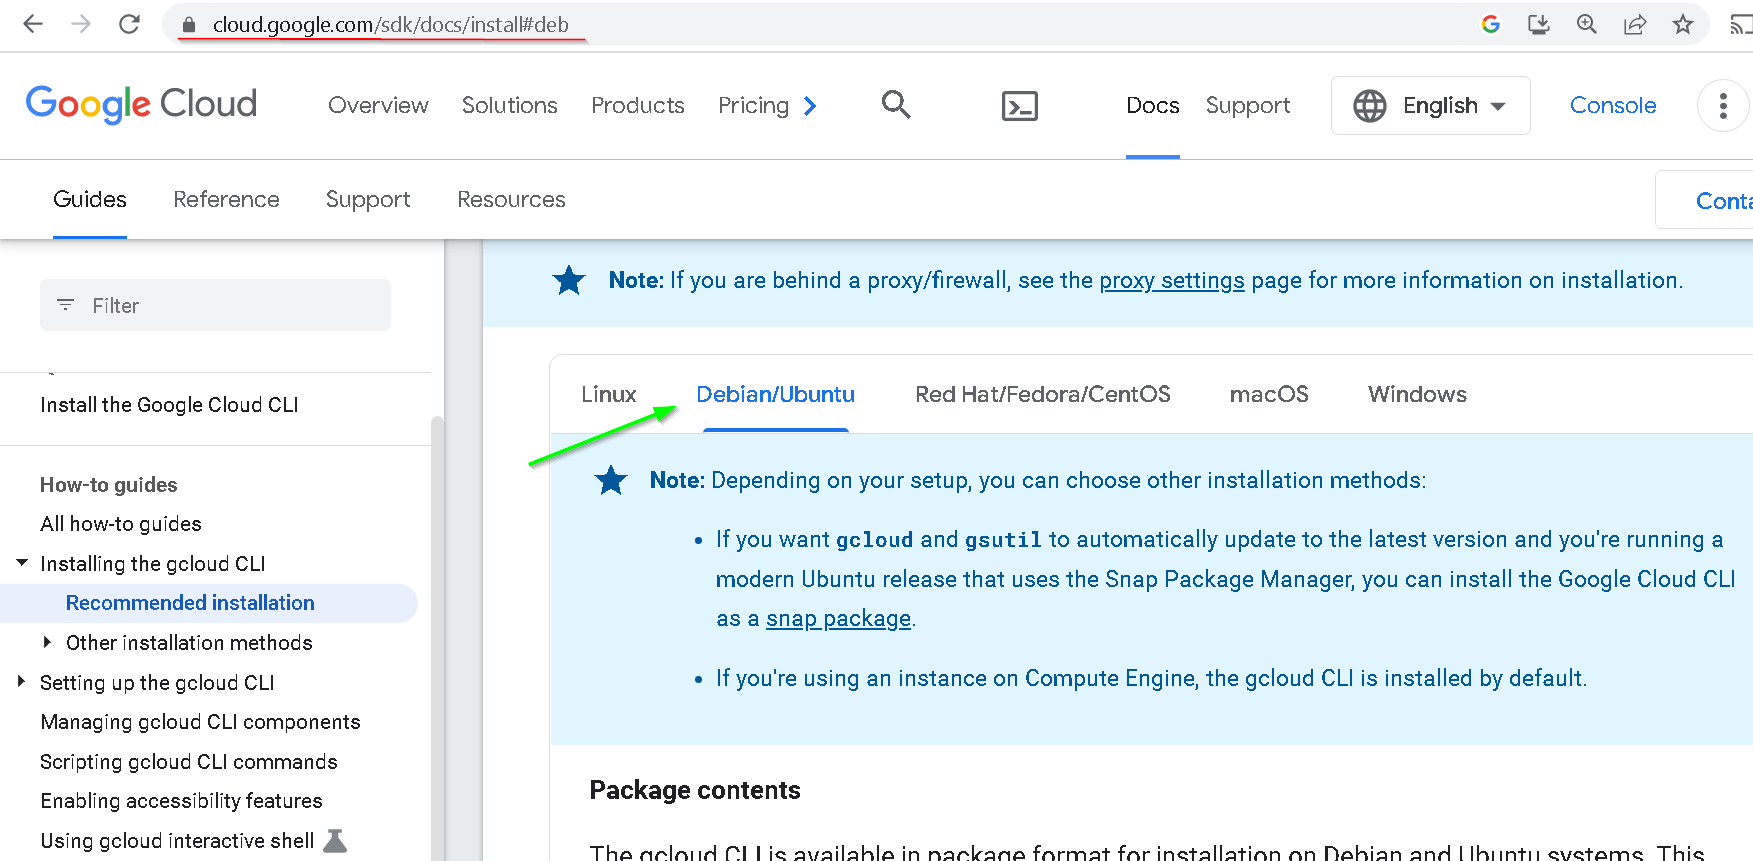
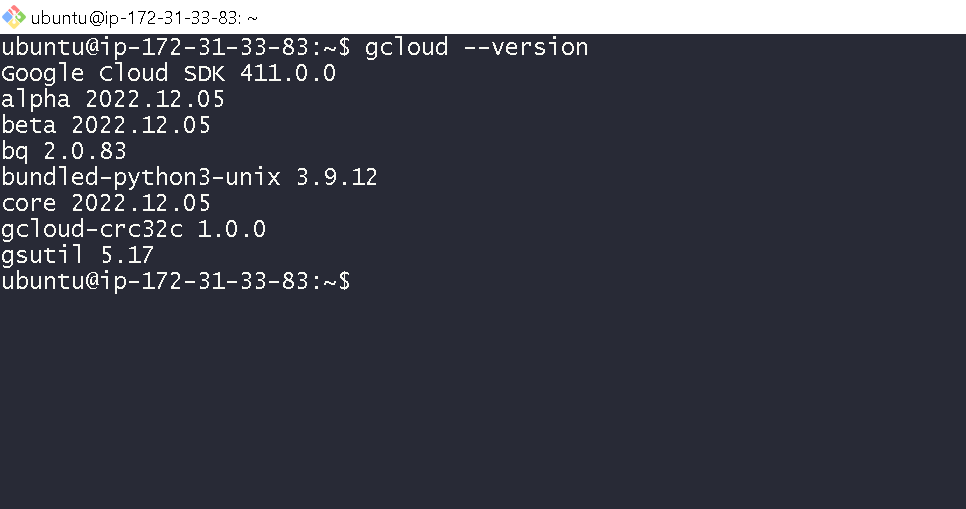
Run commands shown in the screenshot to install and verify the GCloud CLI
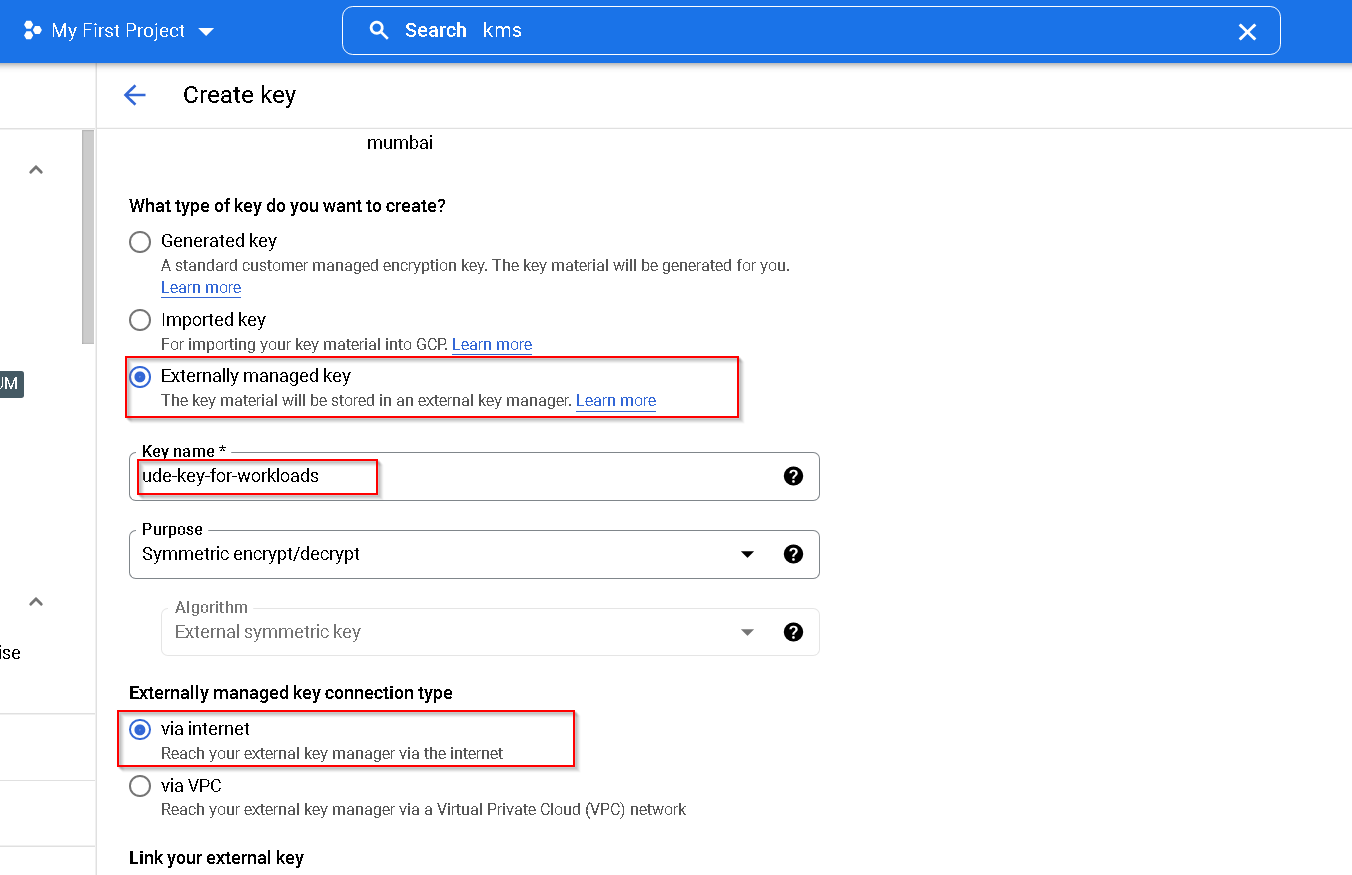
6. Create Externally managed keys
We are creating 2 keys
- One for standard workloads e.g. BQ and Compute Engine VM
- One for Ubiquitous Data Encryption
We have switched between CKM and GCP console many times while creating keys. Could be a bit inconvenient but that is the way to do this.
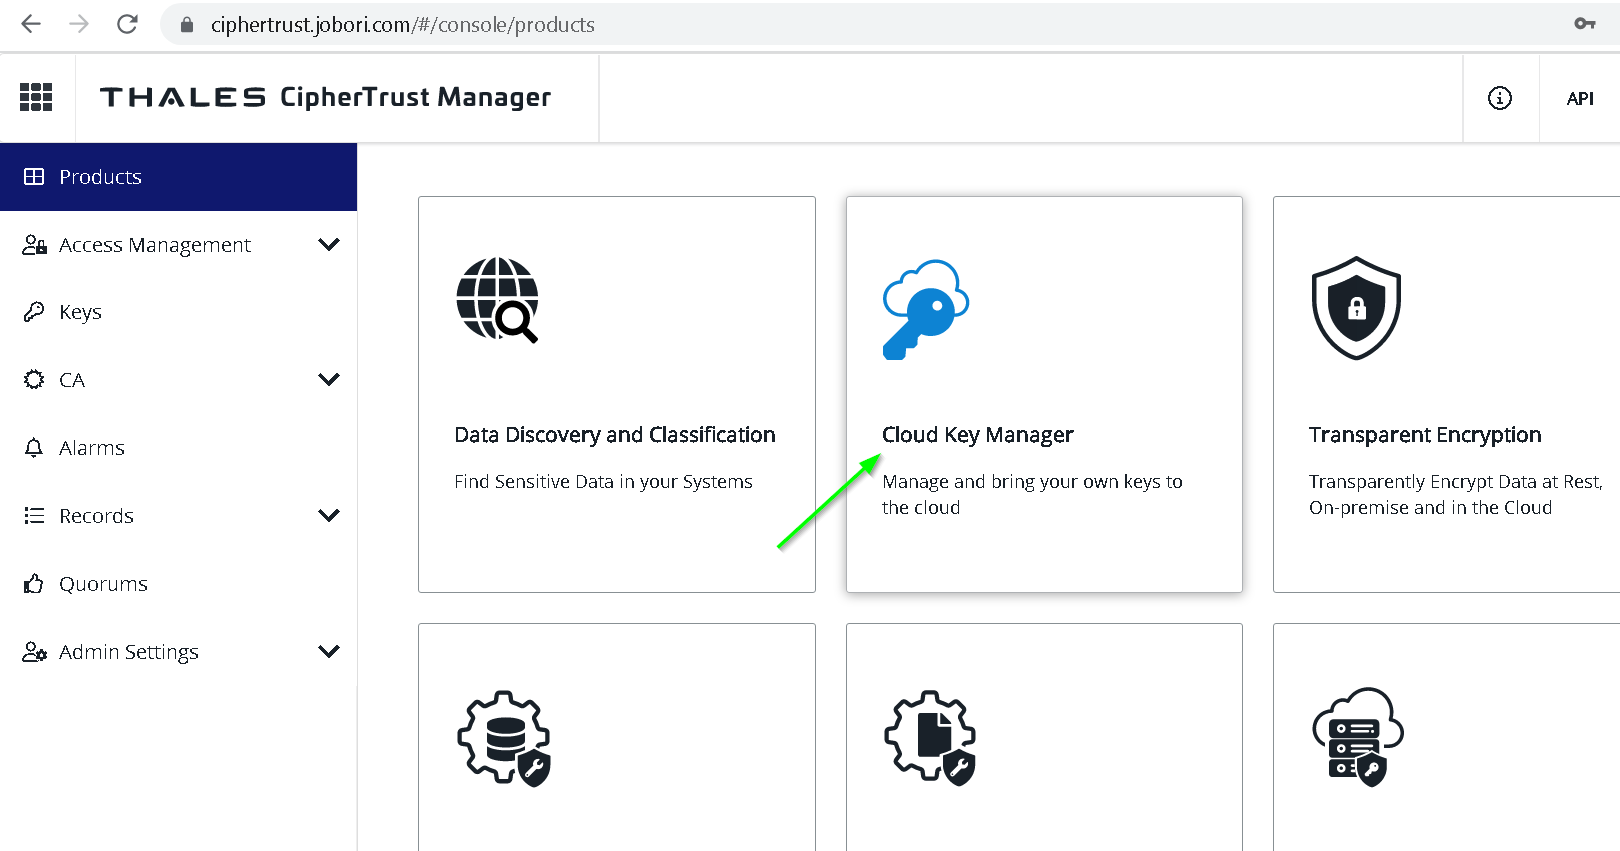
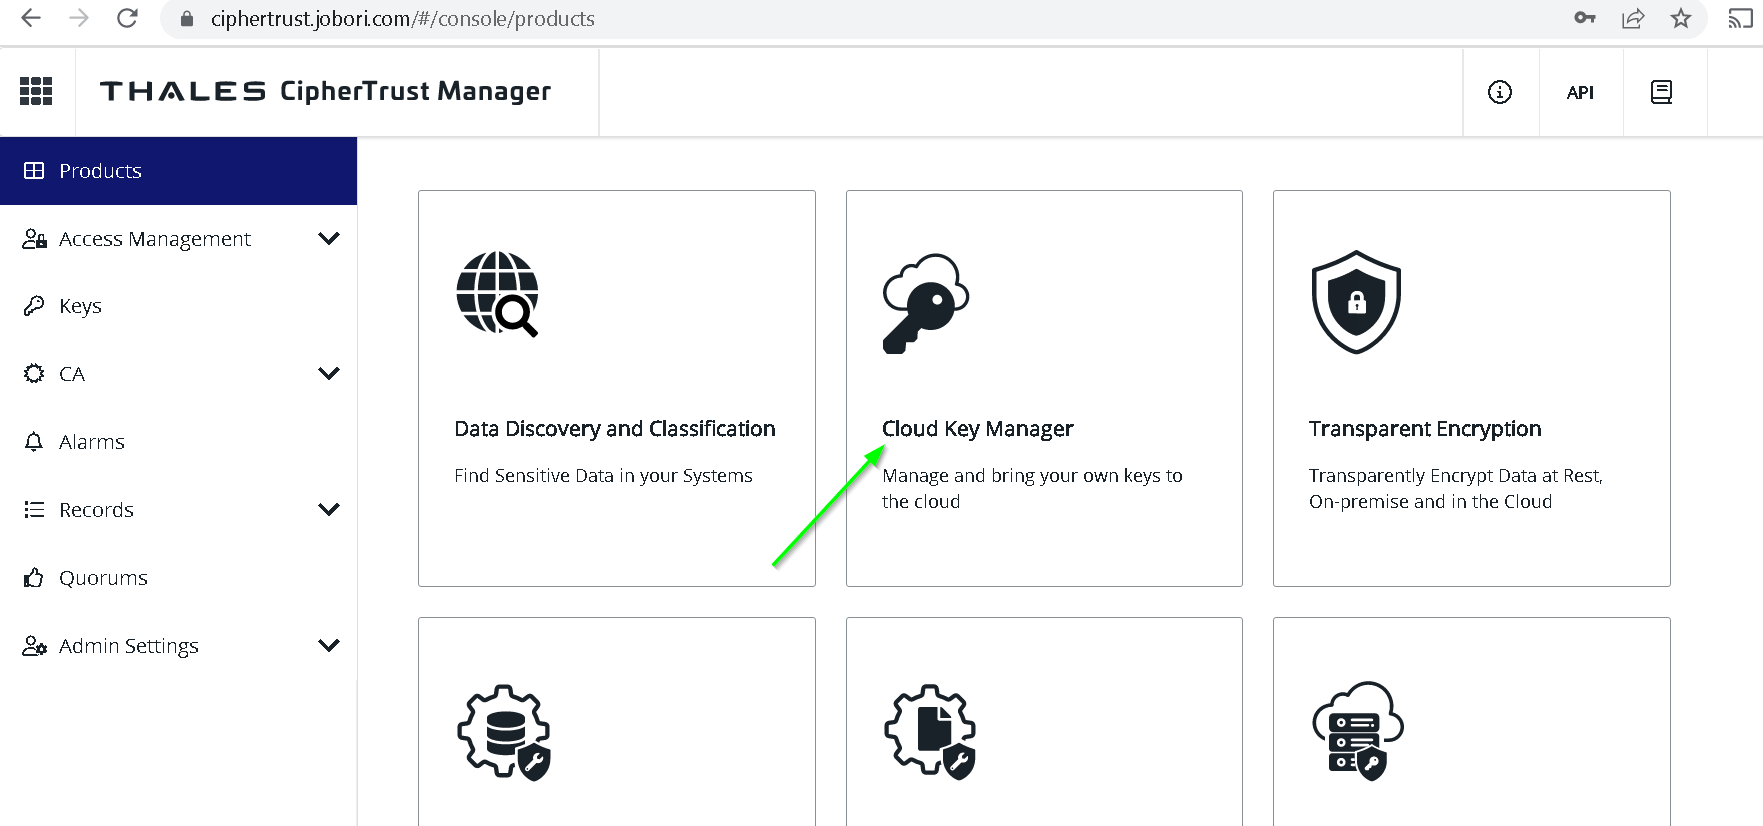
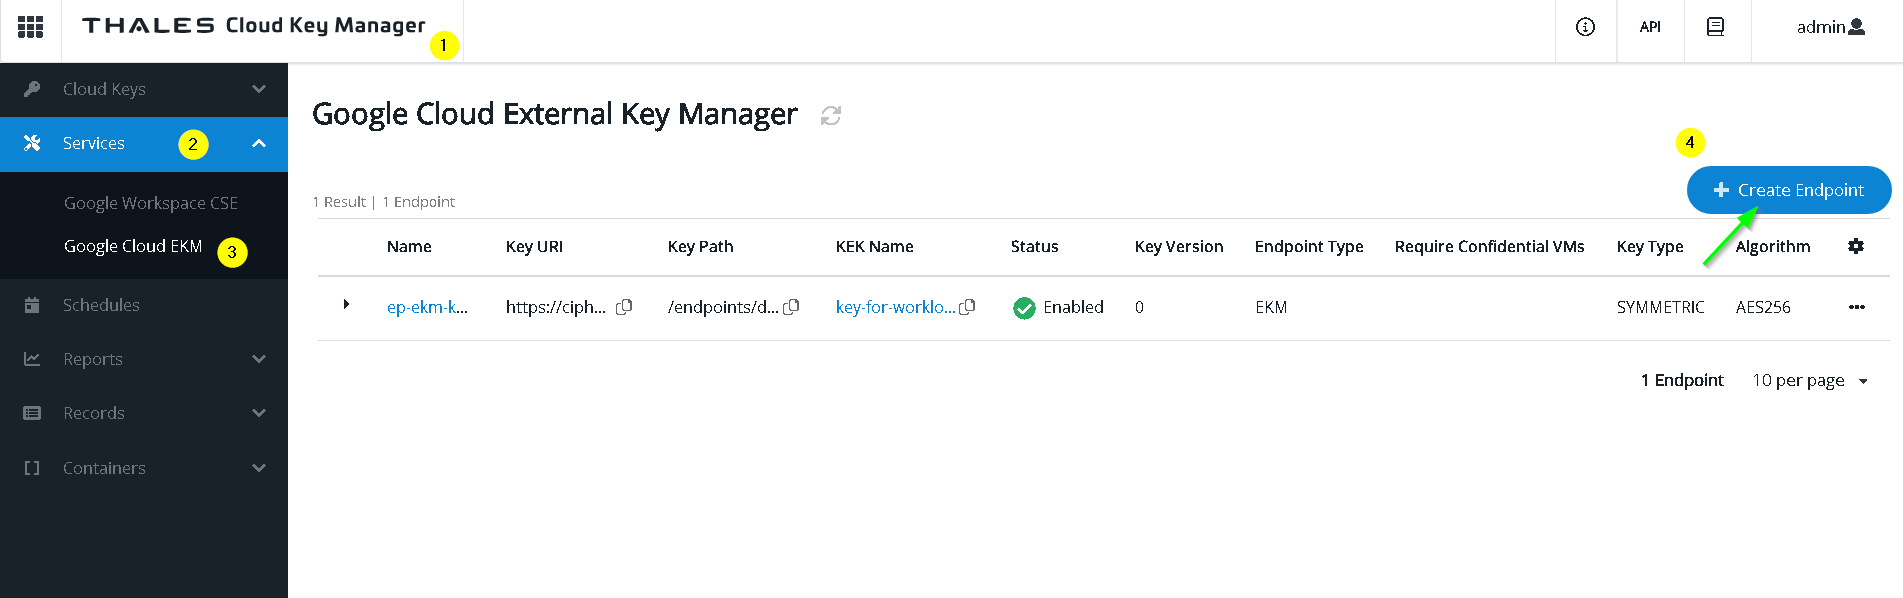
Go to Thales CKM -> Cloud Key Manager
Go to Containers -> Google -> Projects -> Add Existing Project

Manually enter the project id to be your GCP project Id
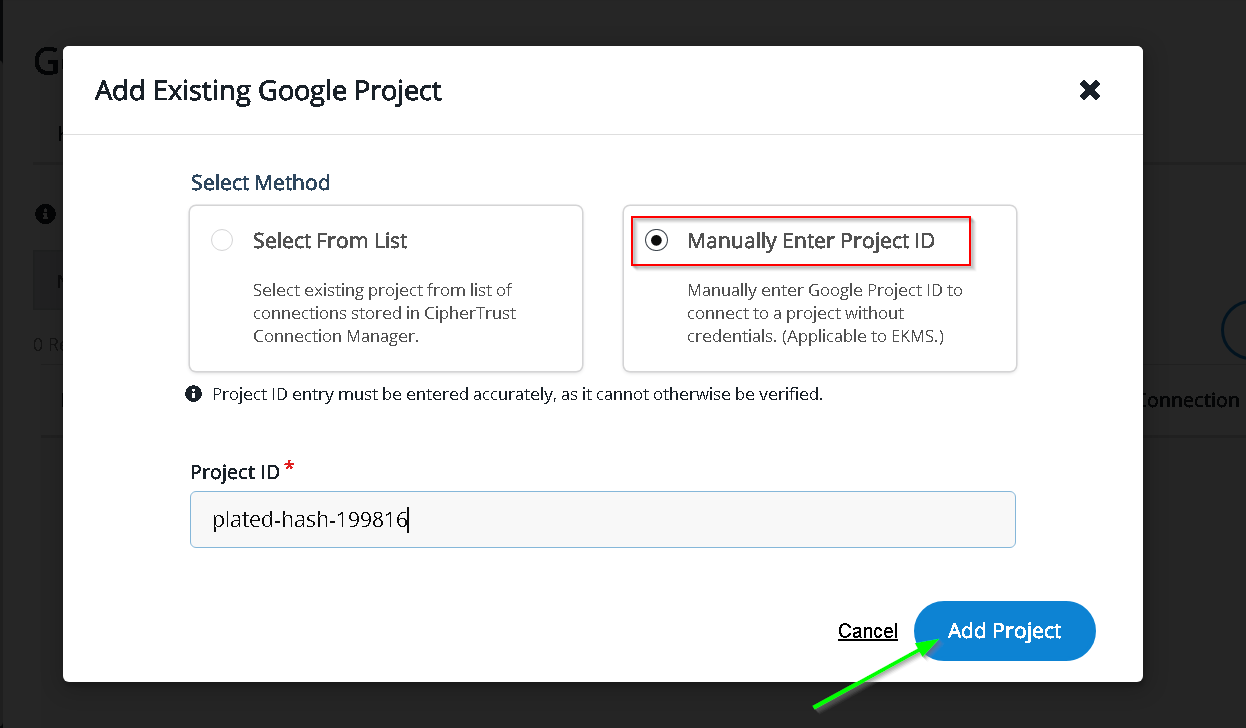
Project Added

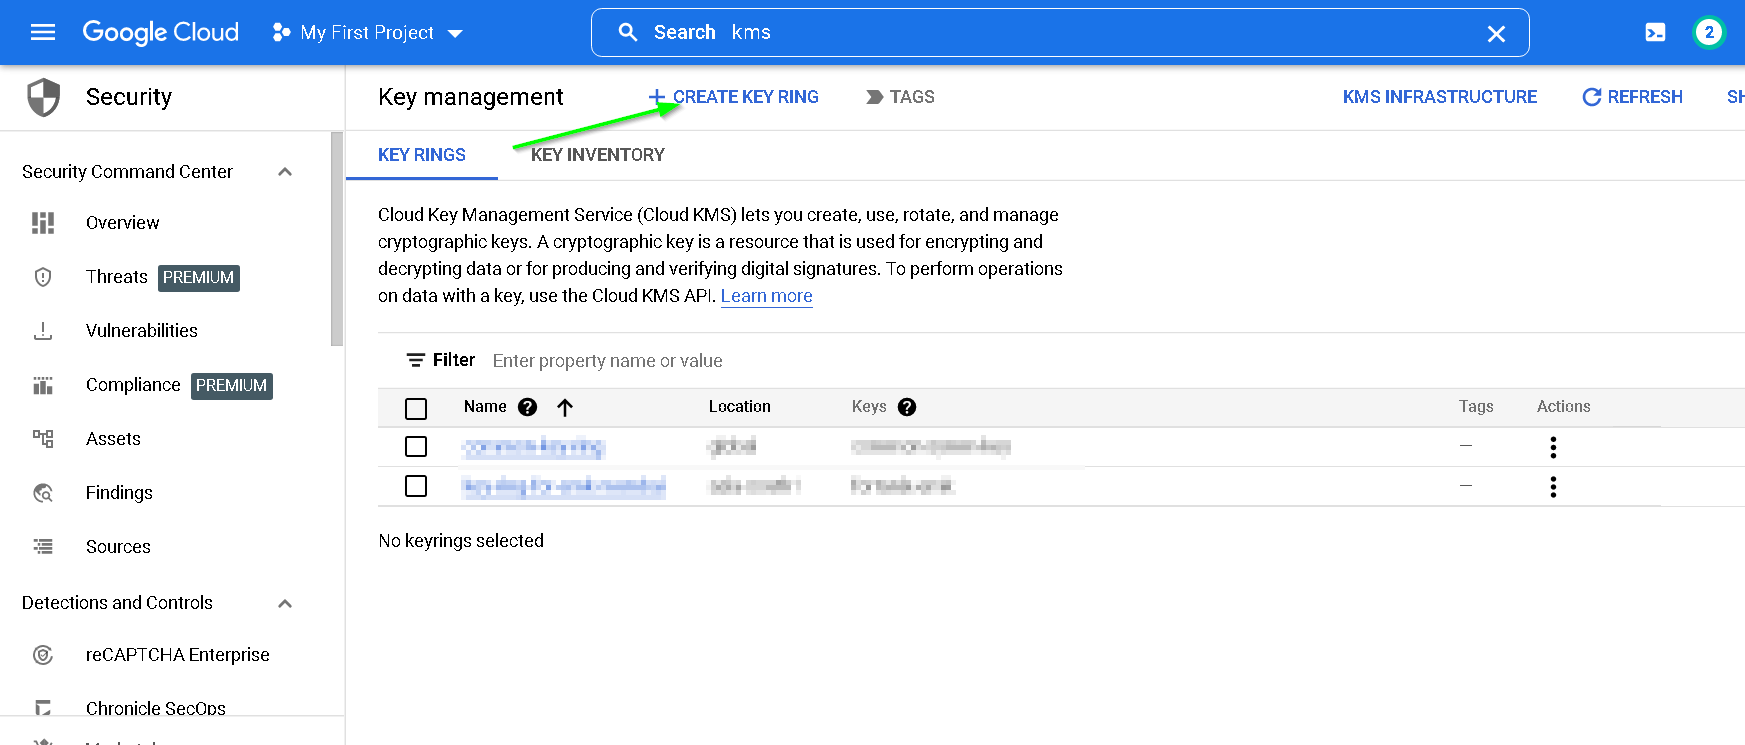
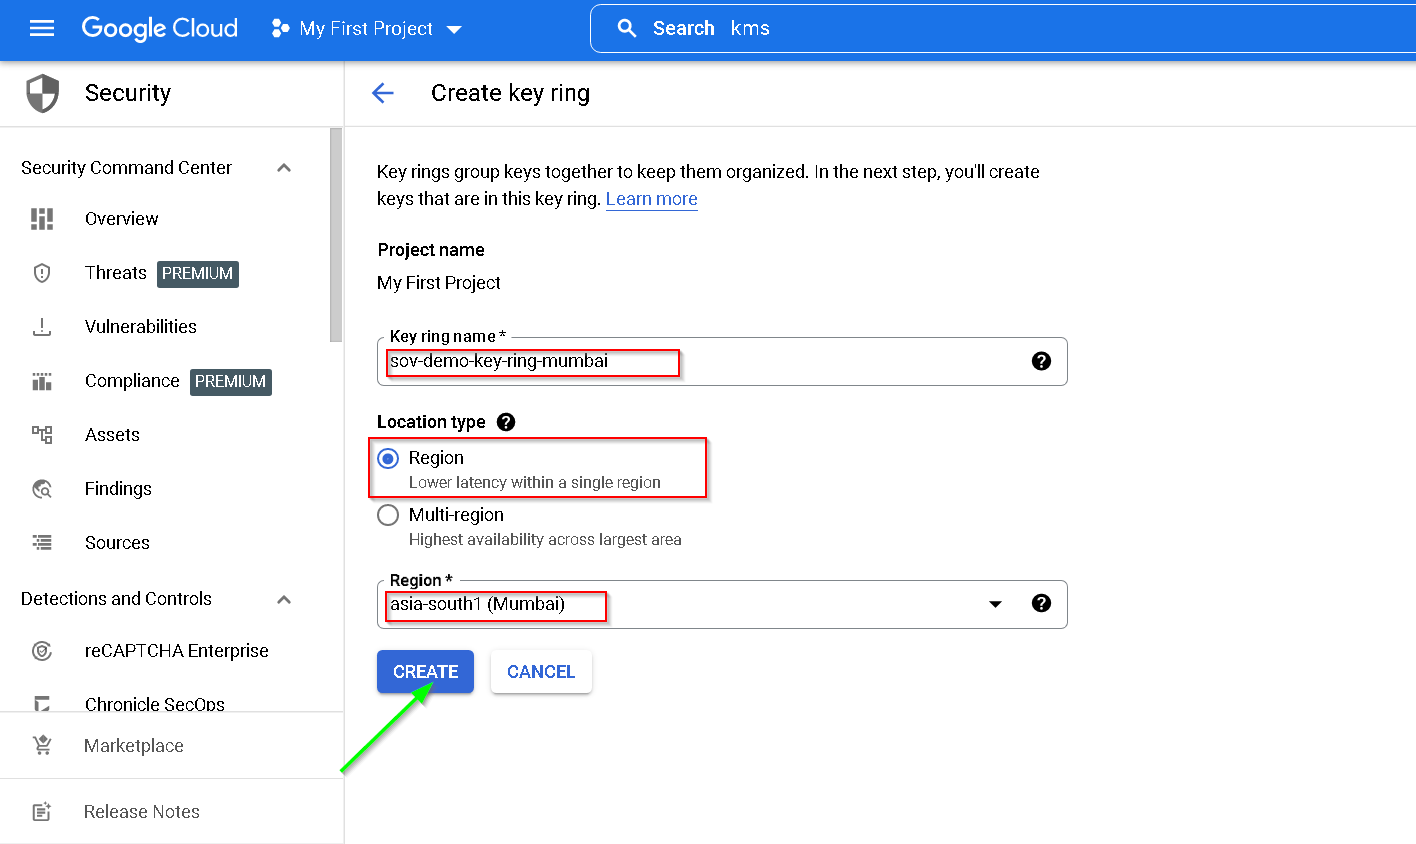
Let’s create the key ring and then the keys
Go to GCP console -> KMS-> Create key ring

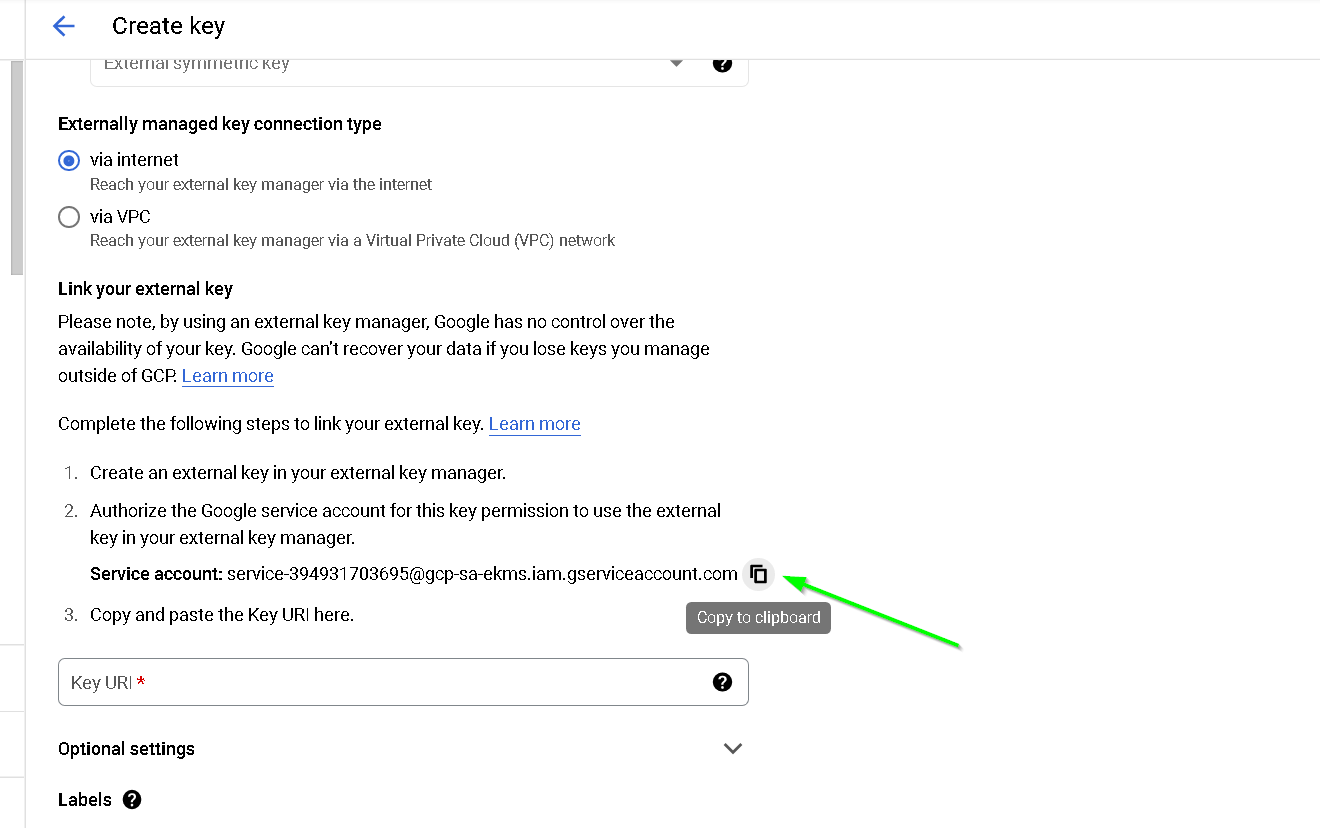
Copy the service account
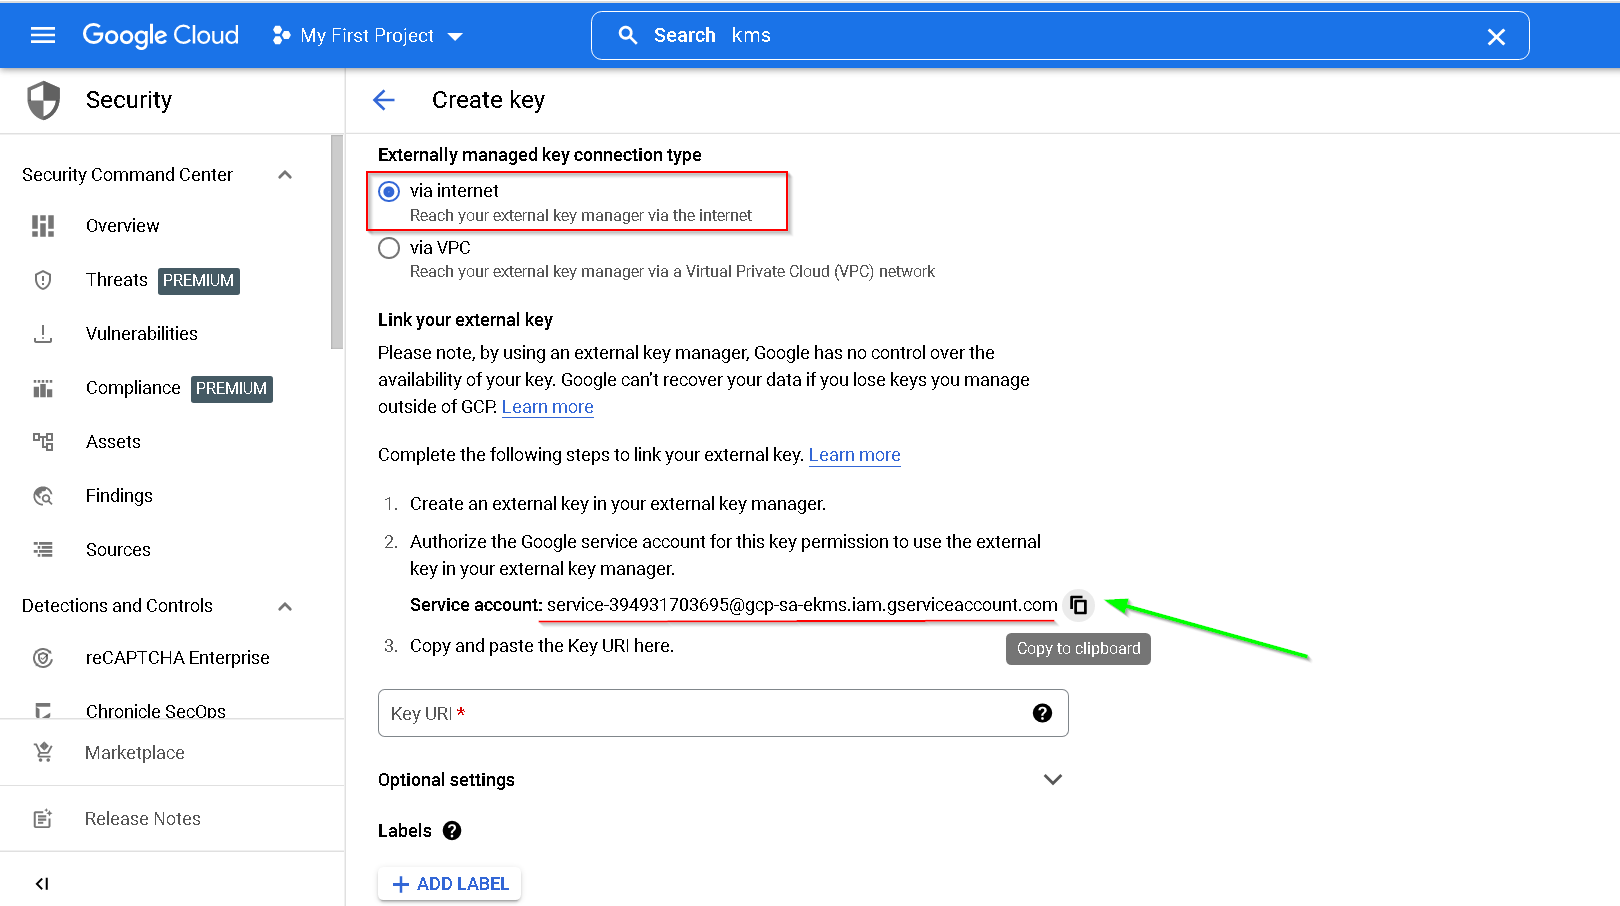
Back to CKM
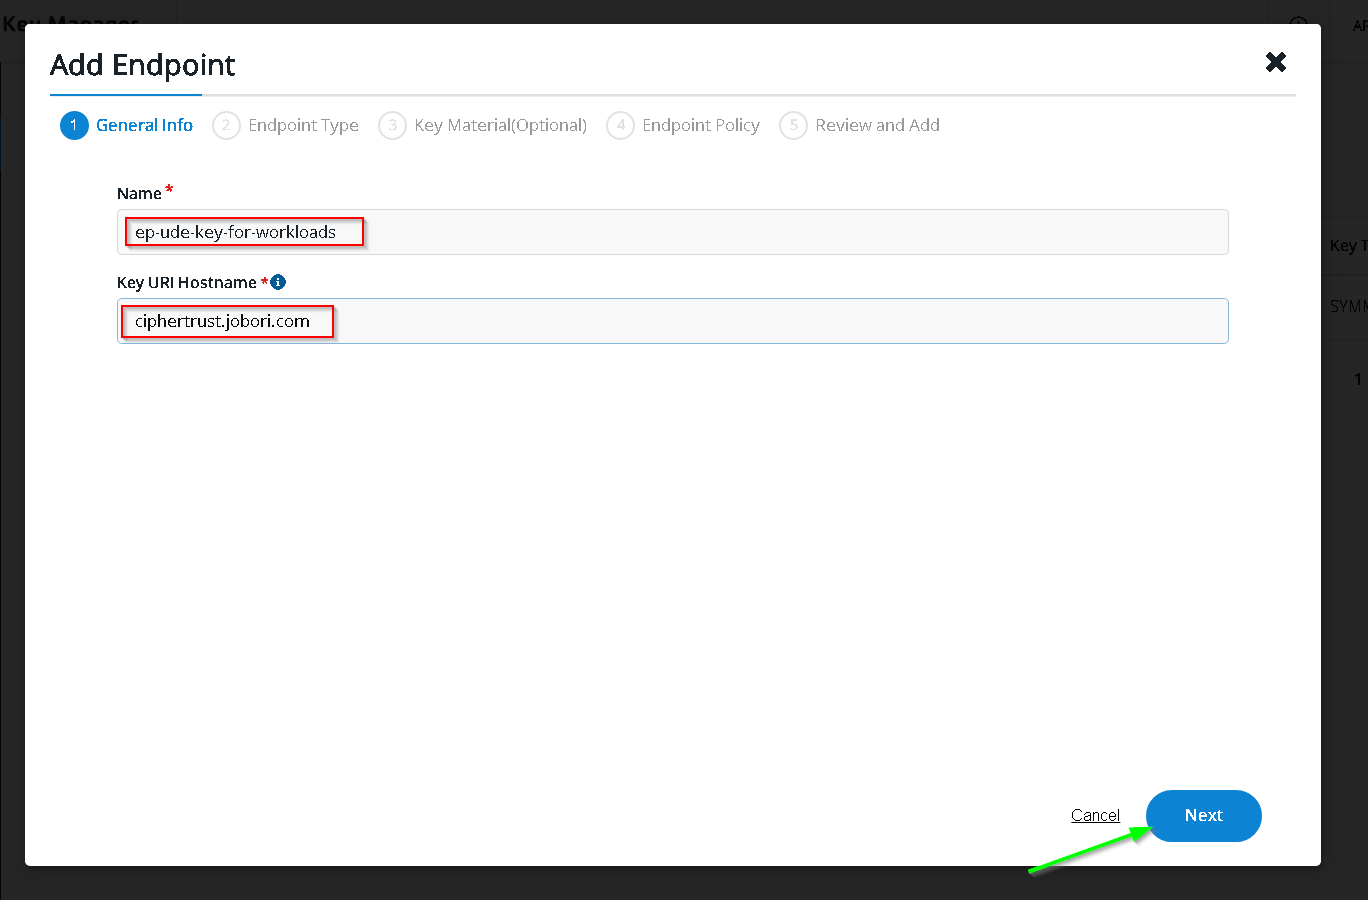
Update / fill options as shown below

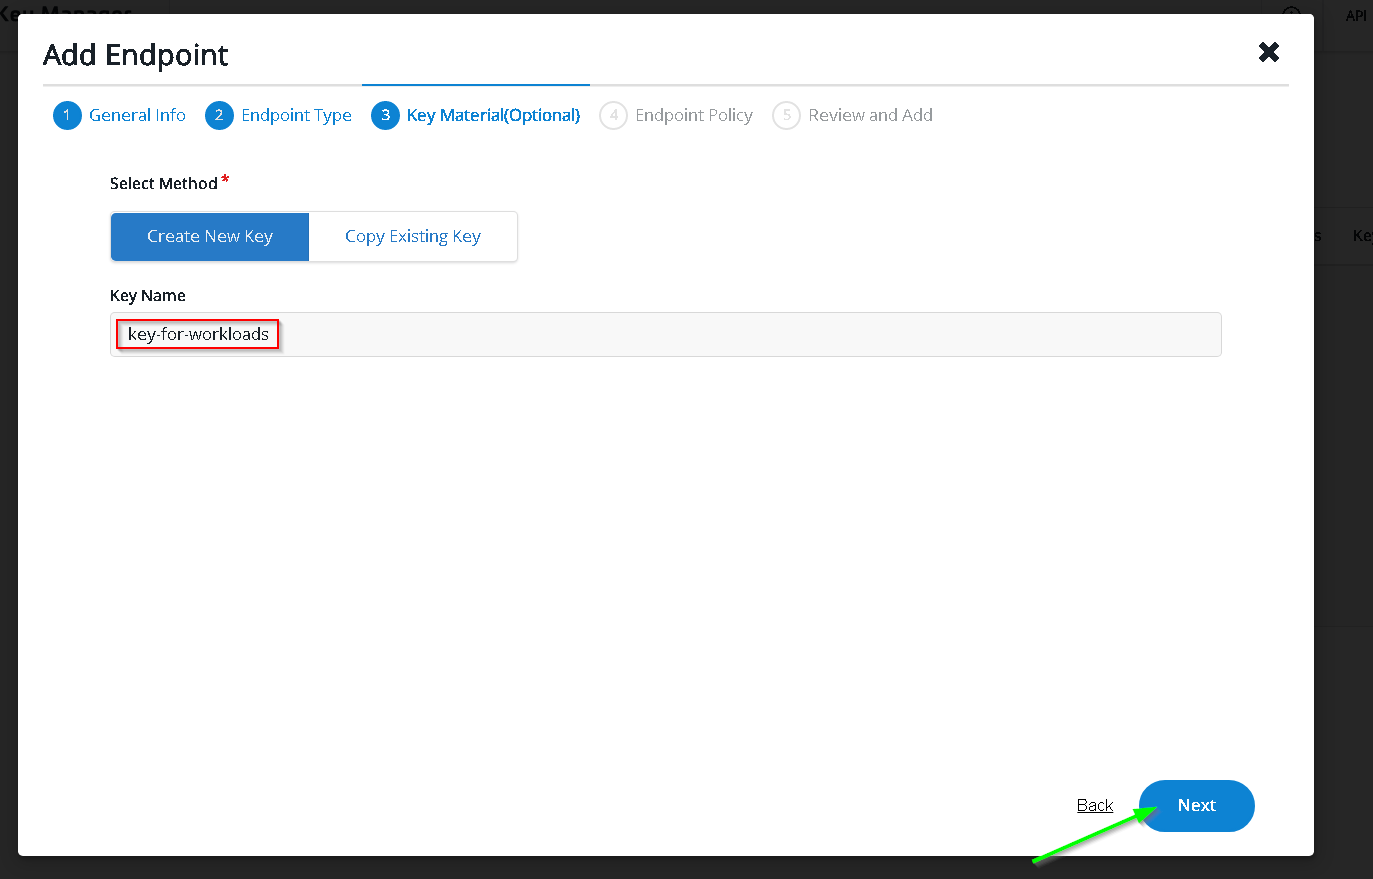
In the clients - paste the copied service account
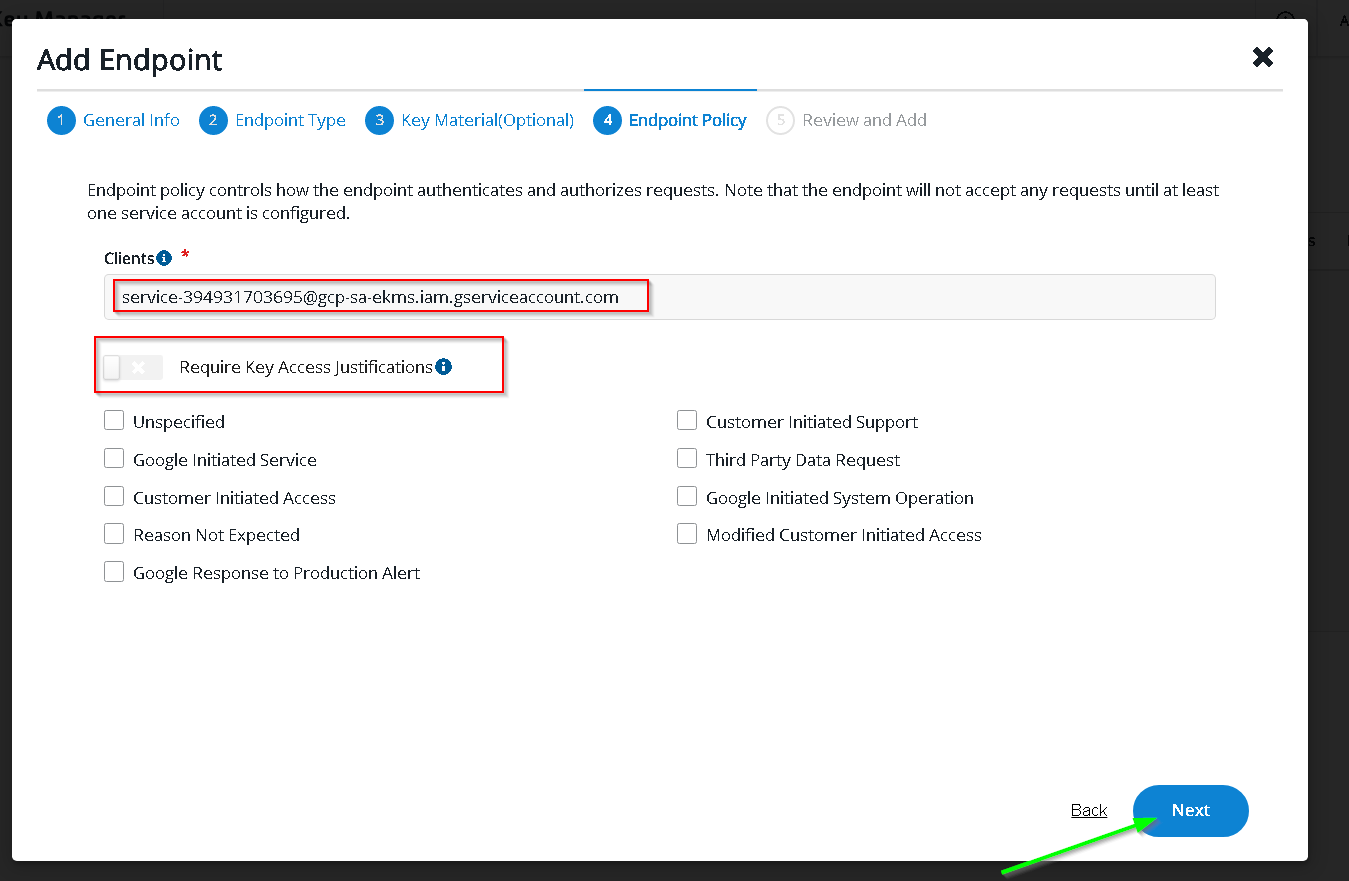
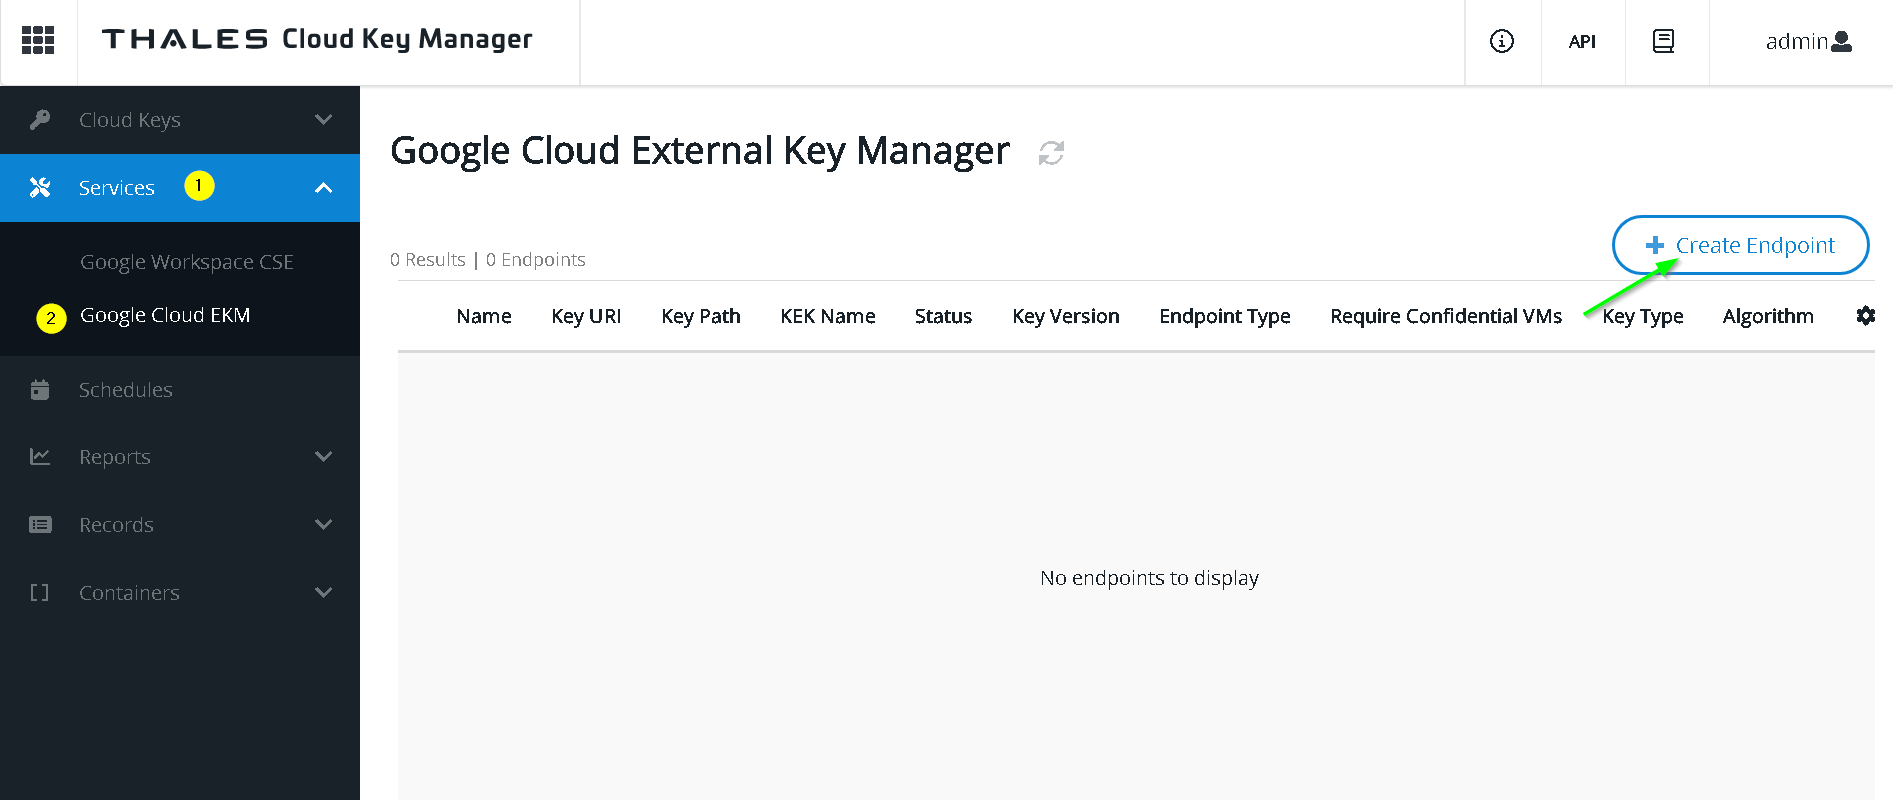
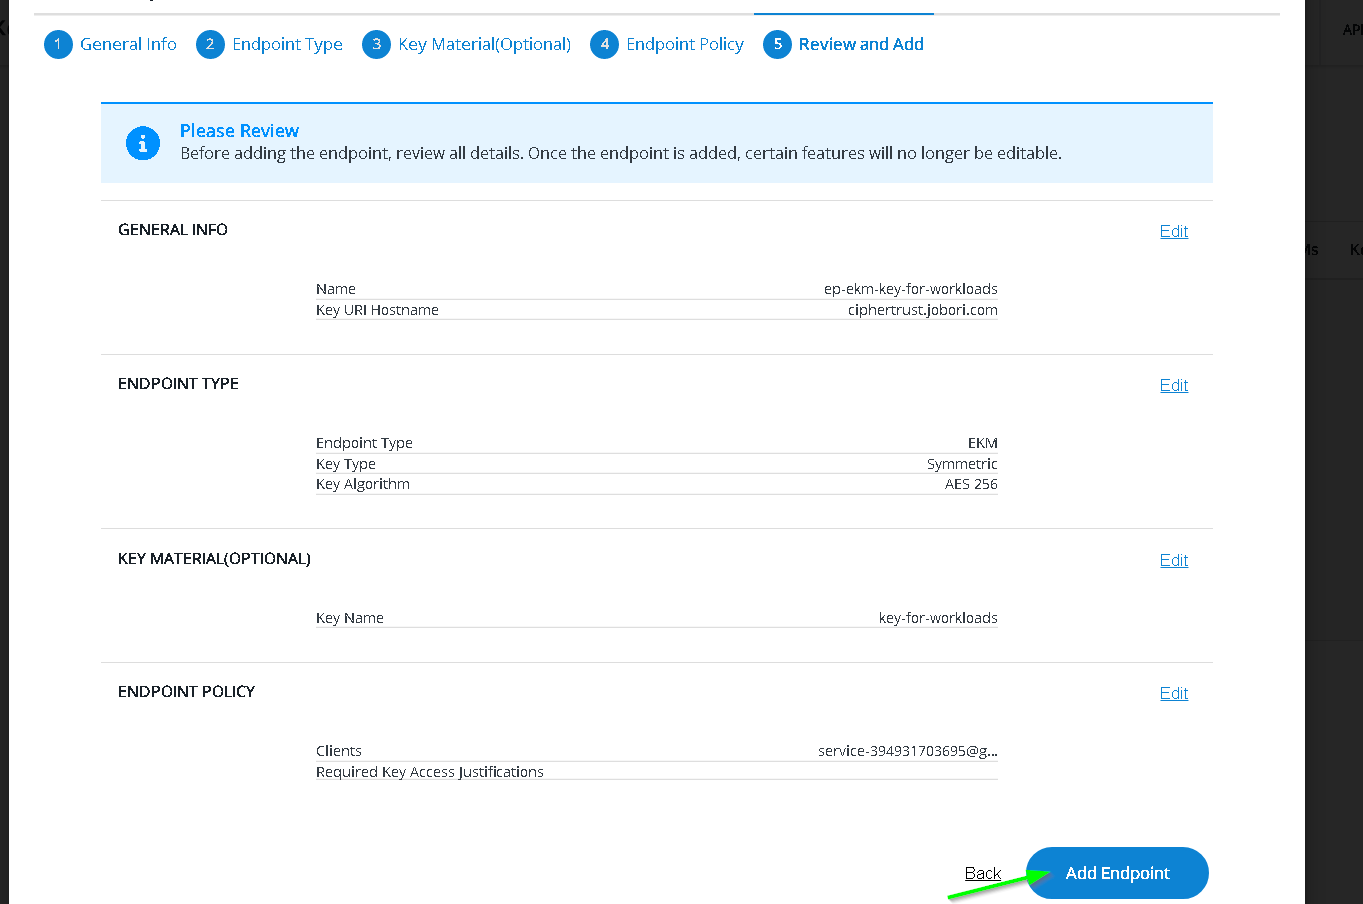
Add Endpoint
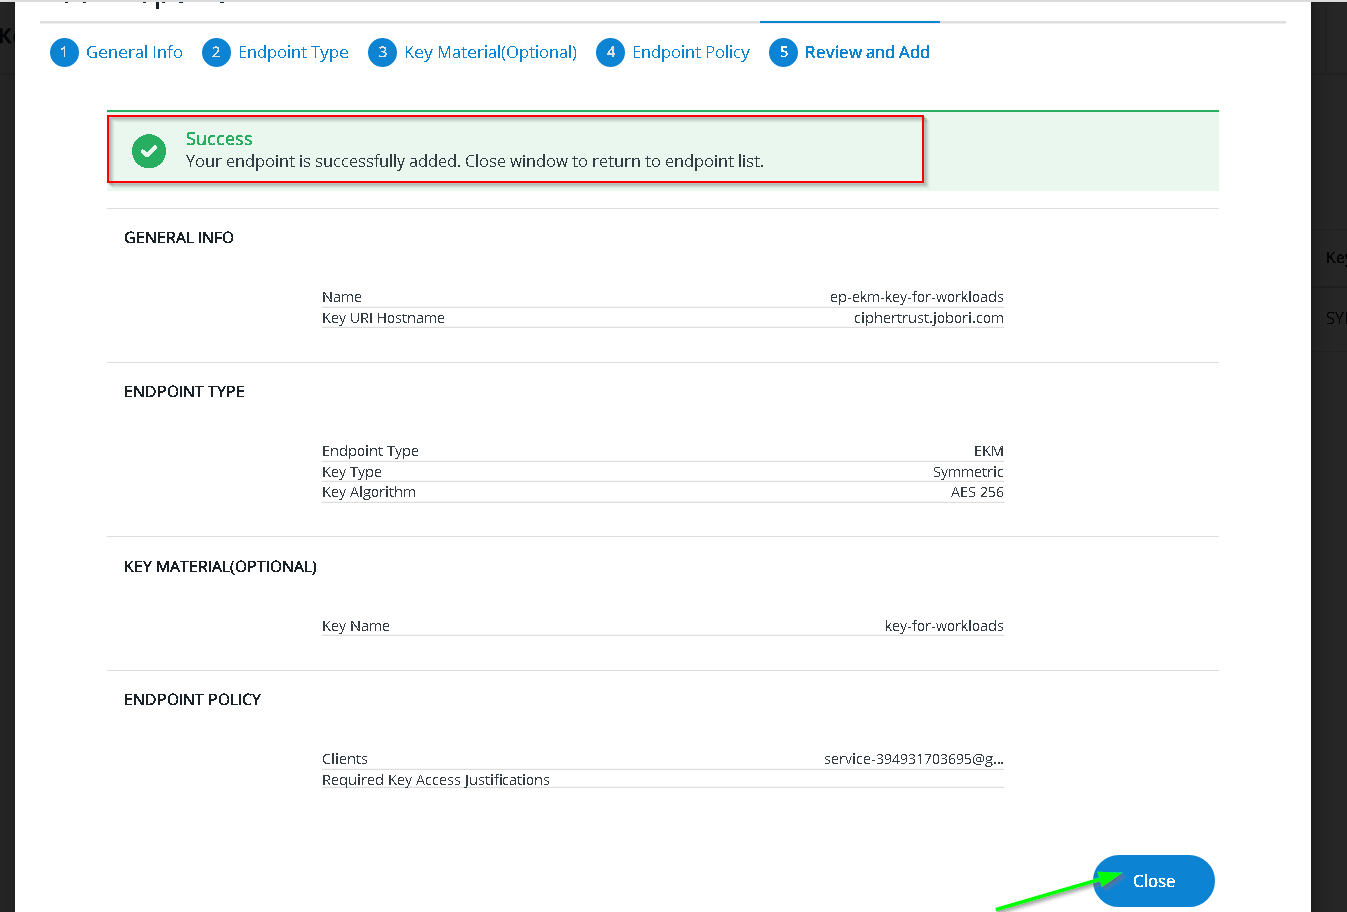
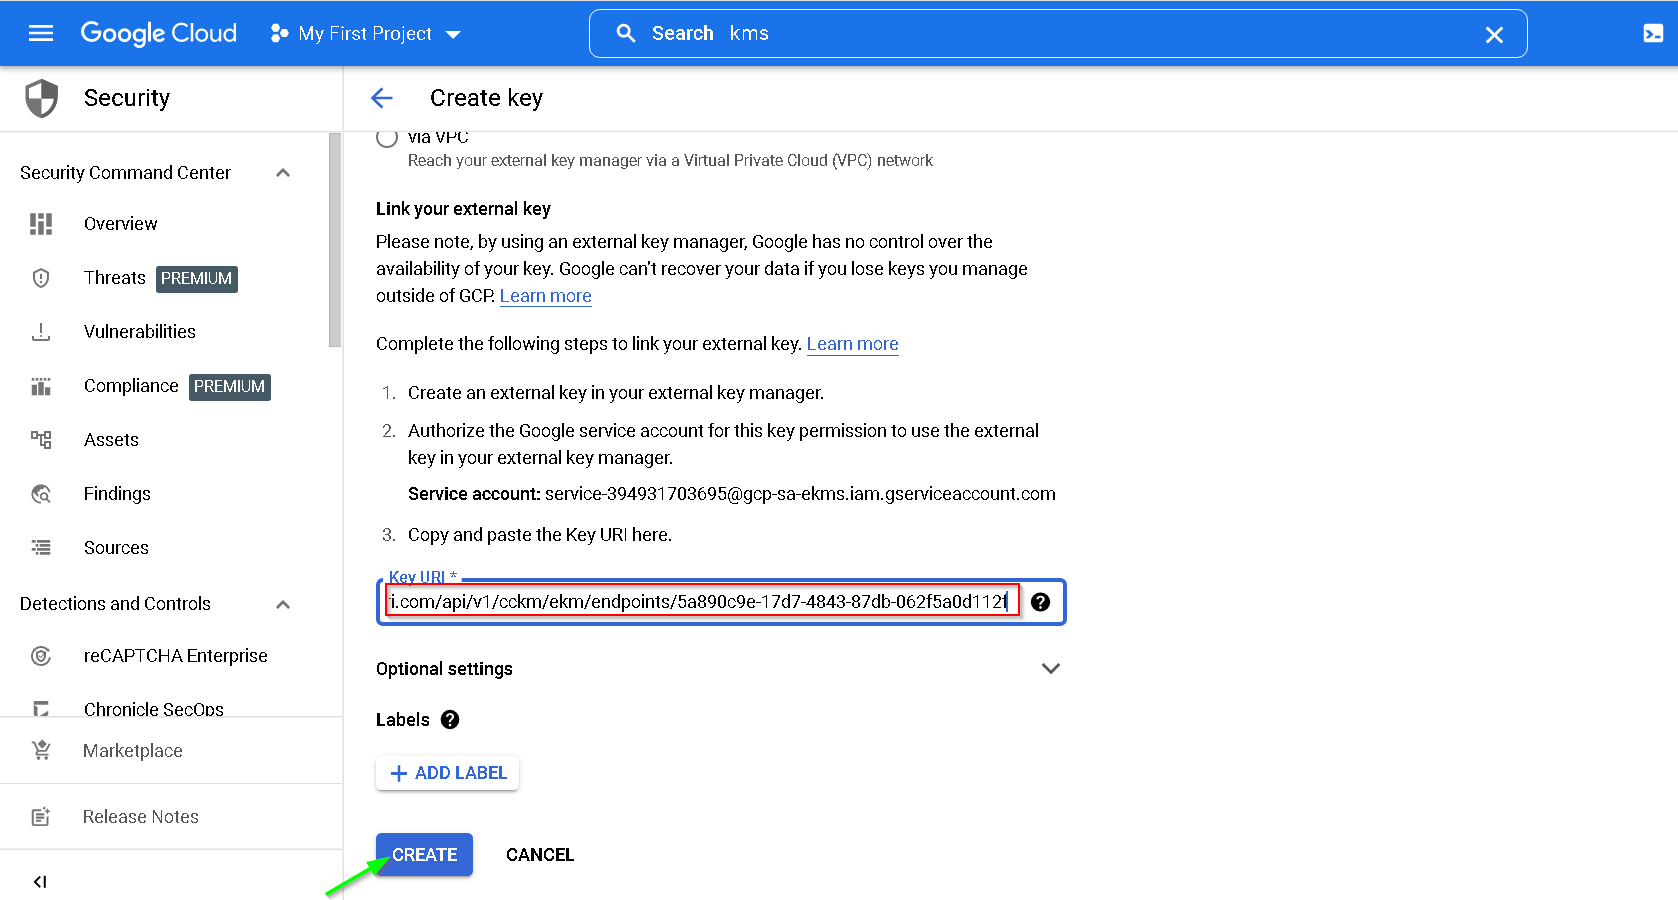
Copy the Key URI
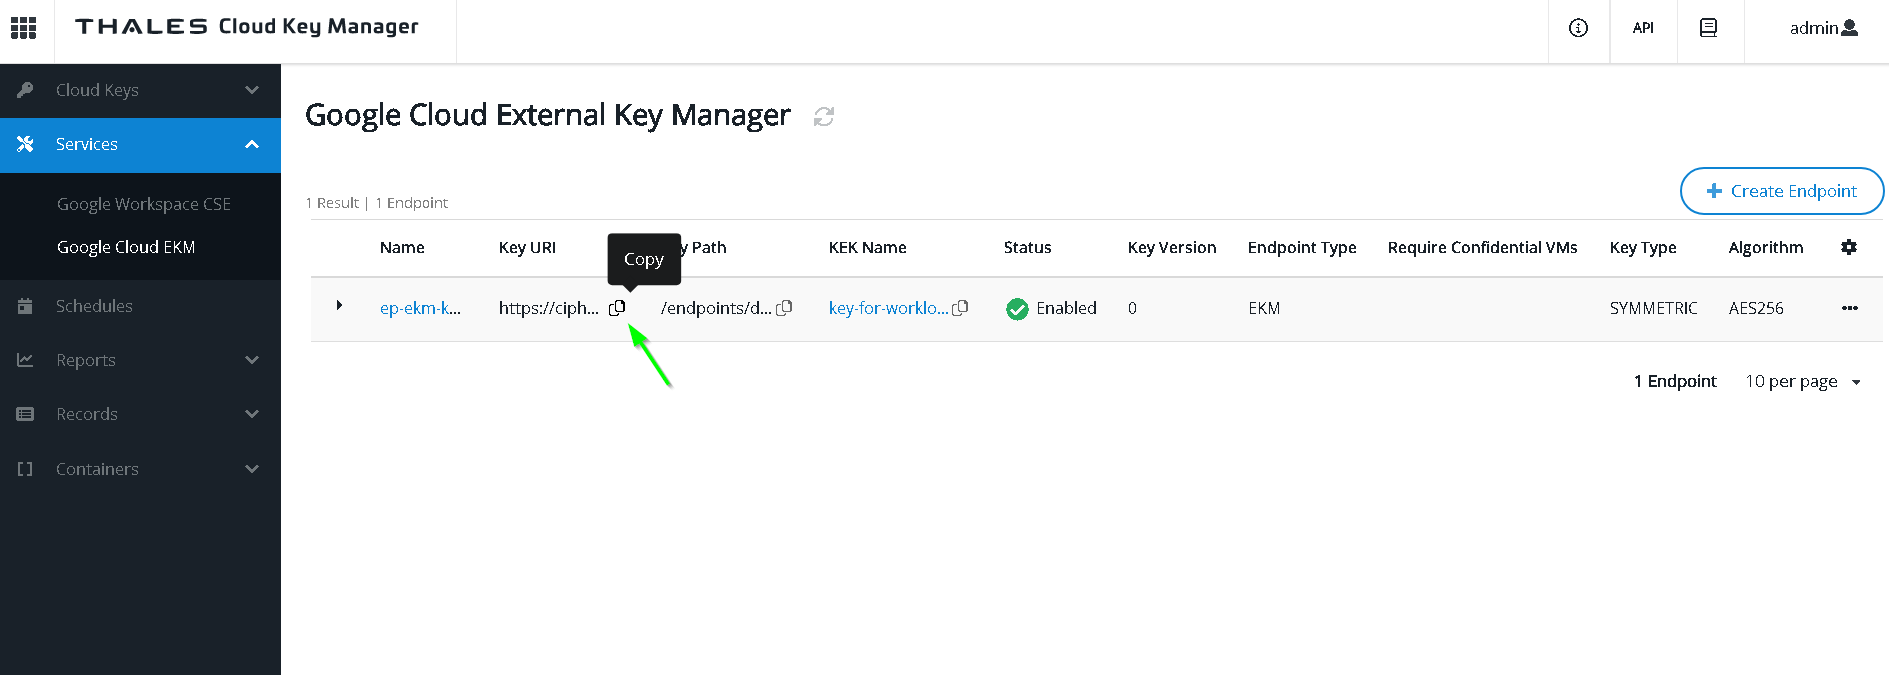
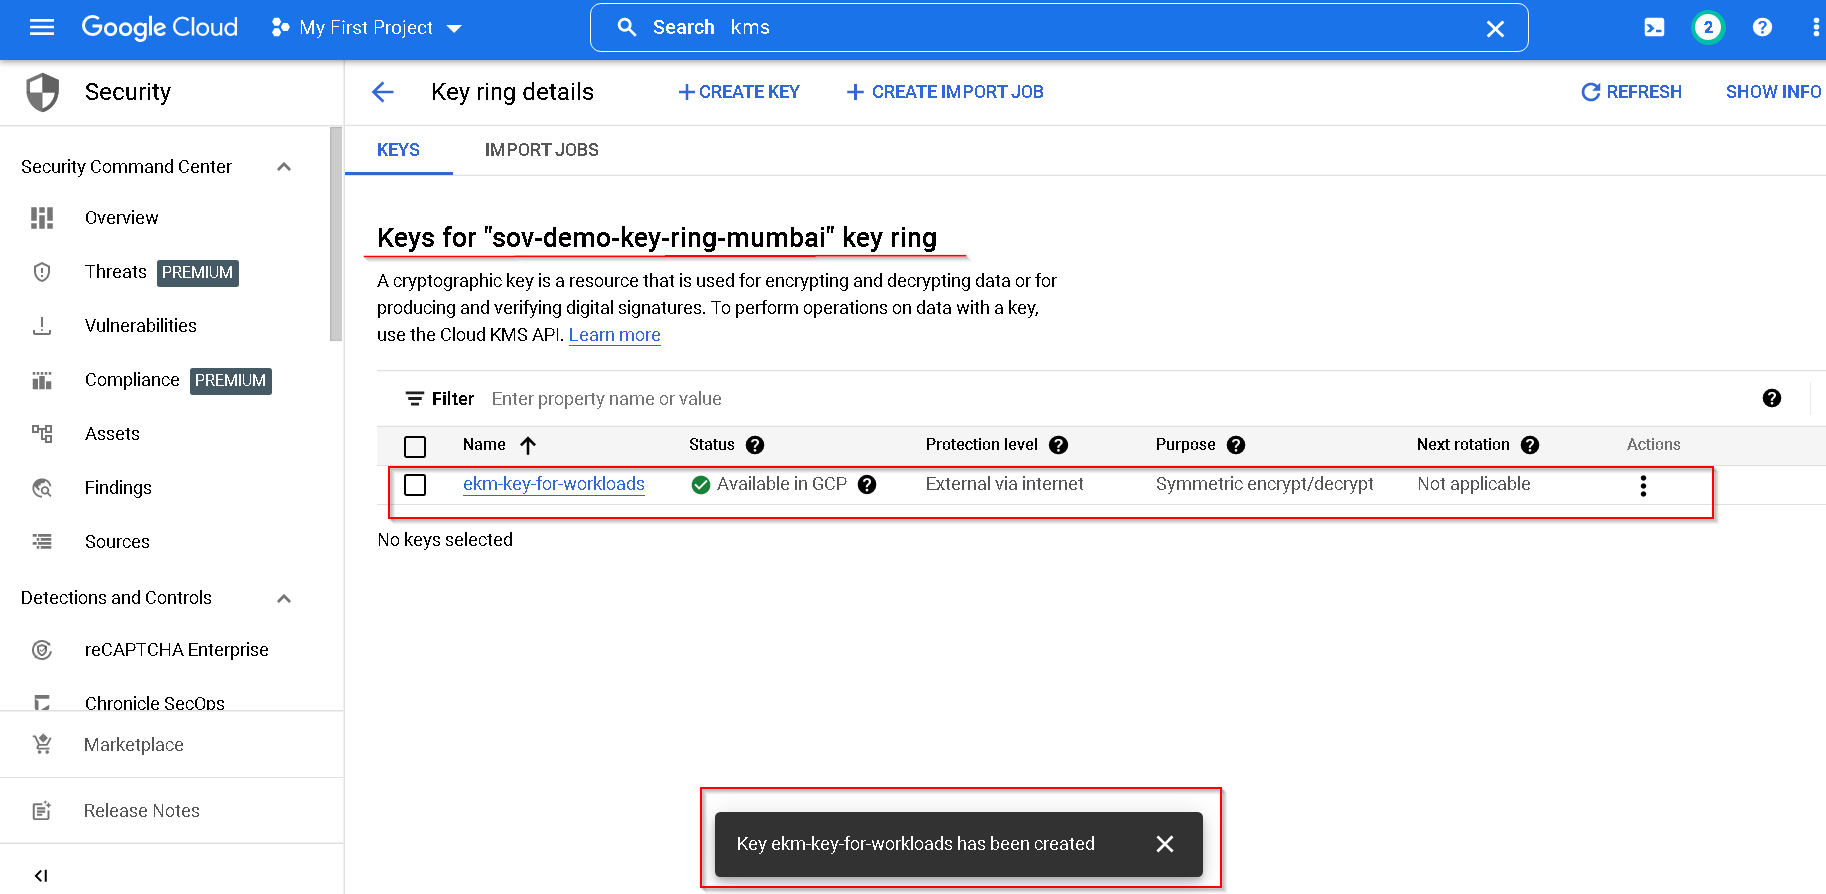
Now paste this in the KMS console in GCP

Key created successfully
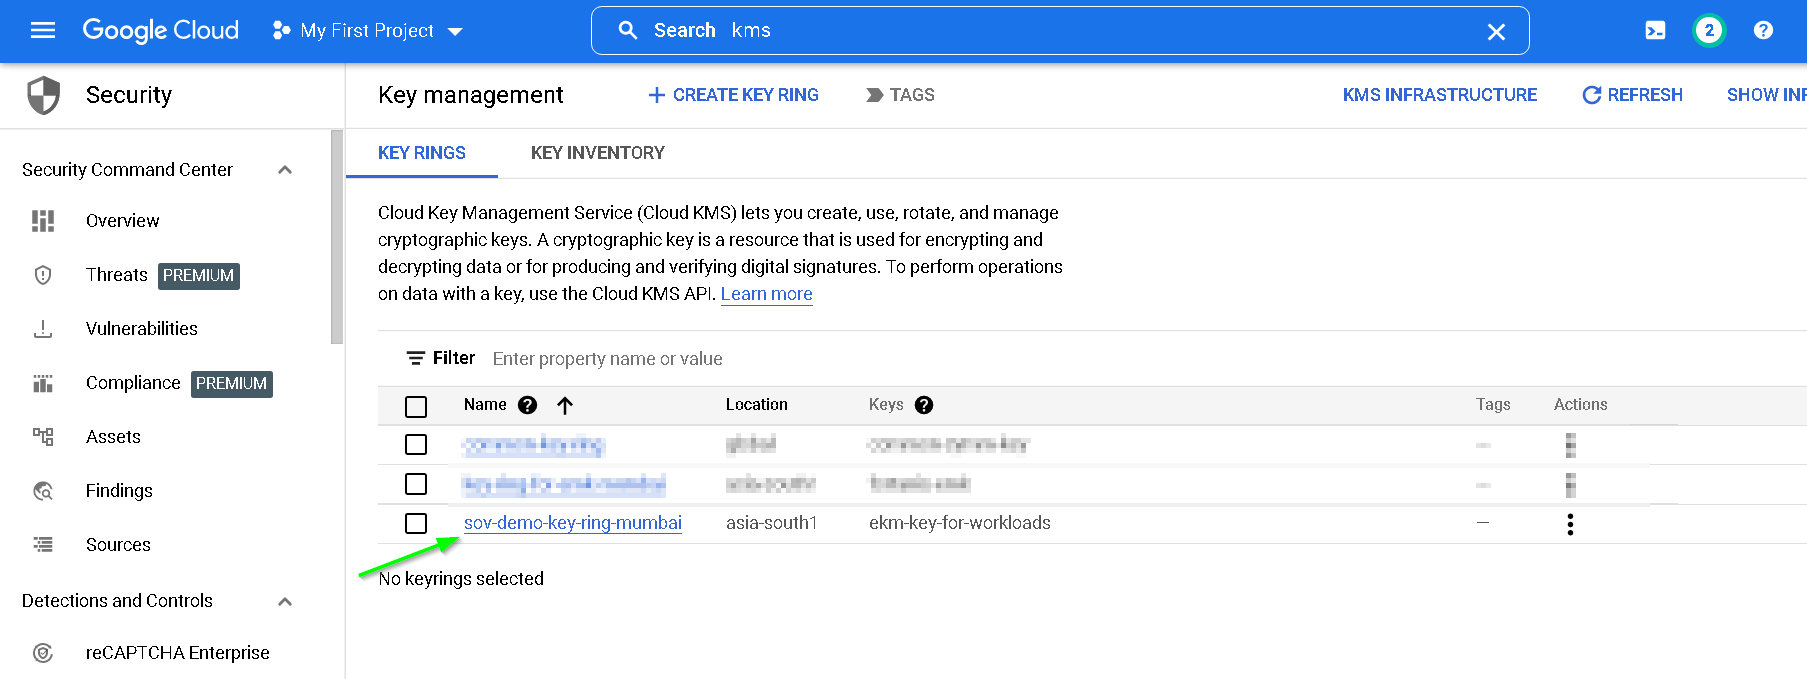
Let’s create the second key. This is for UDE use case.
Click on the key ring
Click create key
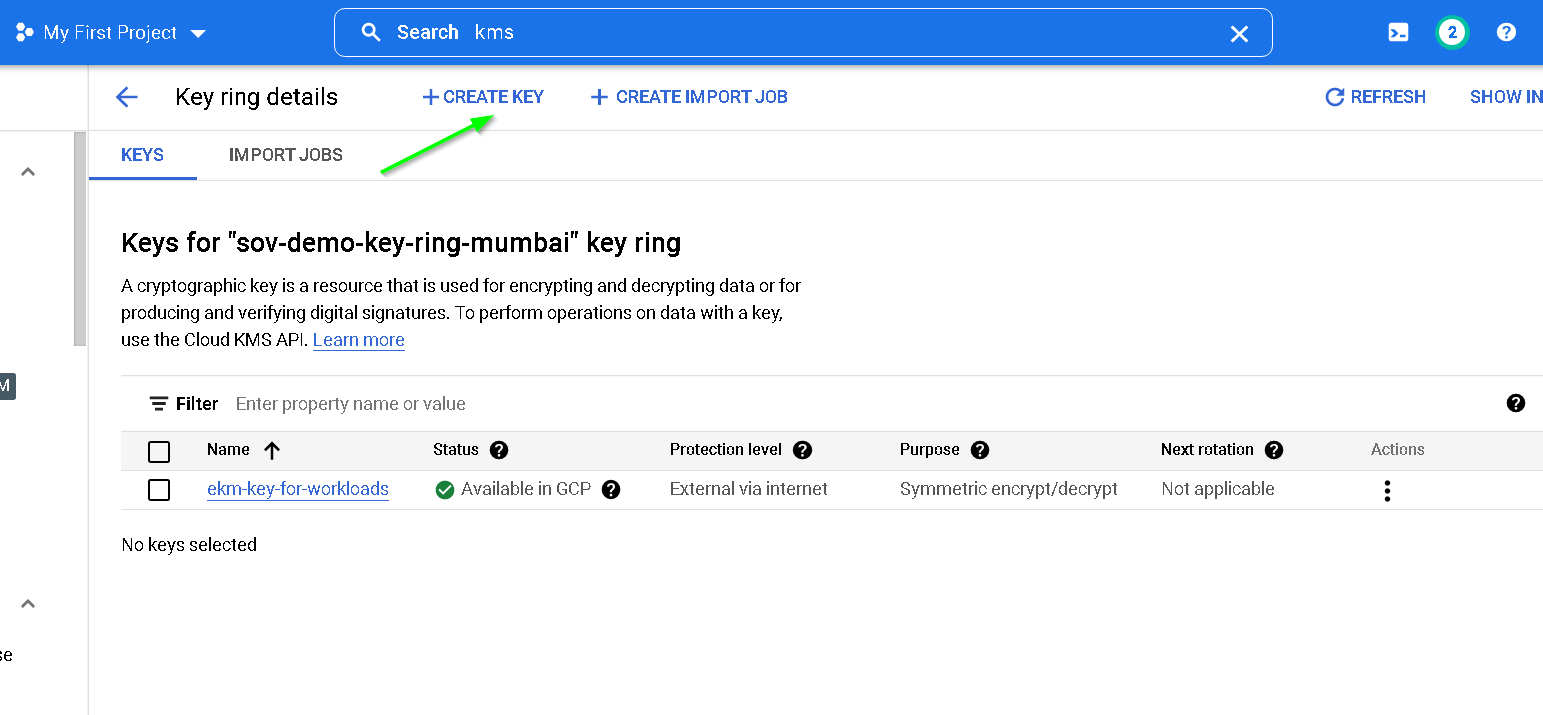
As for the previous key copy the service account
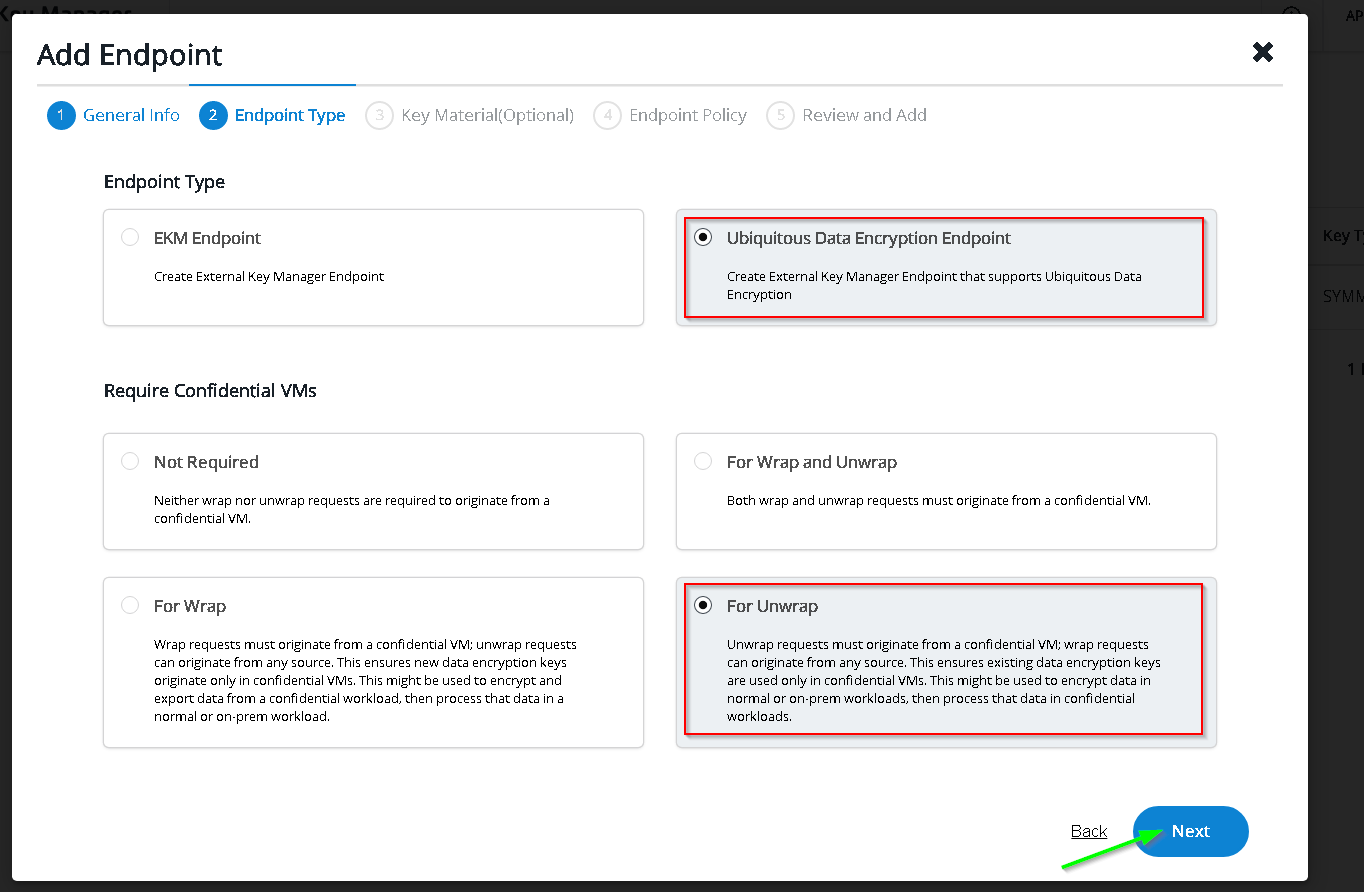
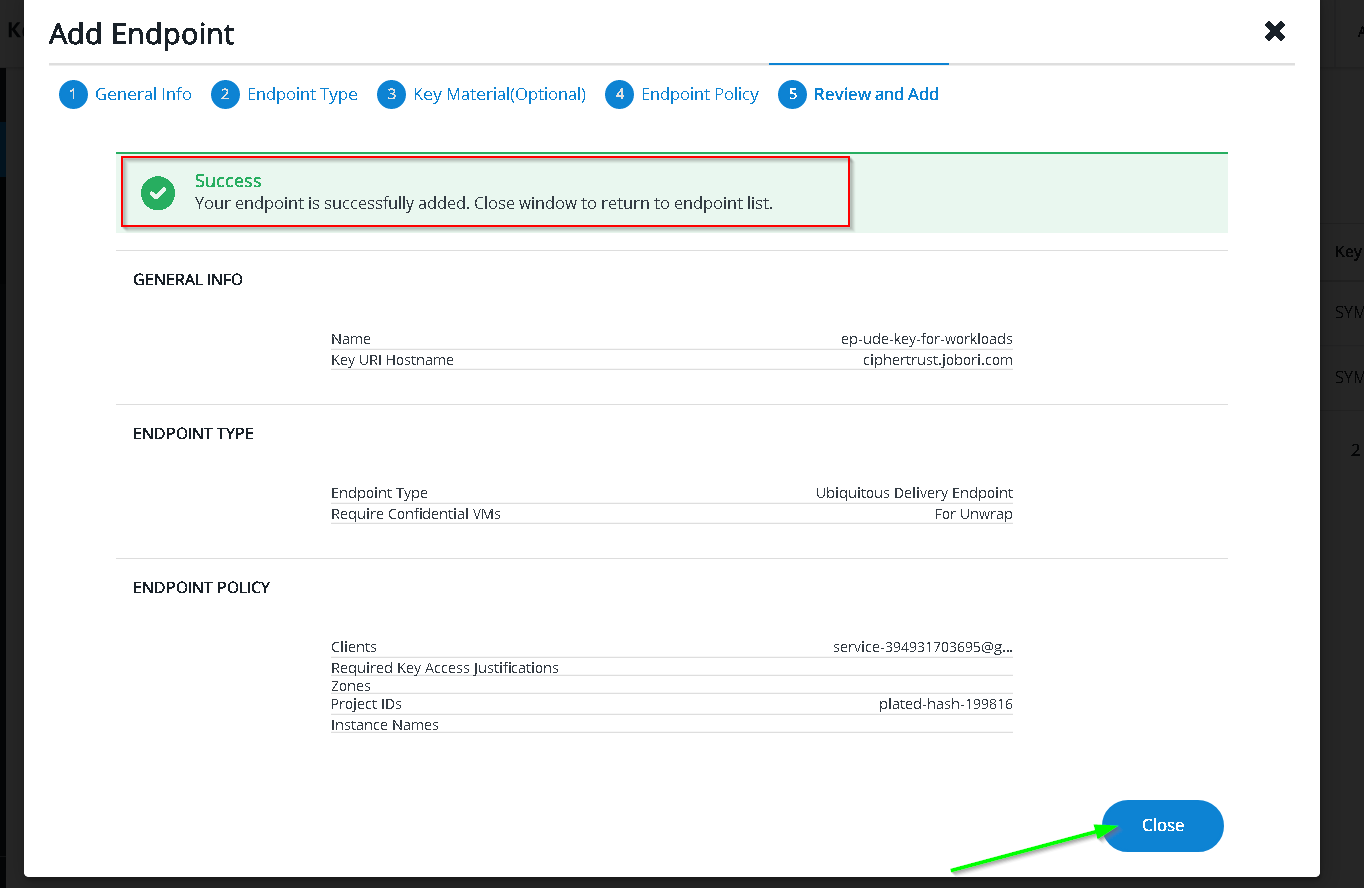
Switch to Thales CKM and click Add Endpoint
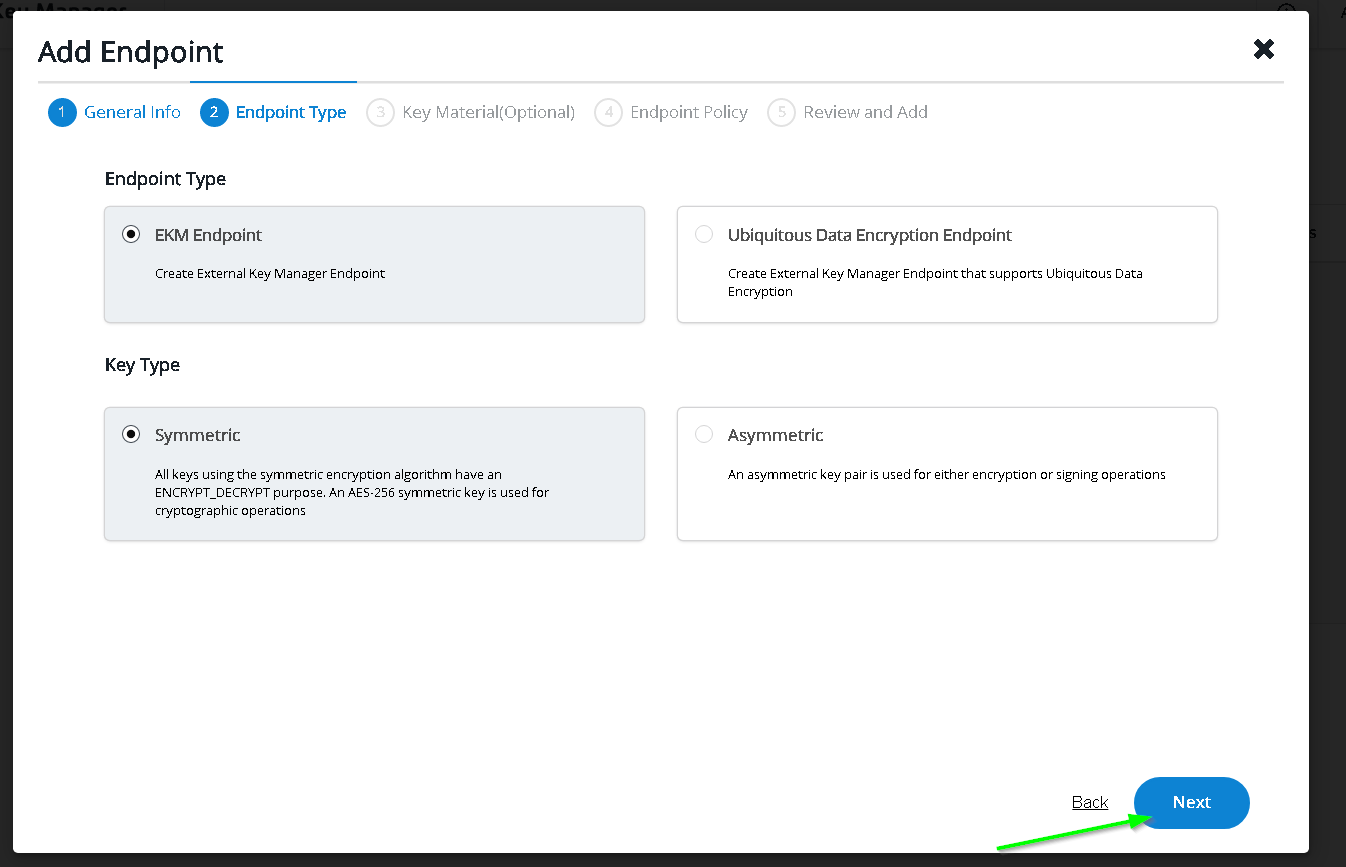
This time choose the UDE endpoint and choose confidential VM for unwrap only
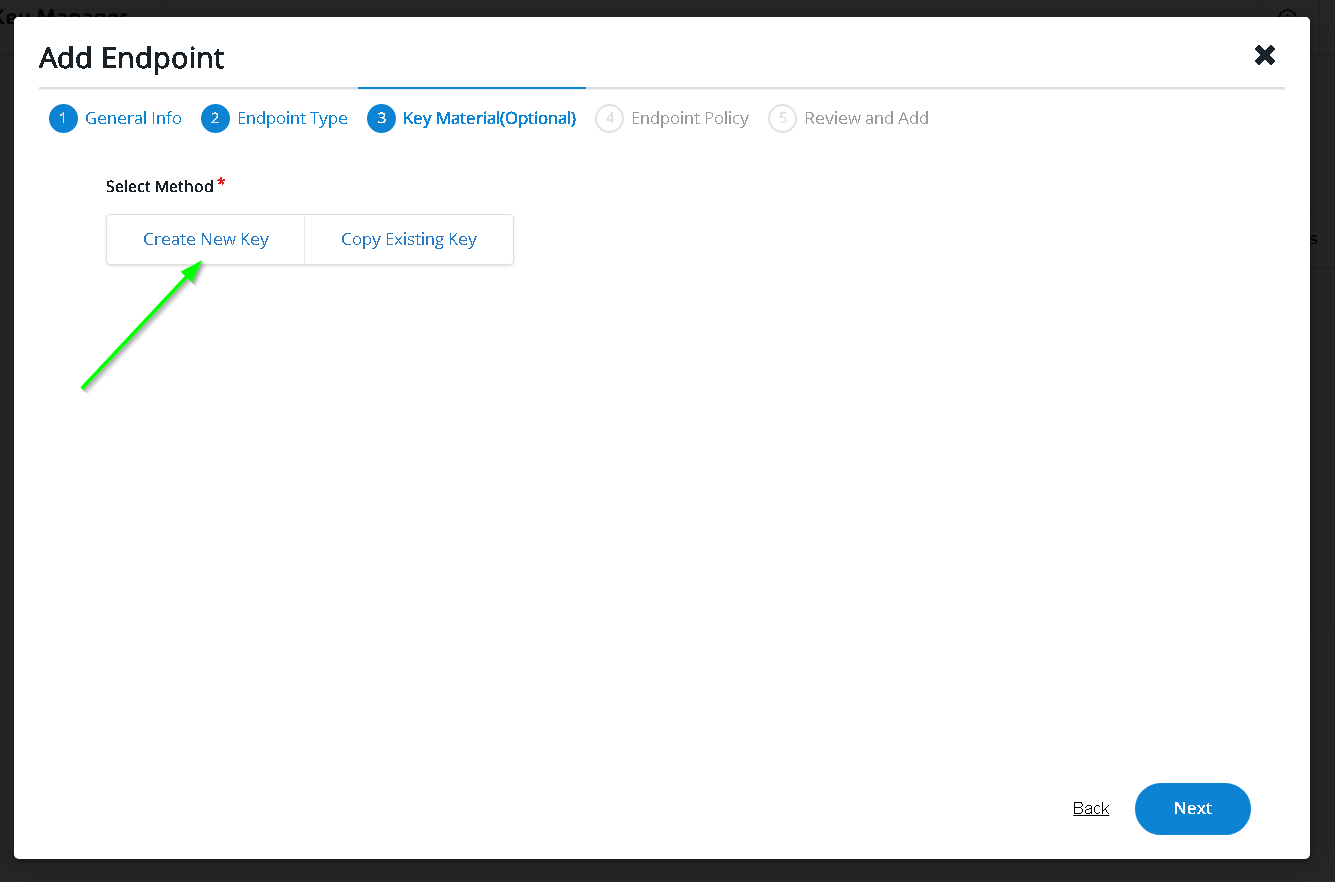
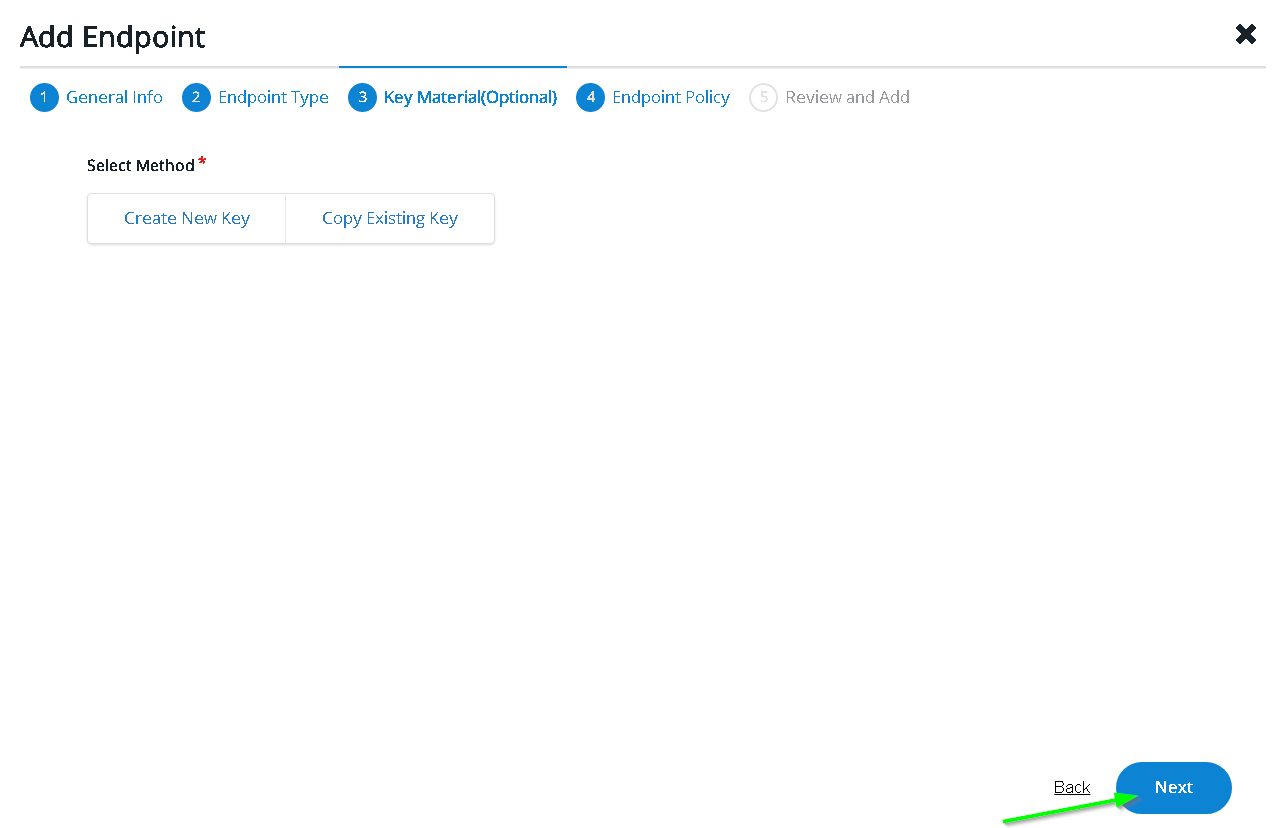
Skip
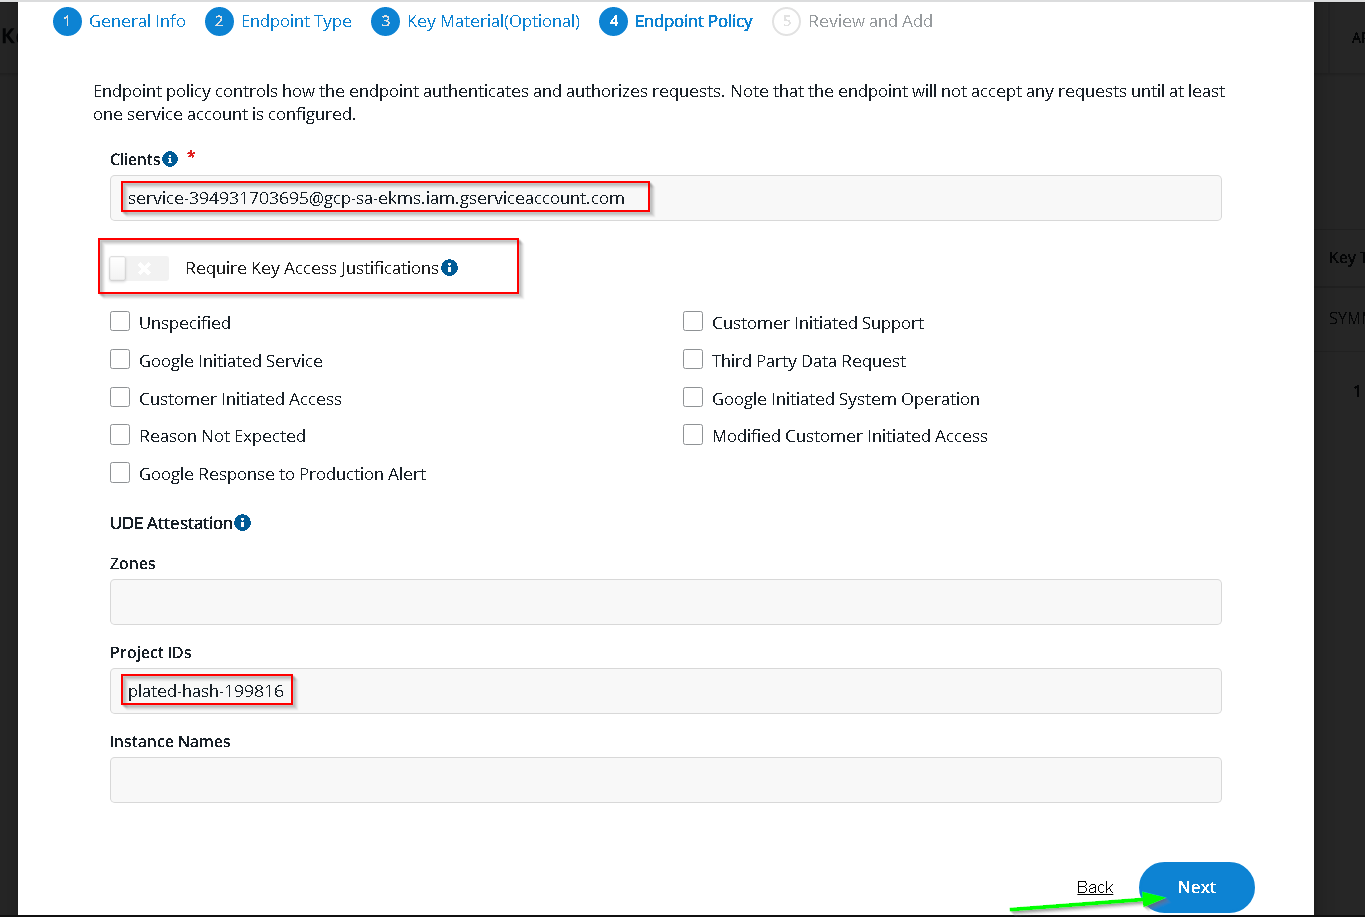
Add options as shown
Add Endpoint
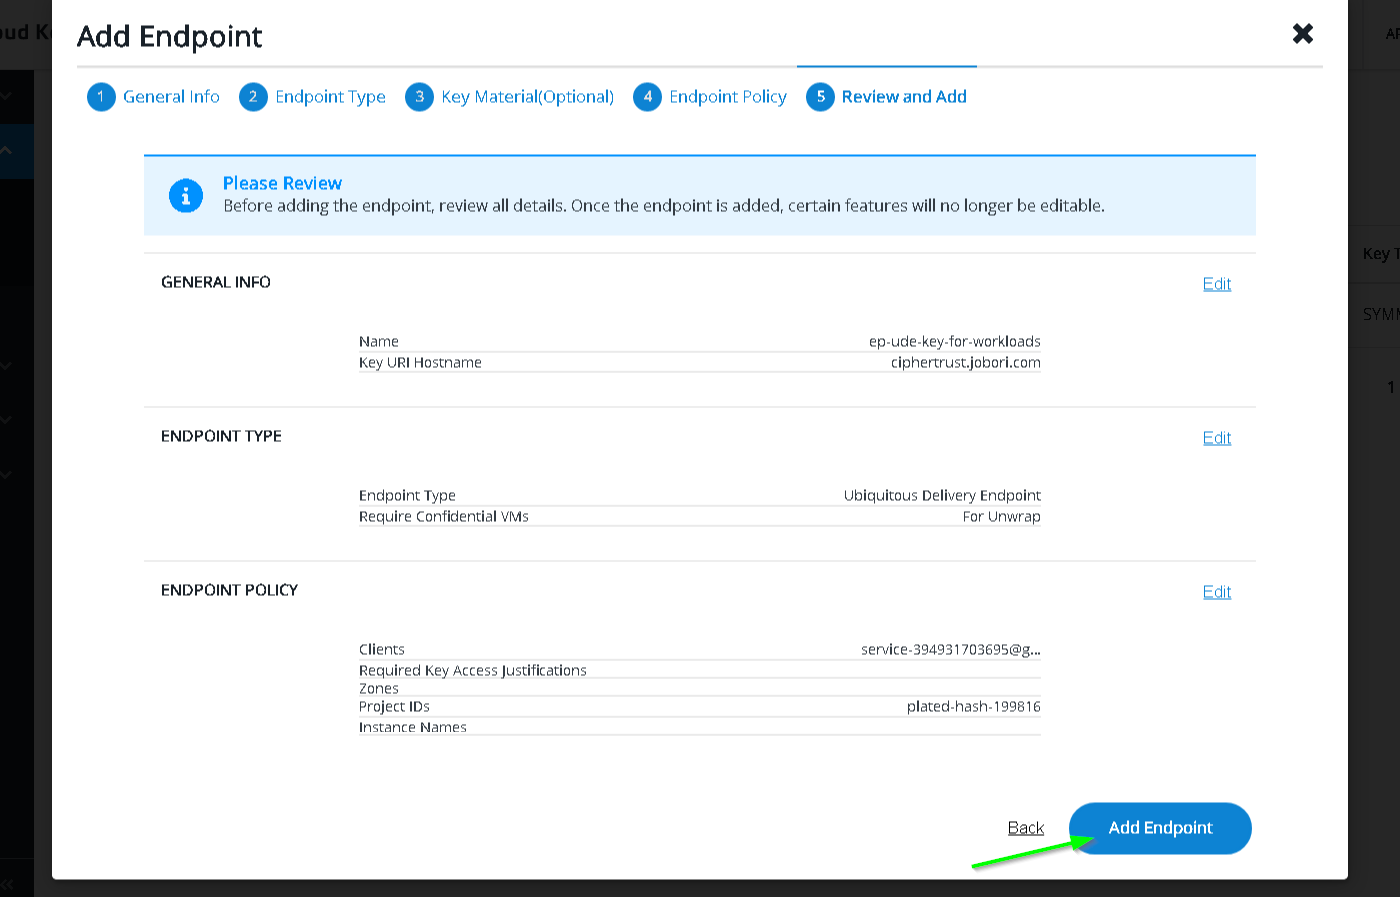
Copy Key URI as before
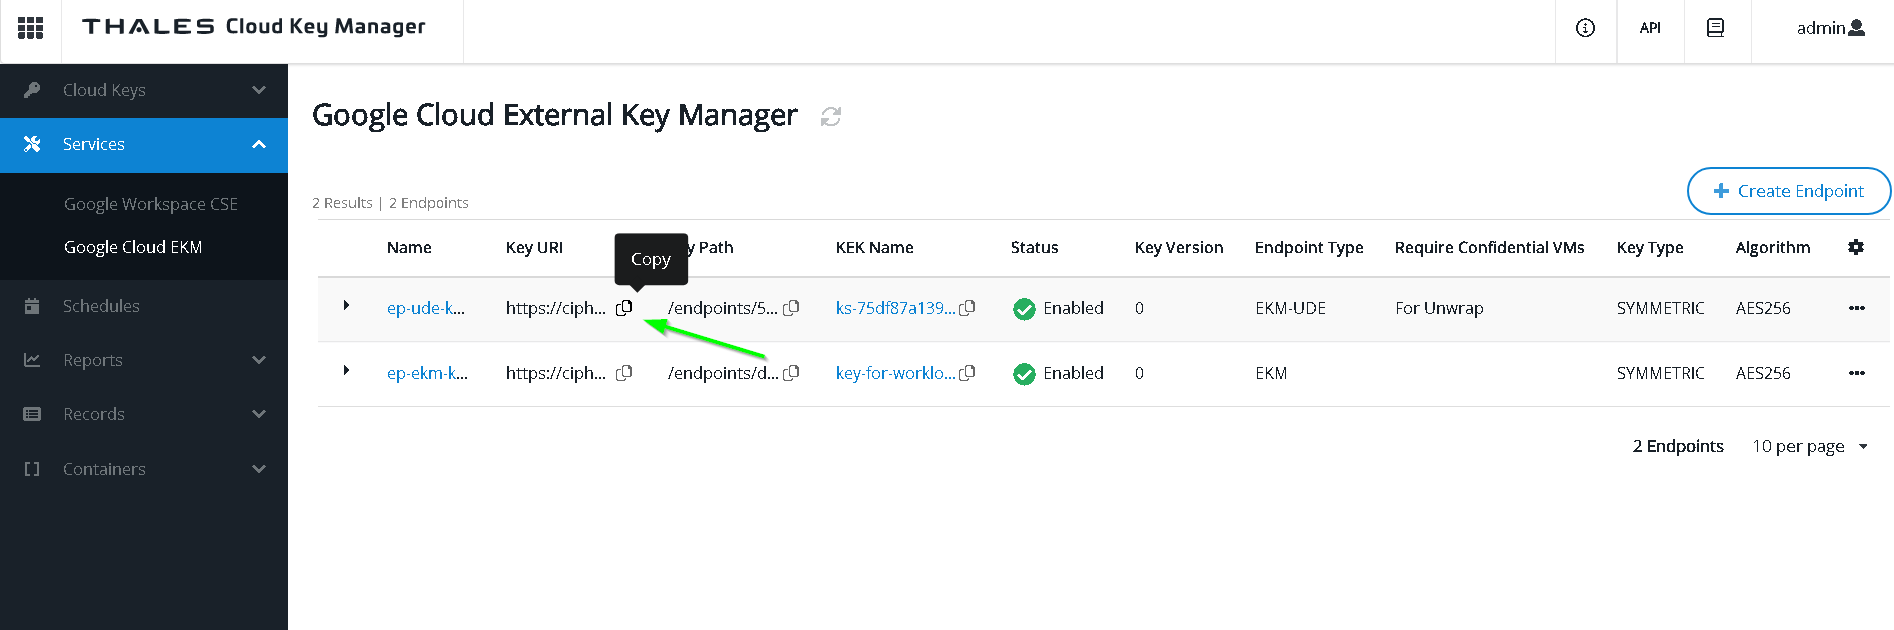
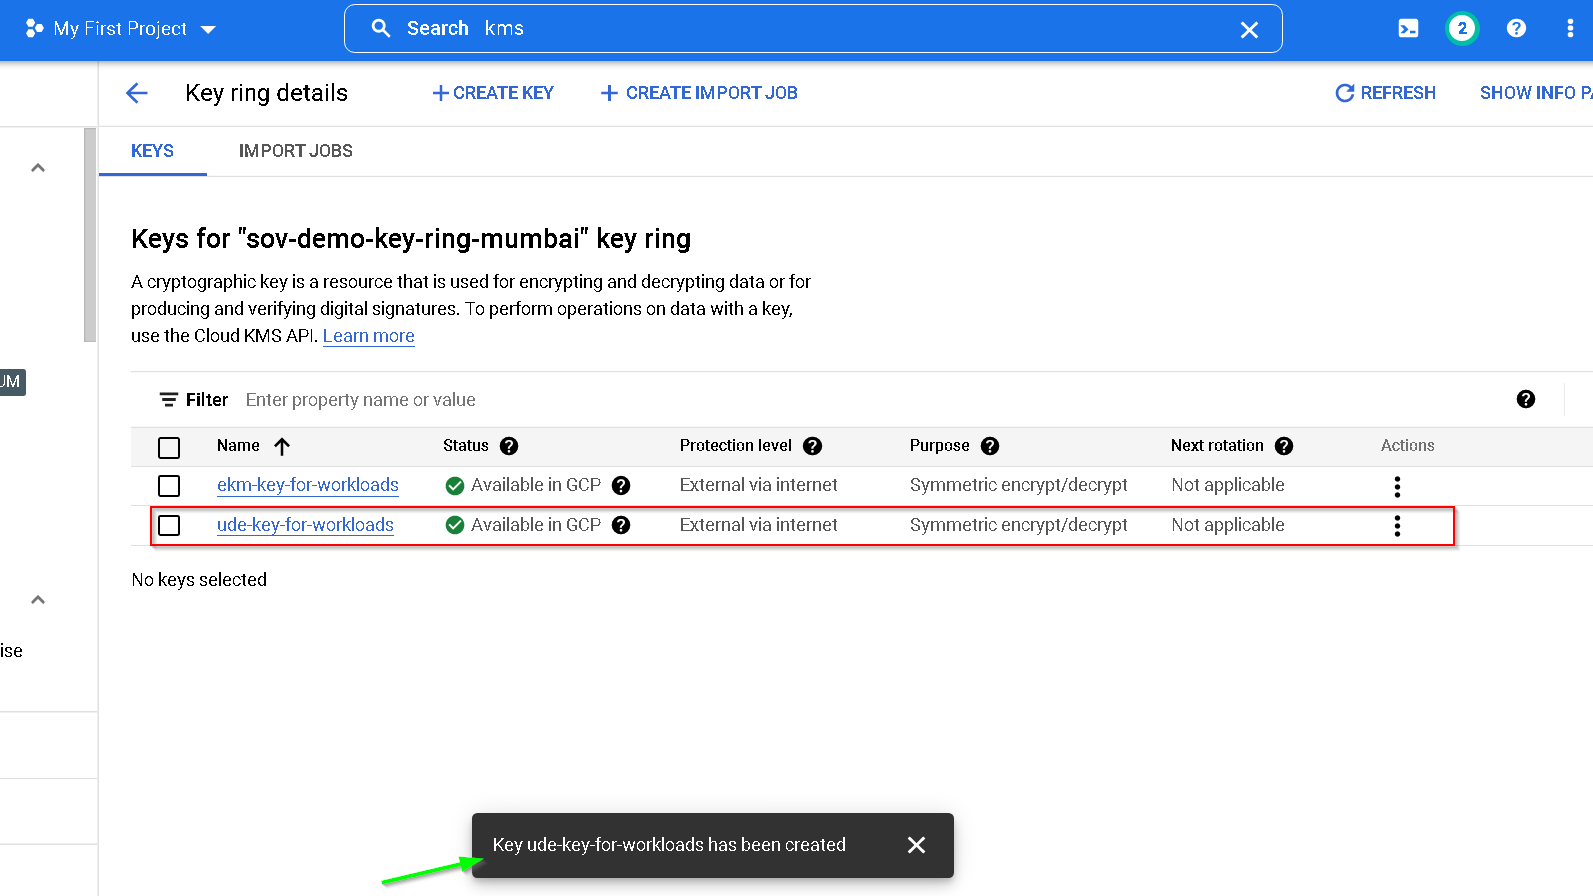
Paste into KMS console
Both keys are now available
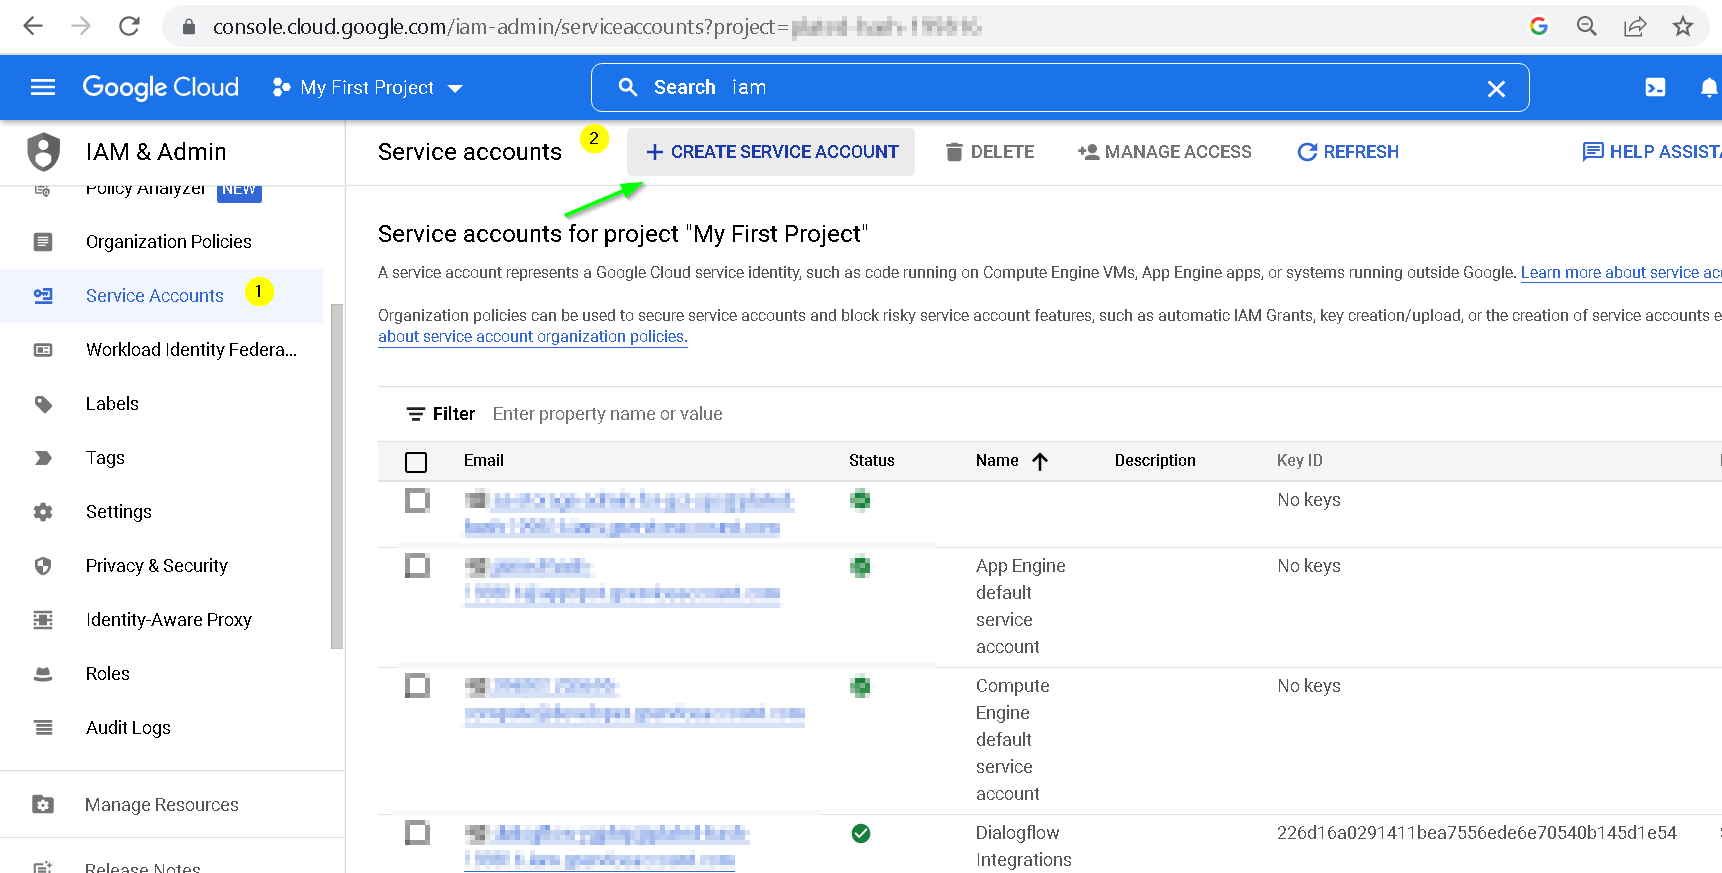
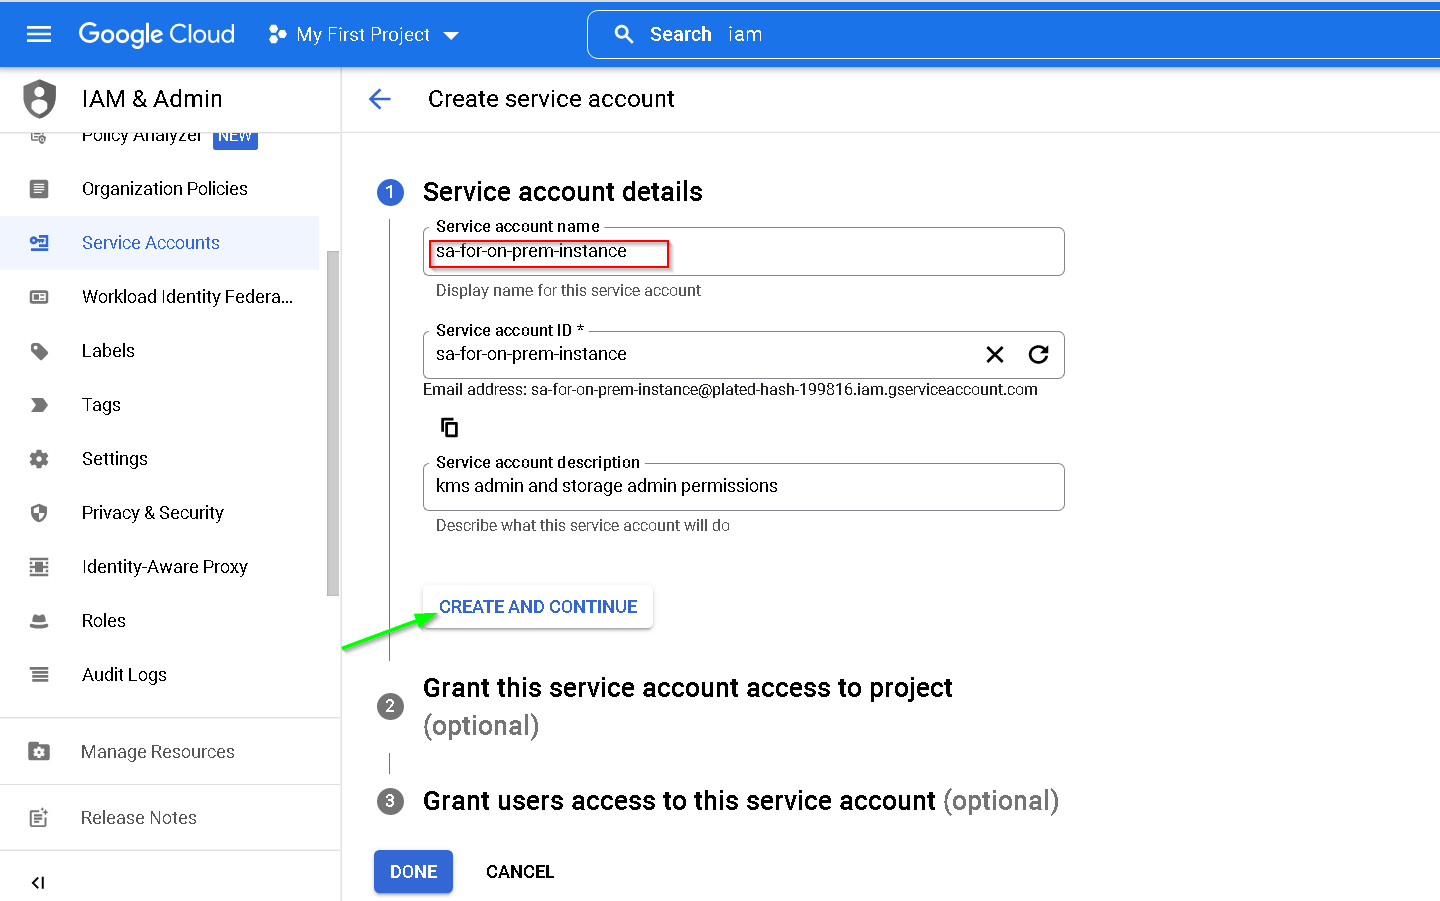
7. Create a service account for on prem instance and for GCP vm instances
Goto GCP console. Navigate to IAM -> Service Accounts -> Create Service Account
Follow the screenshots to create the service account.
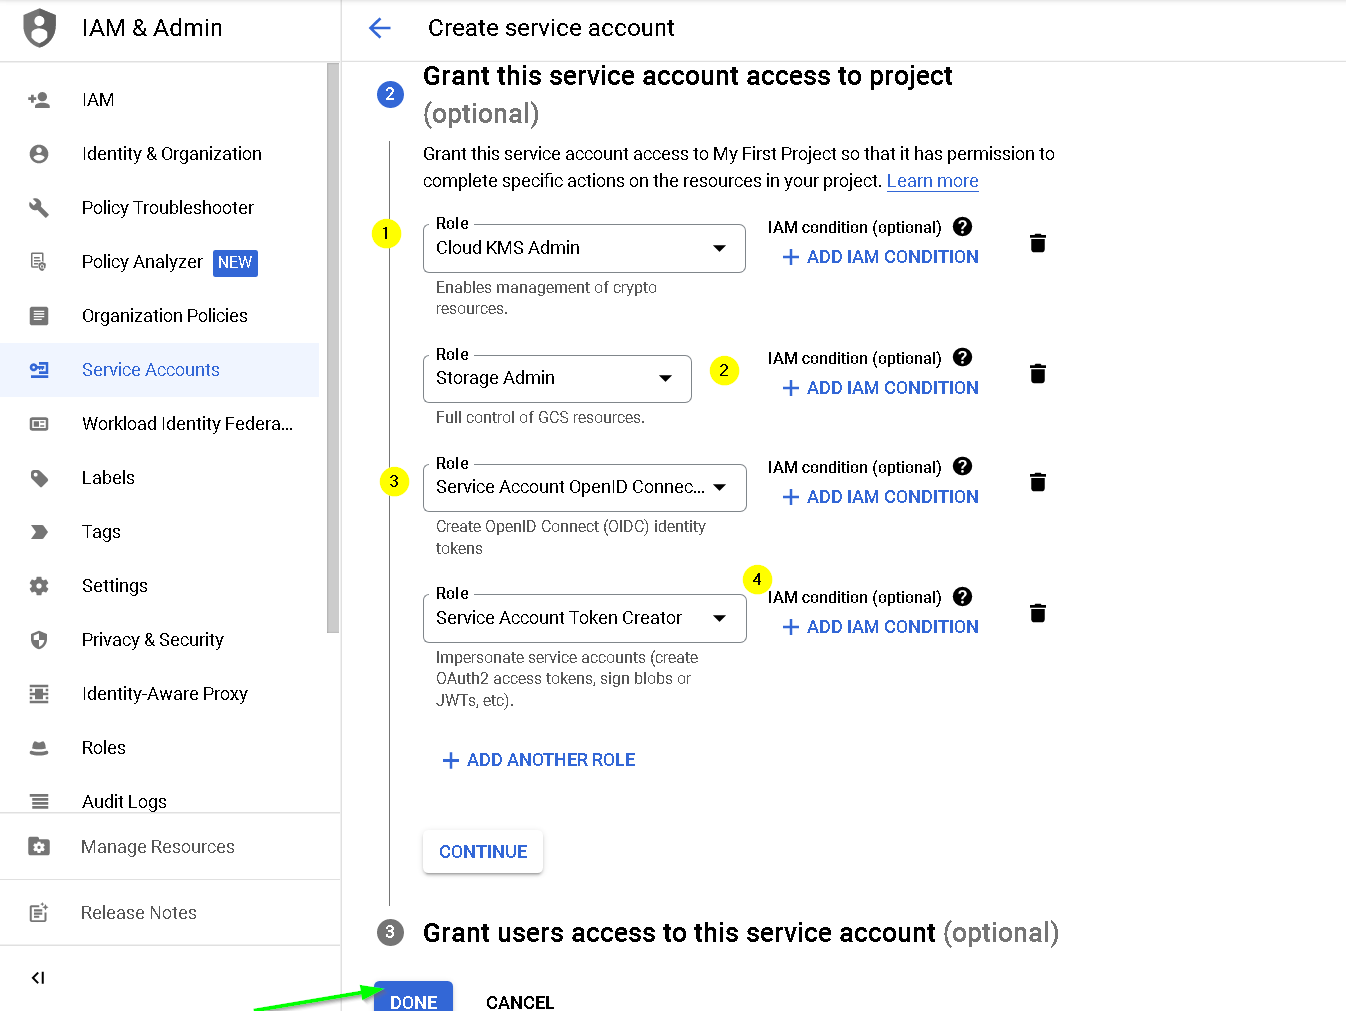
Provide these permissions
Service Account is created, click the service account email
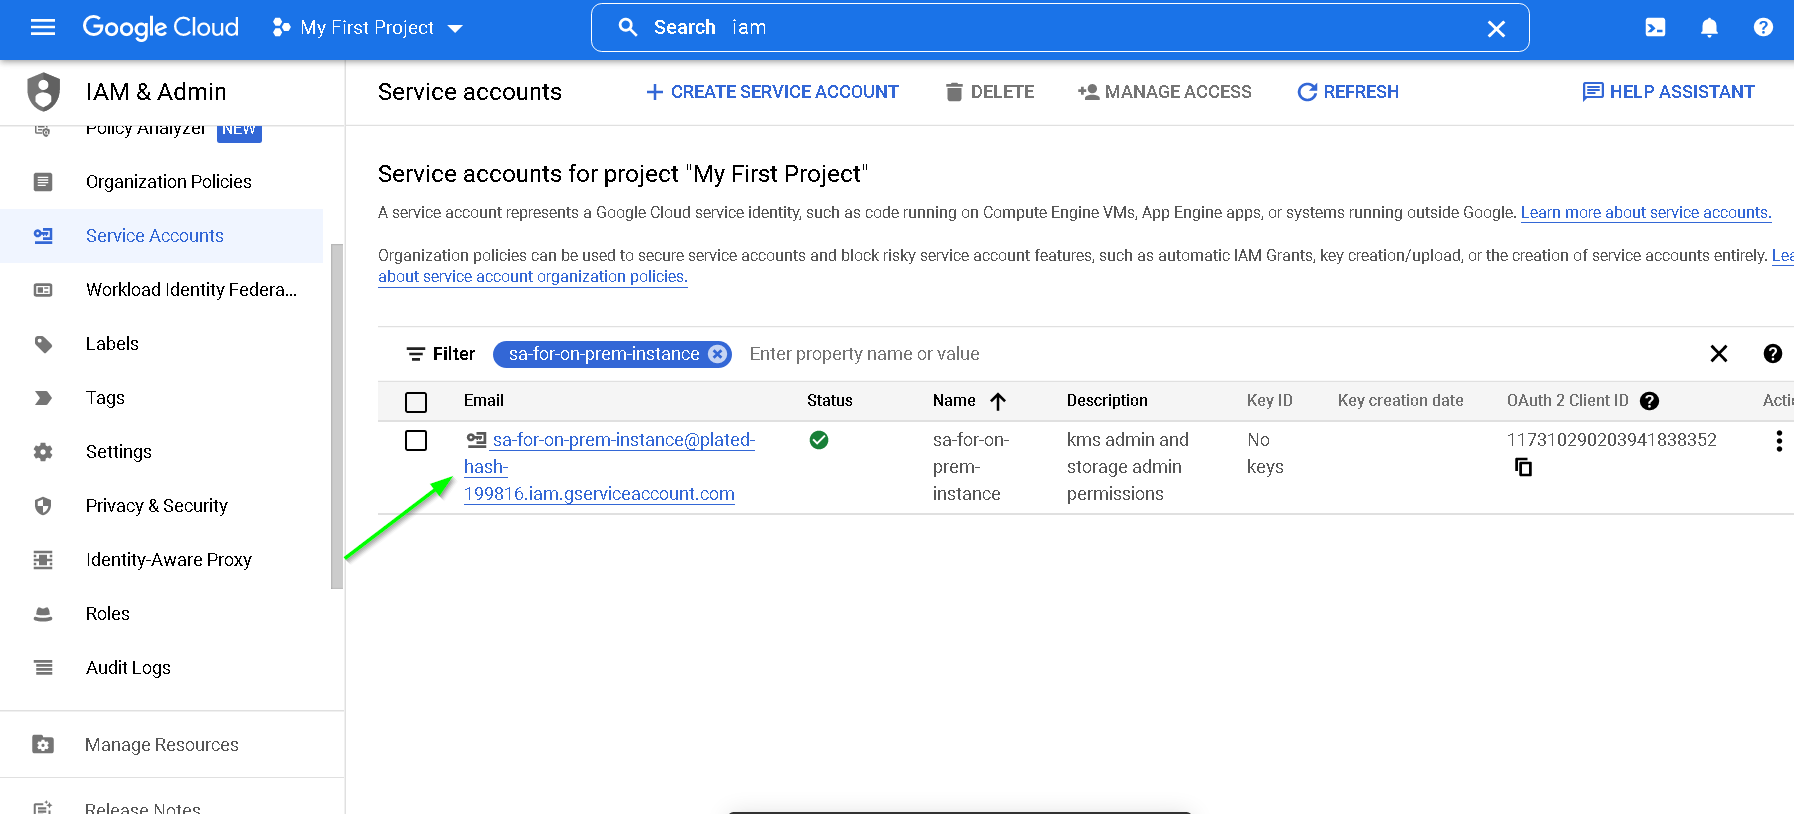
Click KEYS and Create new key
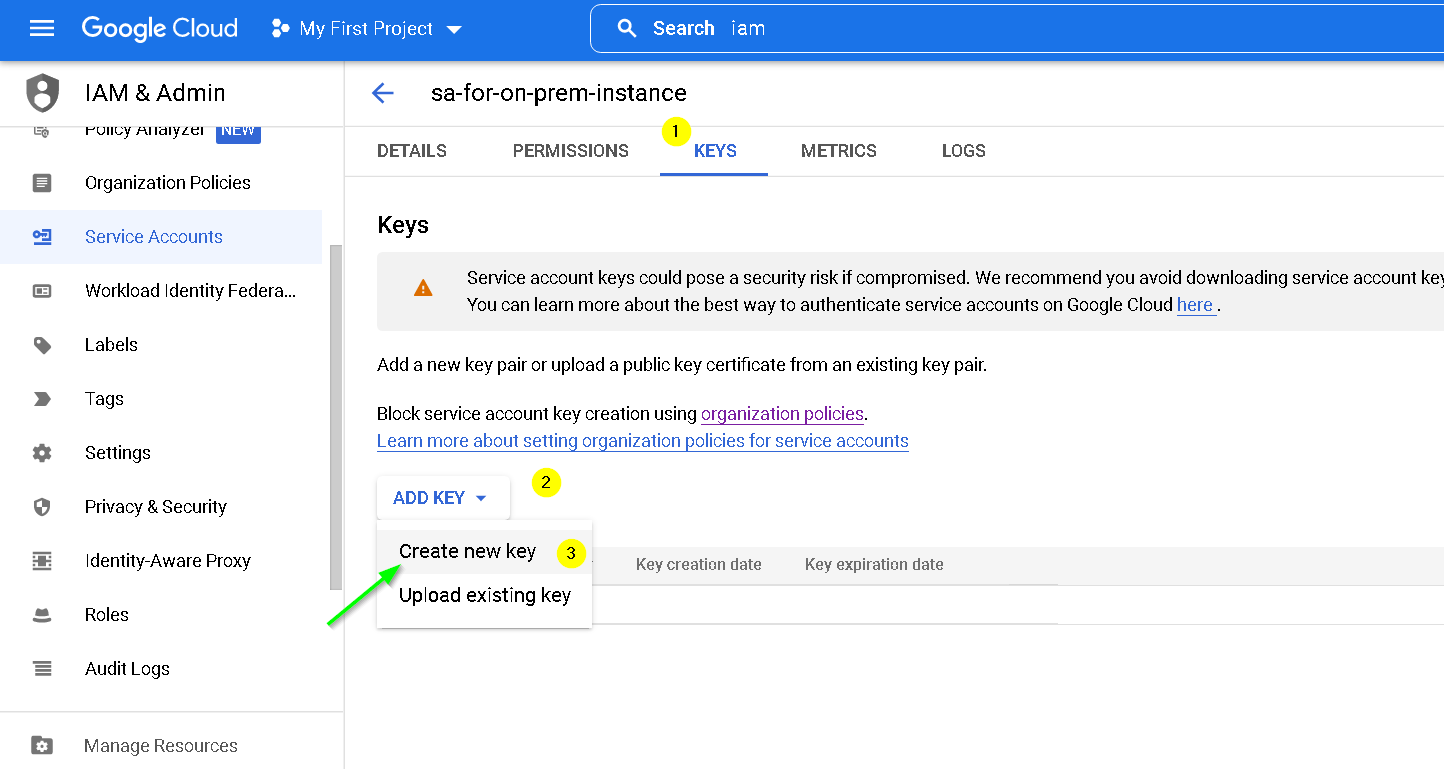
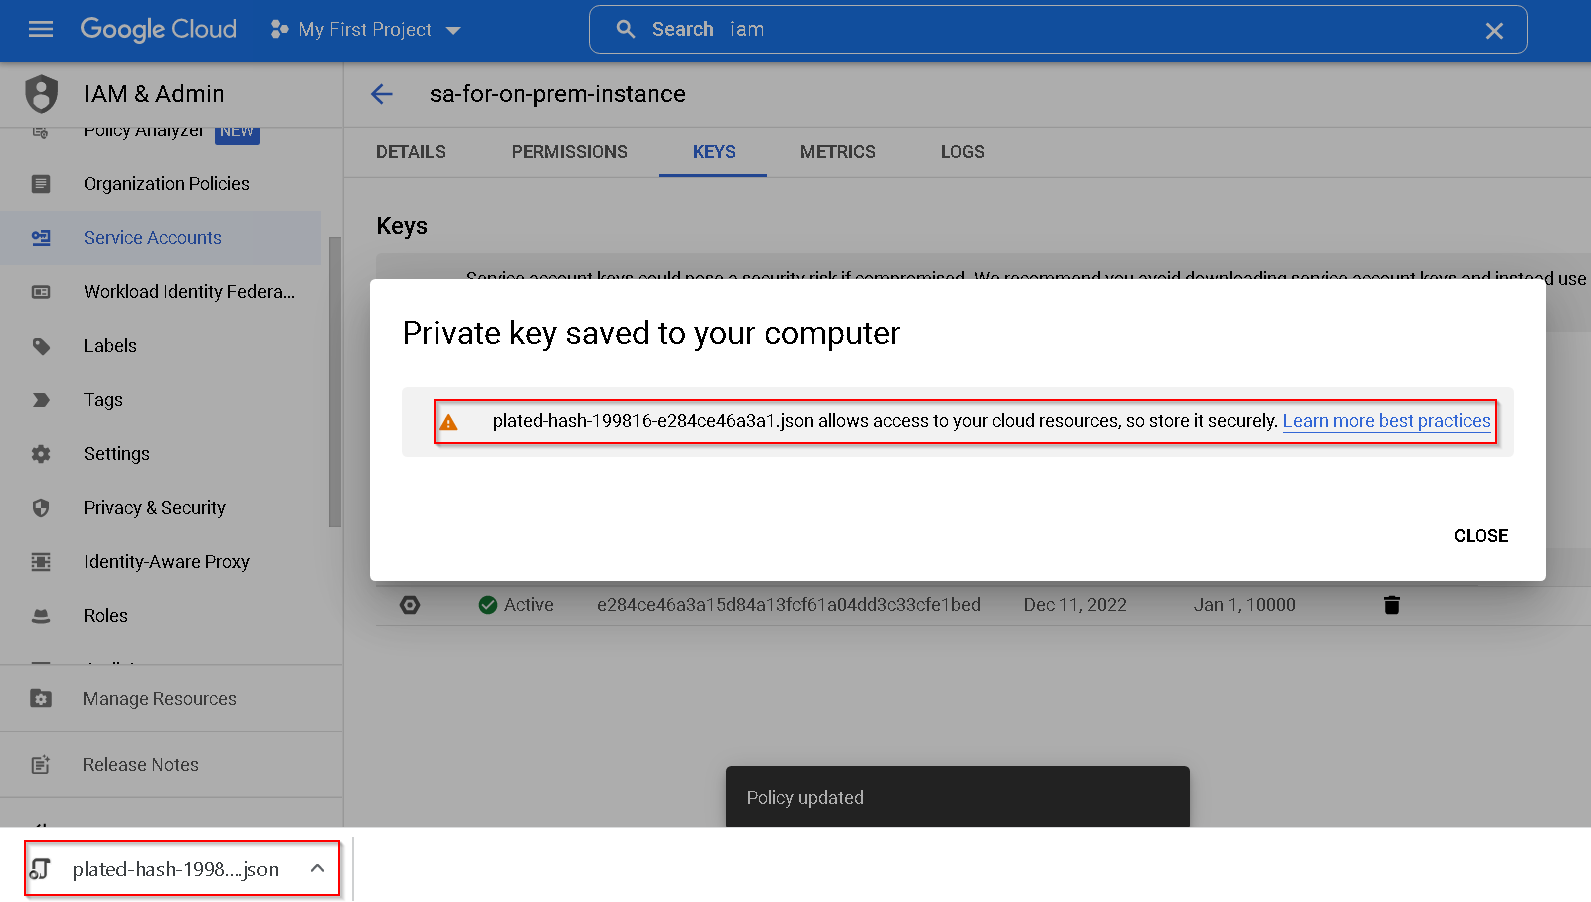
Create JSON key

Key is downloaded, press close
Transfer the key JSON file to the on-prem-instance and run the commands shown in the screenshot to verify the access. Also, the output of 4th command need not be anything but there should not be any error.

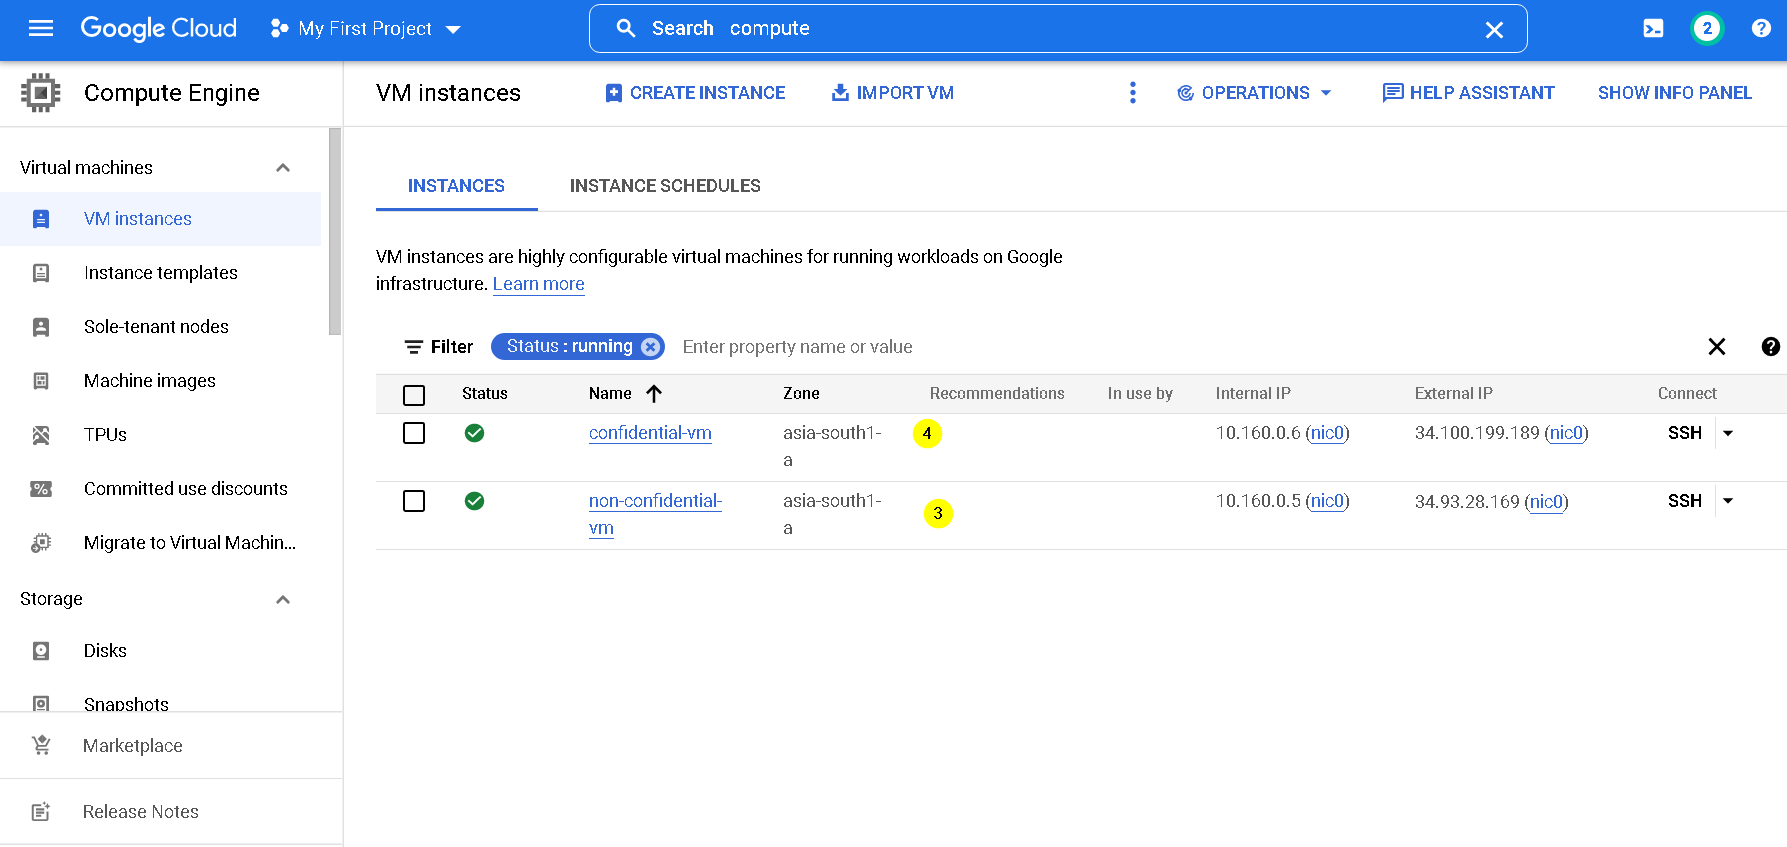
8. Create Non confidential and Confidential VM instances on GCP
We use these instances as below. Again please checkout data sovereignty video demo from part 2 of this sovereignty series
- Non confidential VM/ Standard - to show that our workload does not run on a non confidential VM
- Confidential VM - to show that our workload runs only on a non confidential VM
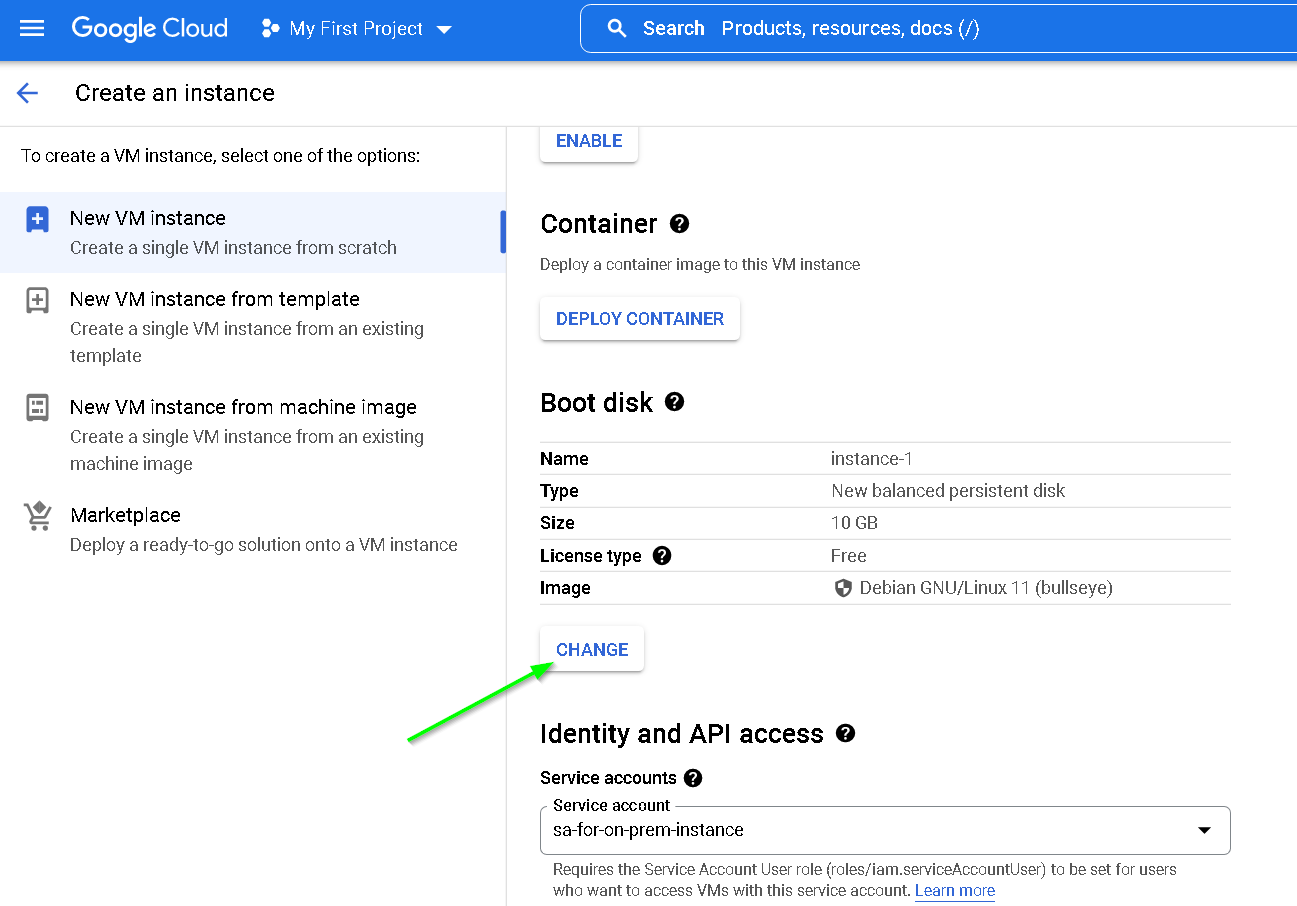
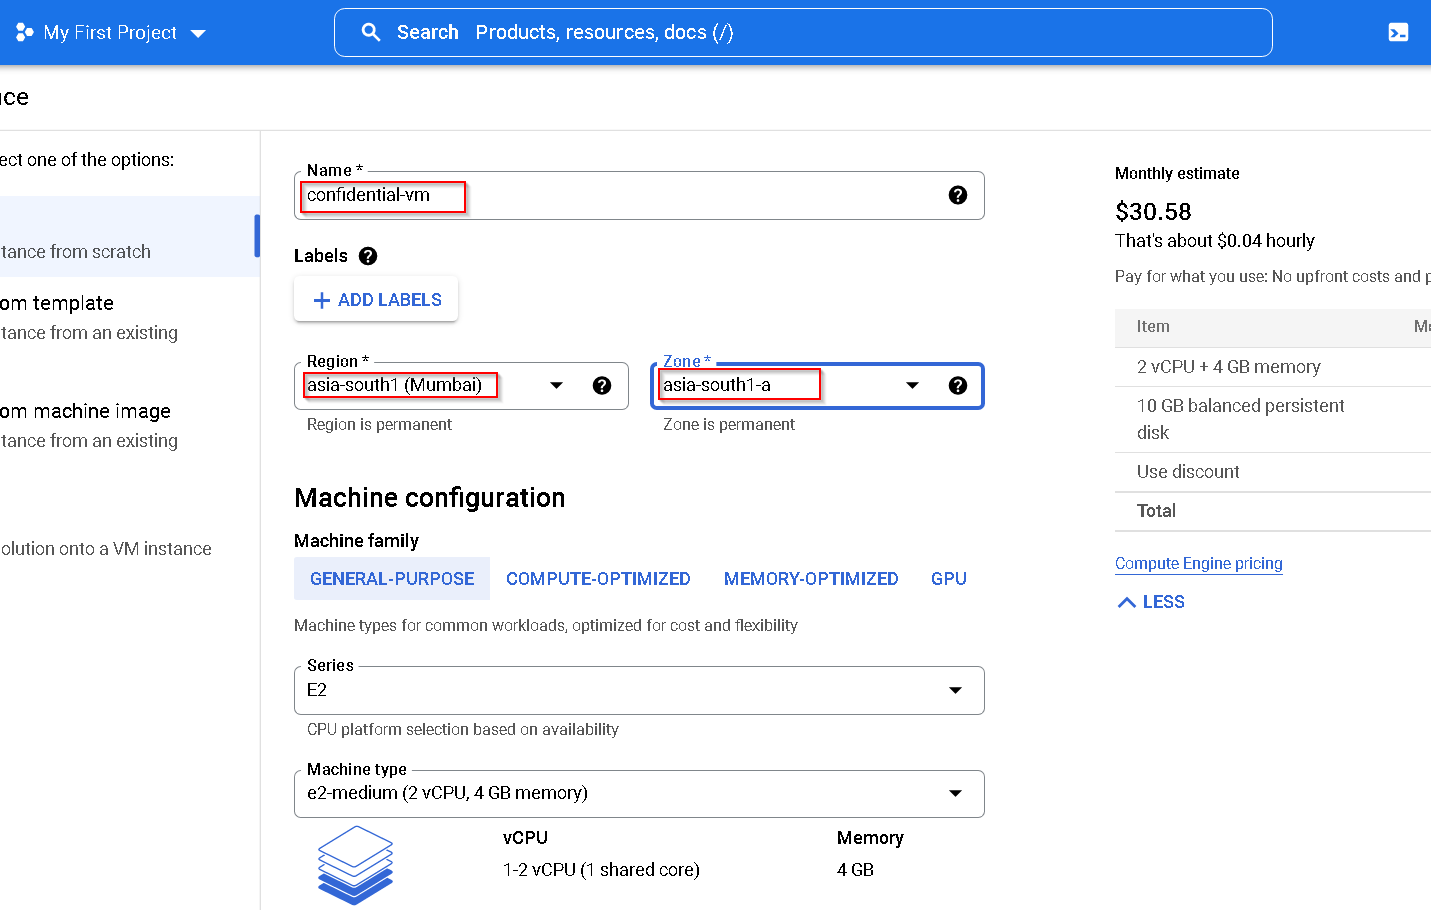
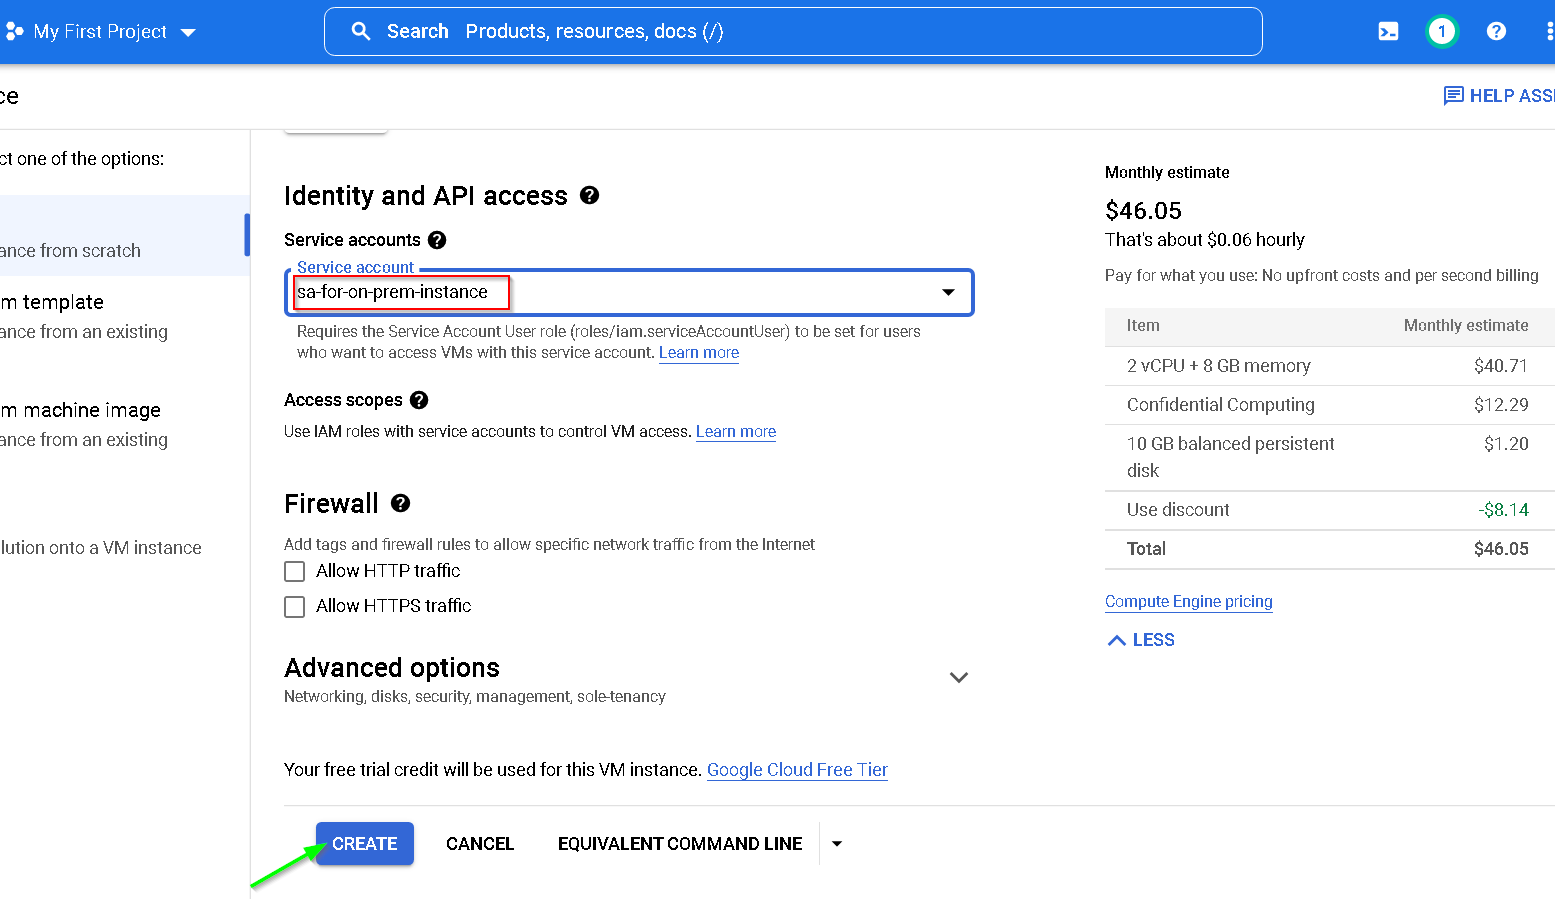
Follow screenshot to create a standard VM. Again keeping with the rest of the resources I am creating resources in Mumbai region
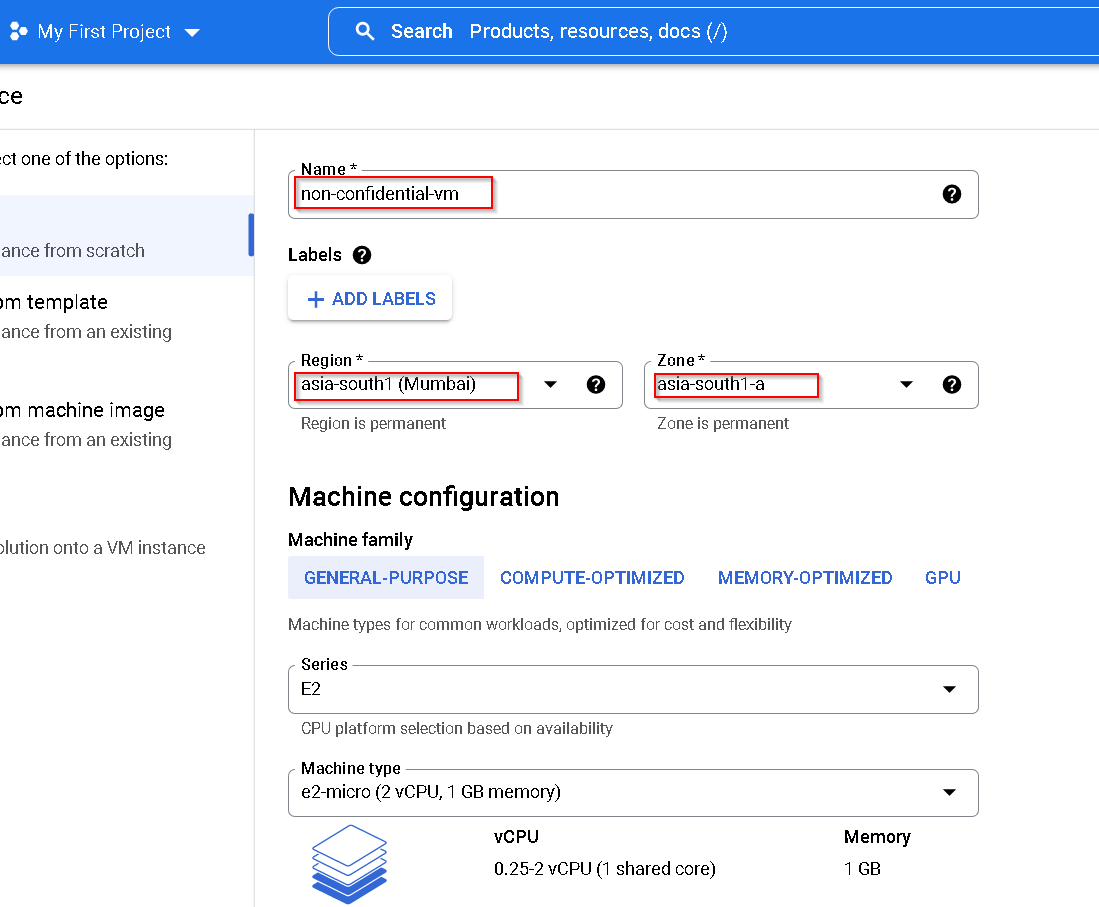
Use the Service Account created earlier
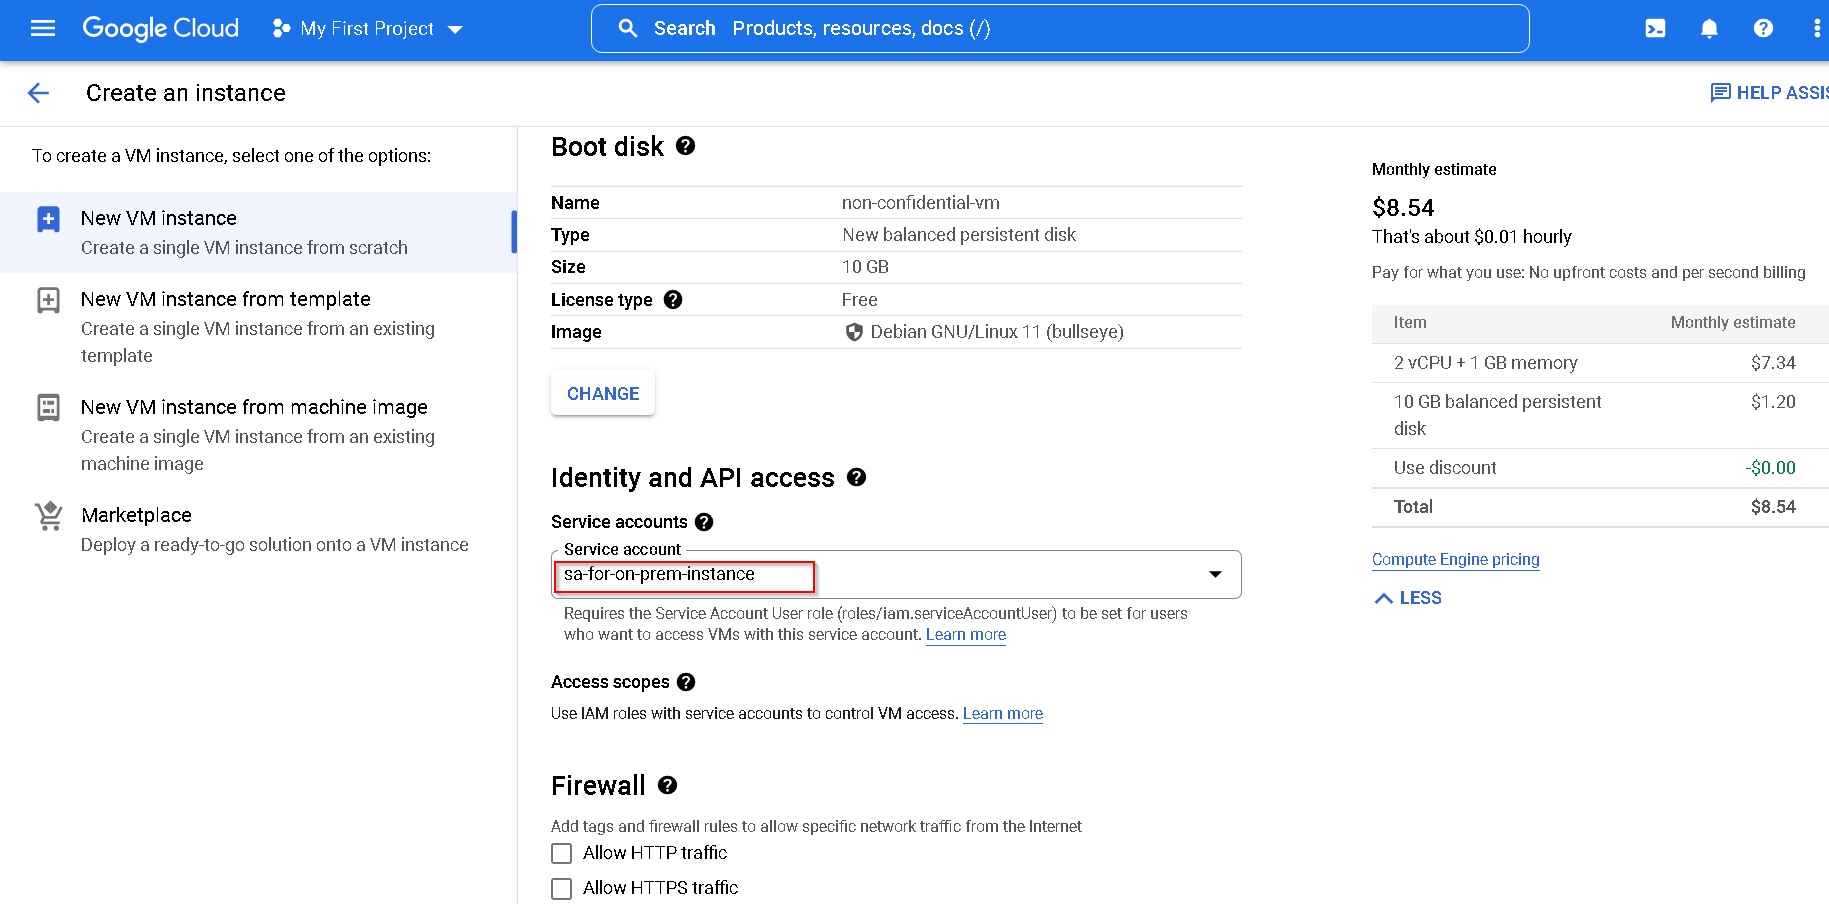
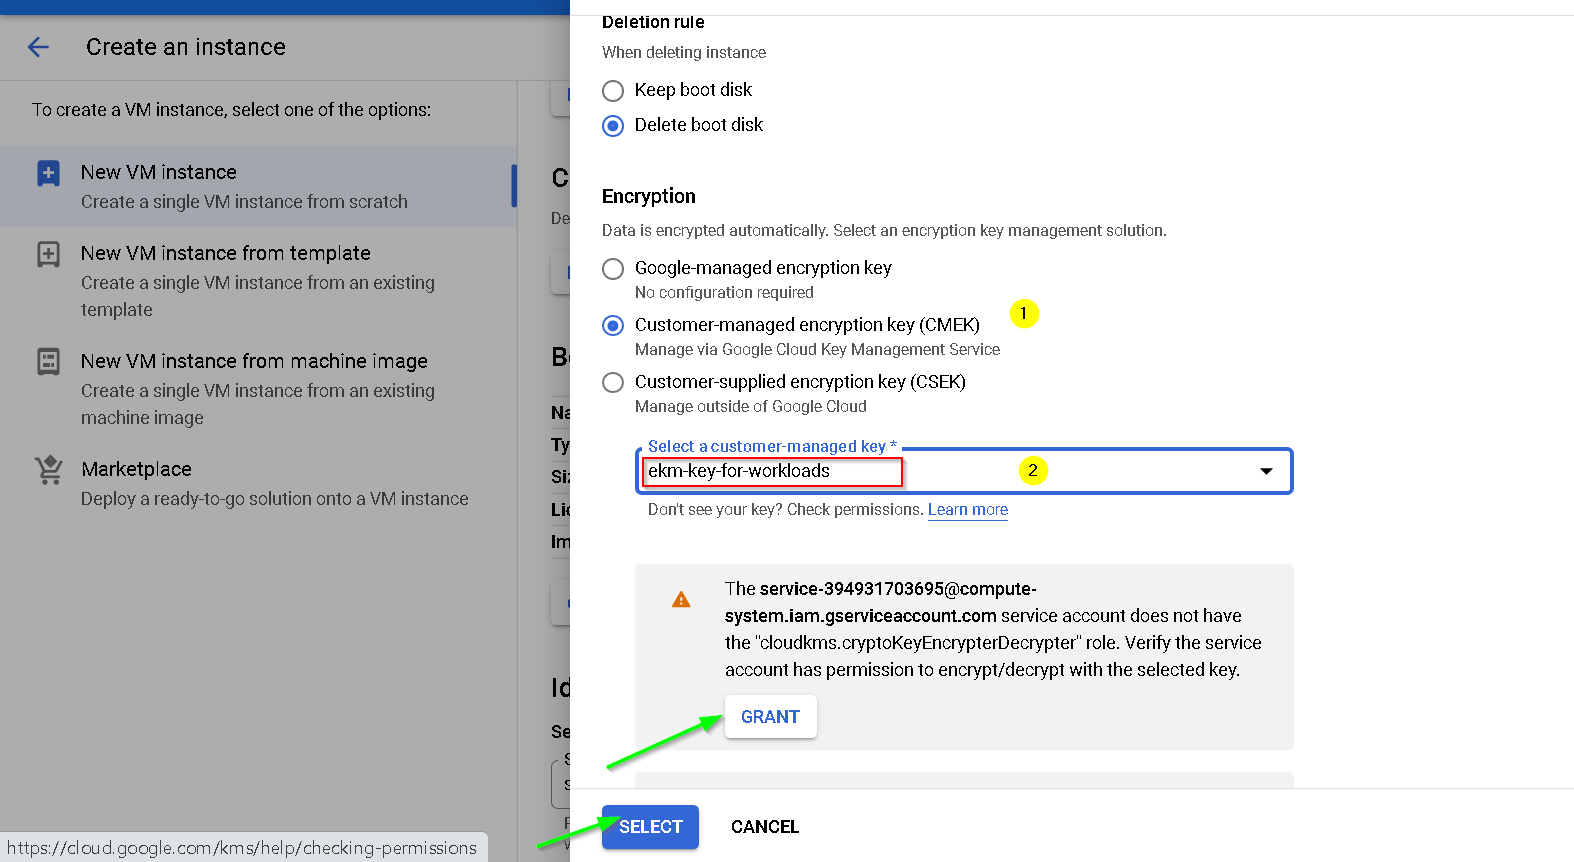
Let’s encrypt the disk with the external key we created earlier
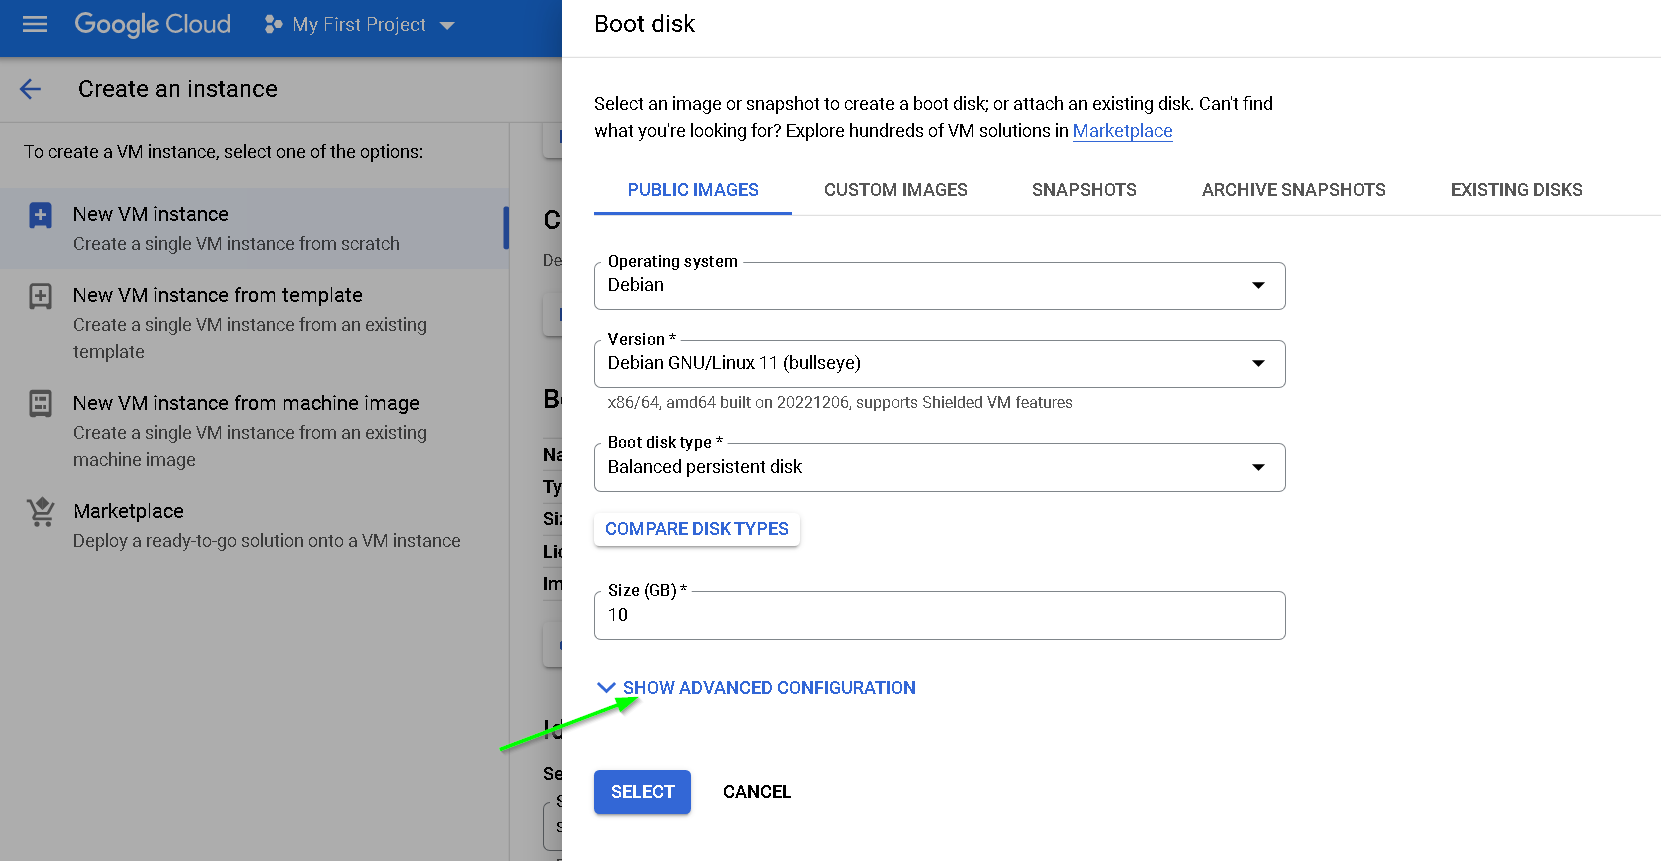
Click Advanced options
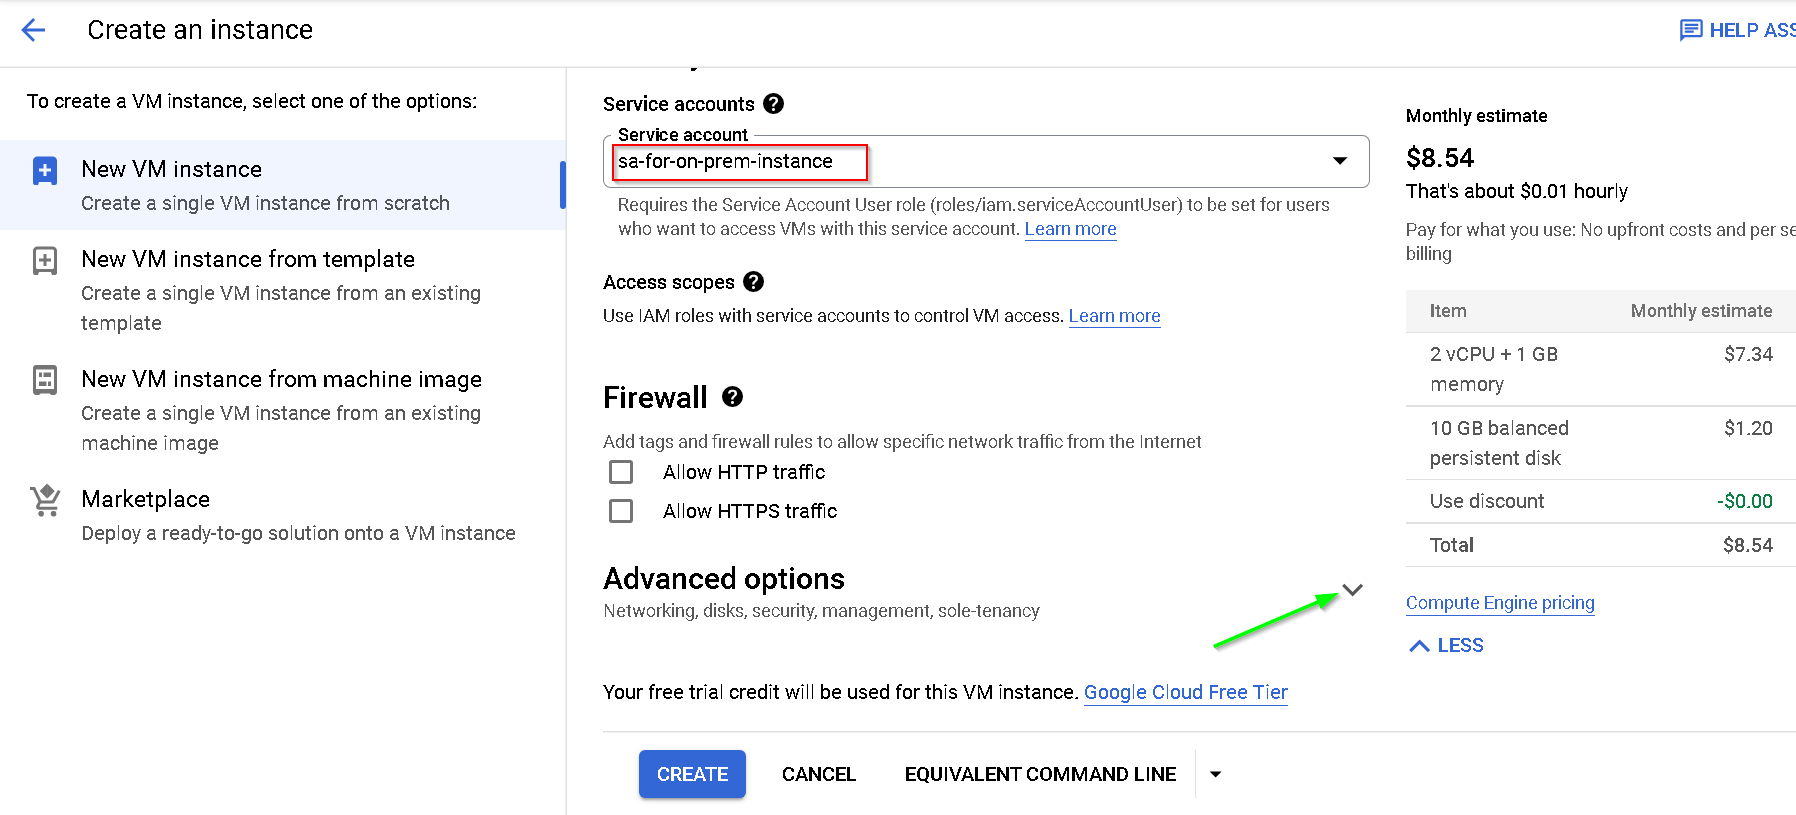
Uncheck the options as shown below
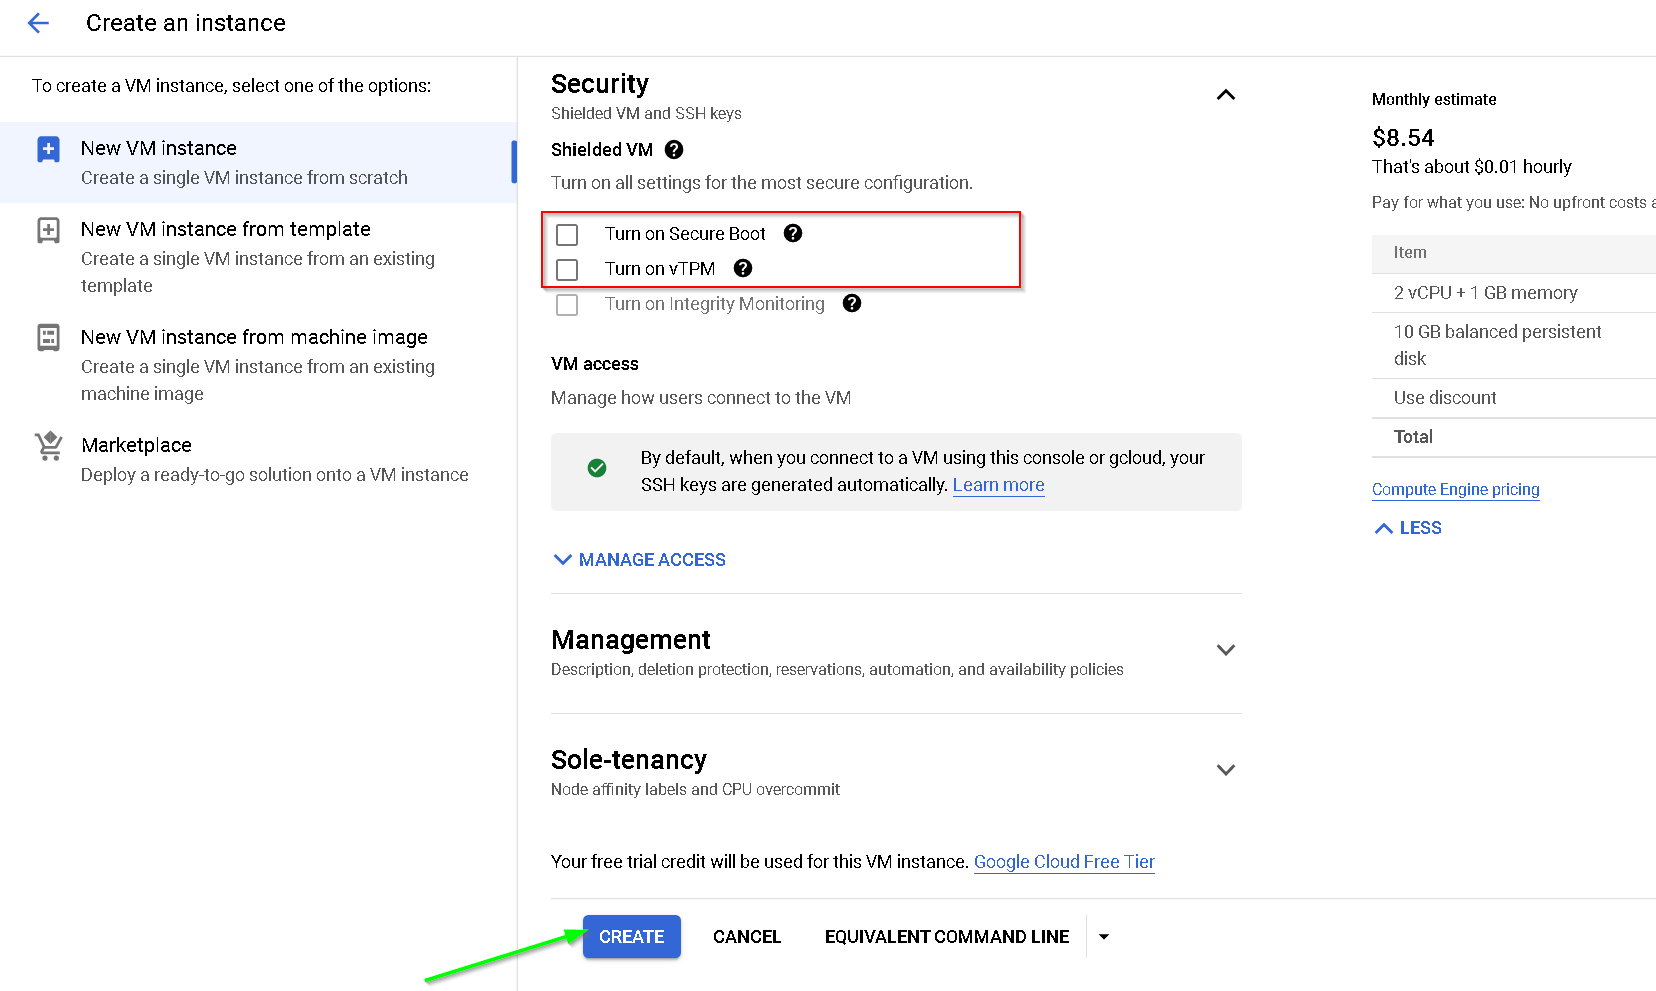
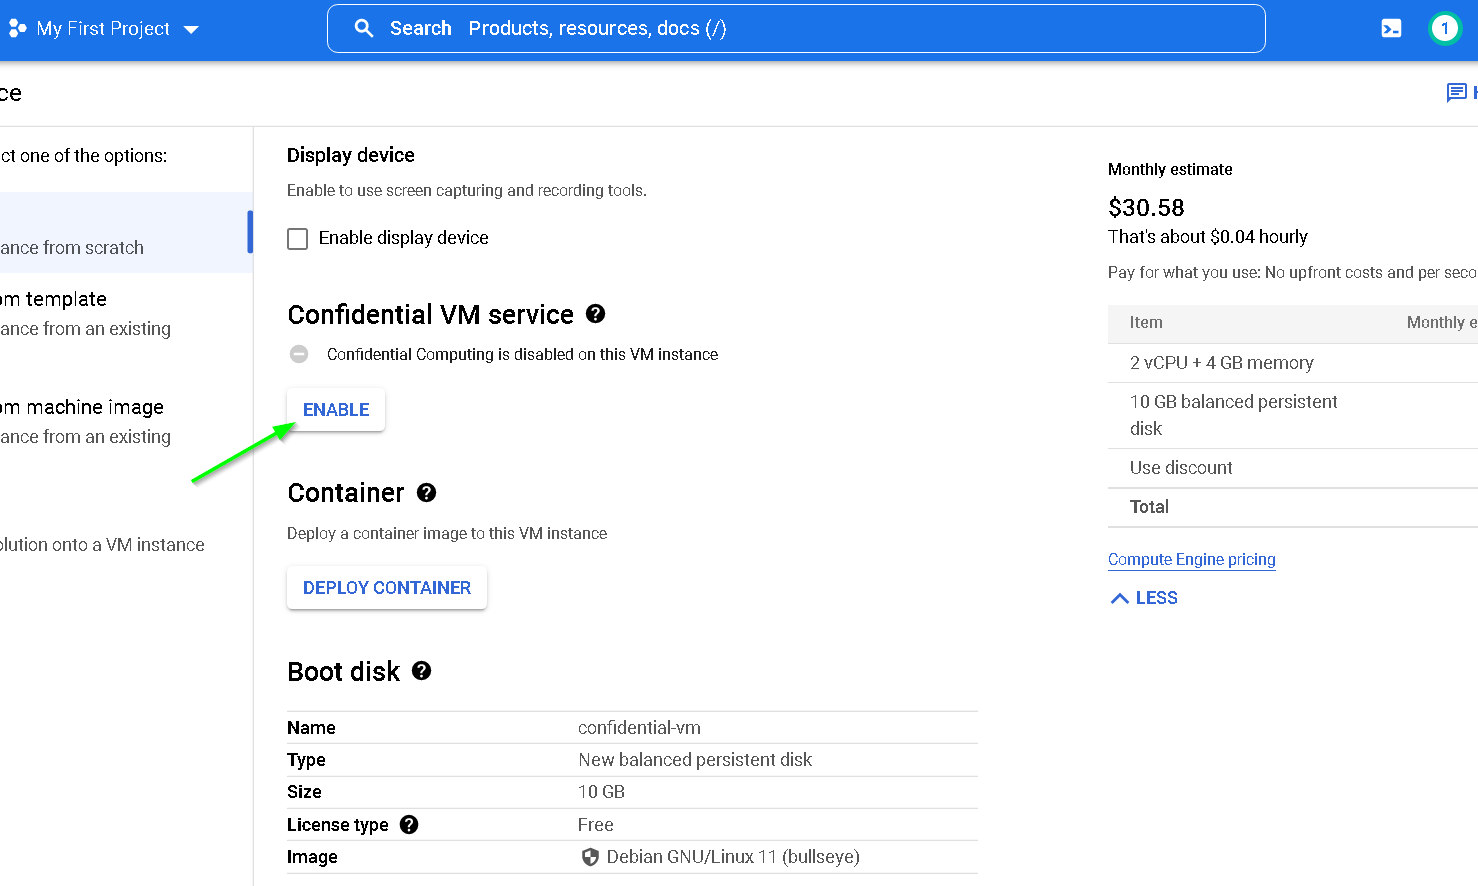
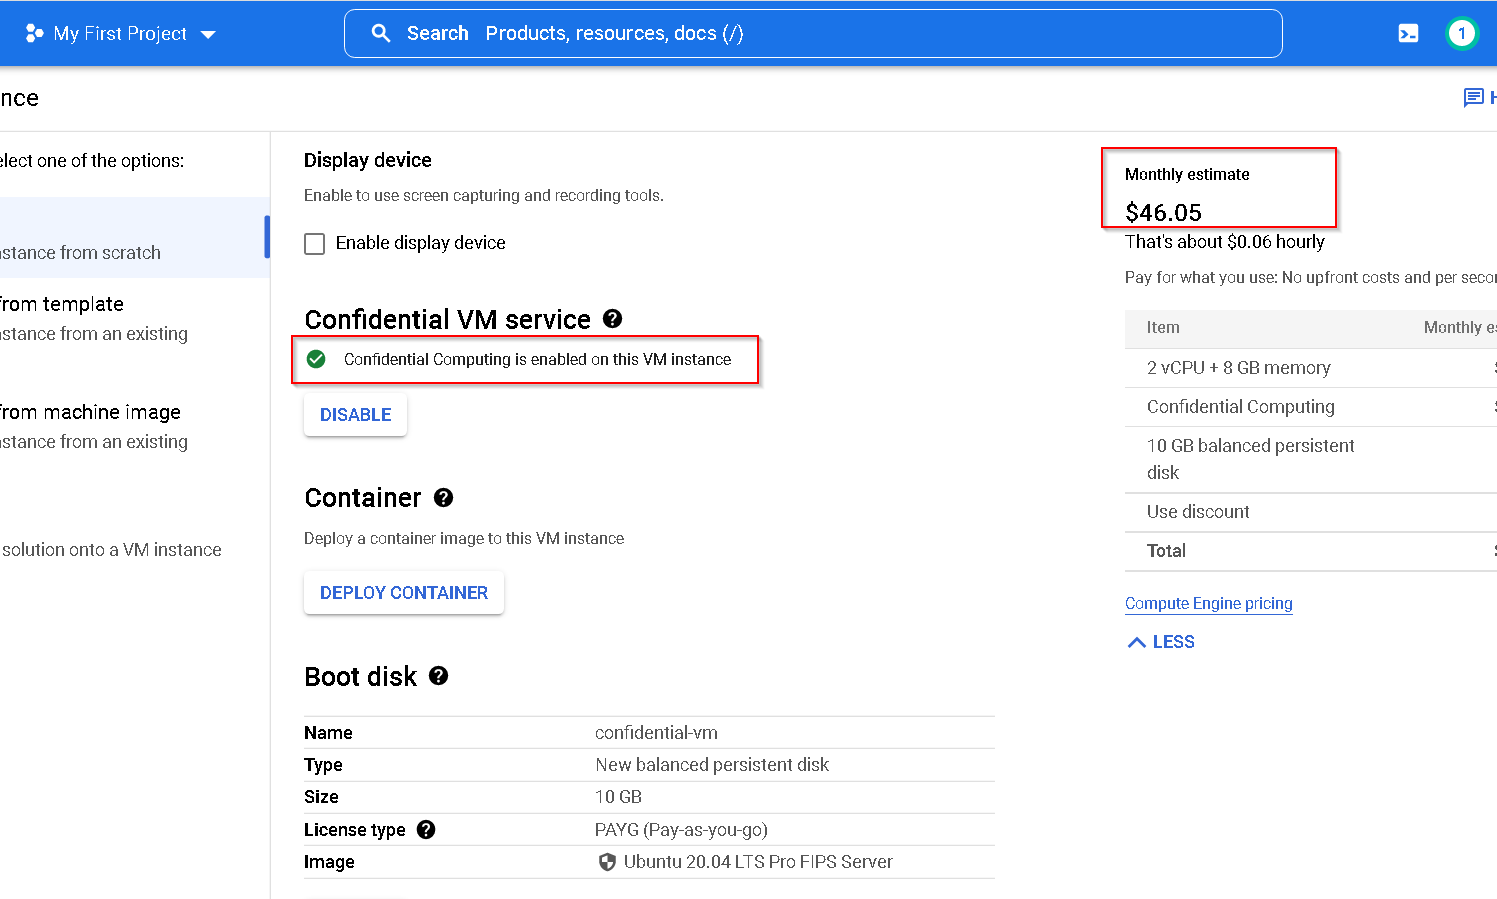
This creates the VM-1 required for the demo. Please follow the same steps for creating a confidential VM except for the following steps where we specifically create confidential VM

So, at this point we have these 4 VMs, 2 on AWS (for Thales CKM and on prem instance) and 2 on GCP (one for confidential and another standard)
9. Setting up externally encrypted BQ dataset and table.
This is for the first use case. We are doing following
- Create a dataset
- Create a table within this dataset
- Both are set to be encrypted with externally managed key created above
- Upload mock data to the table
- Show how data can be queried in only as long as the EKM endpoint is enabled.
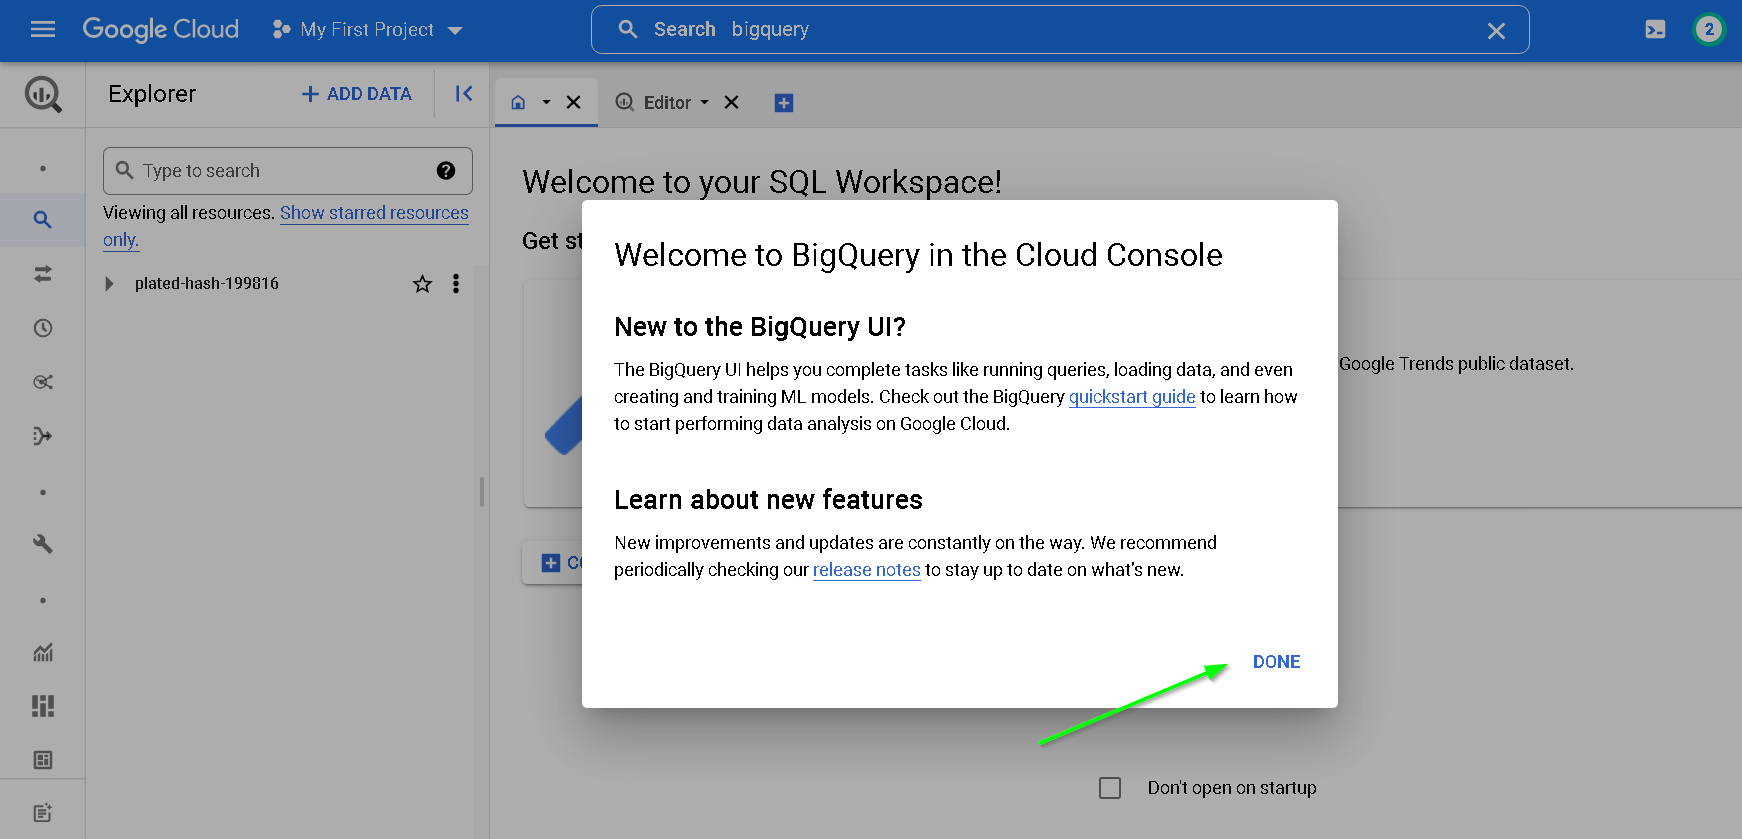
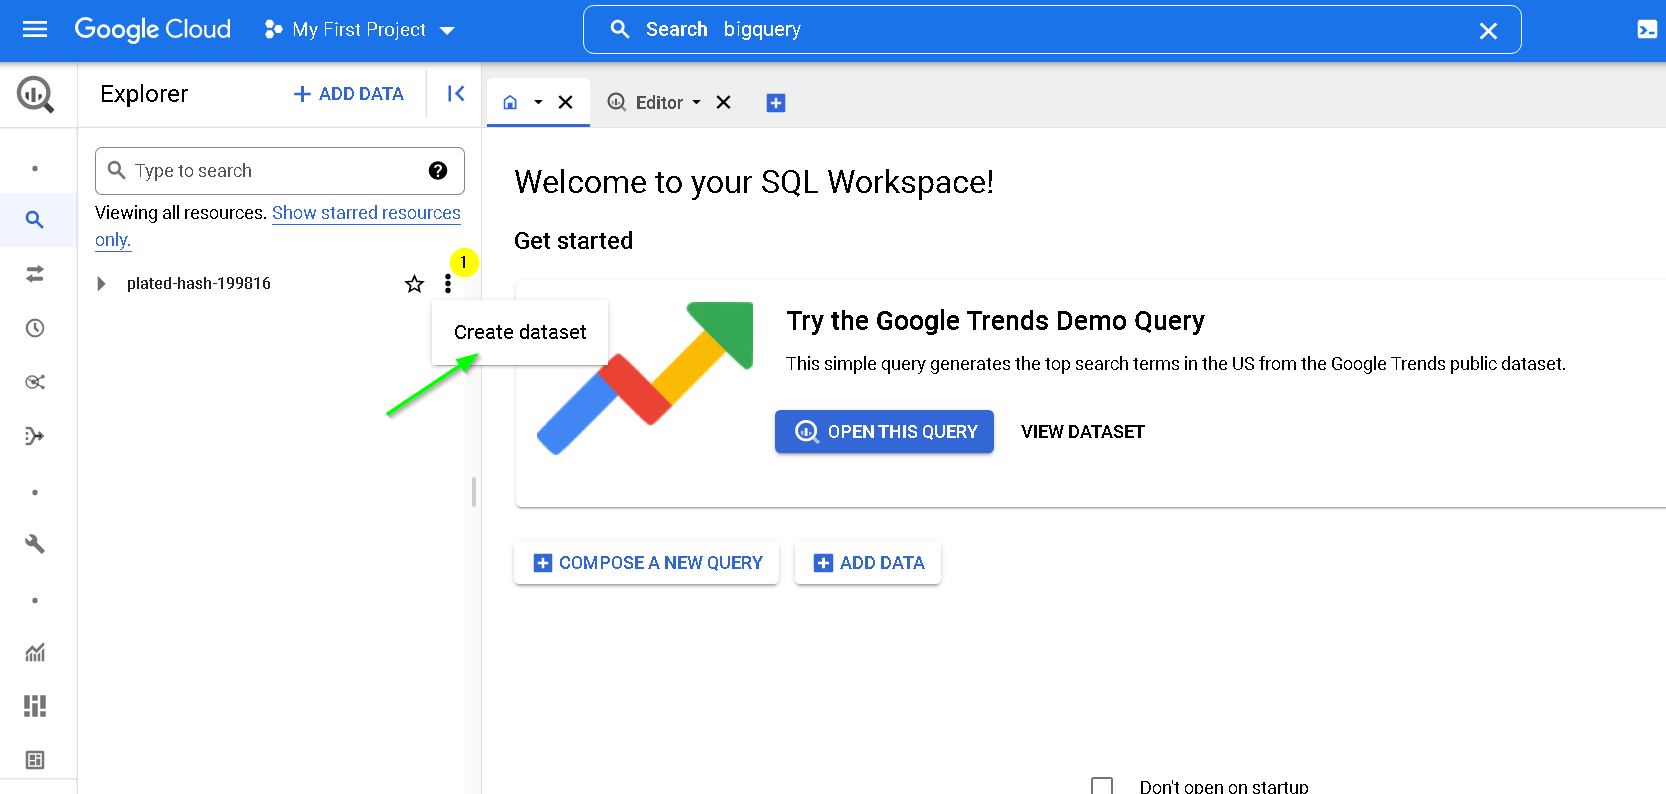
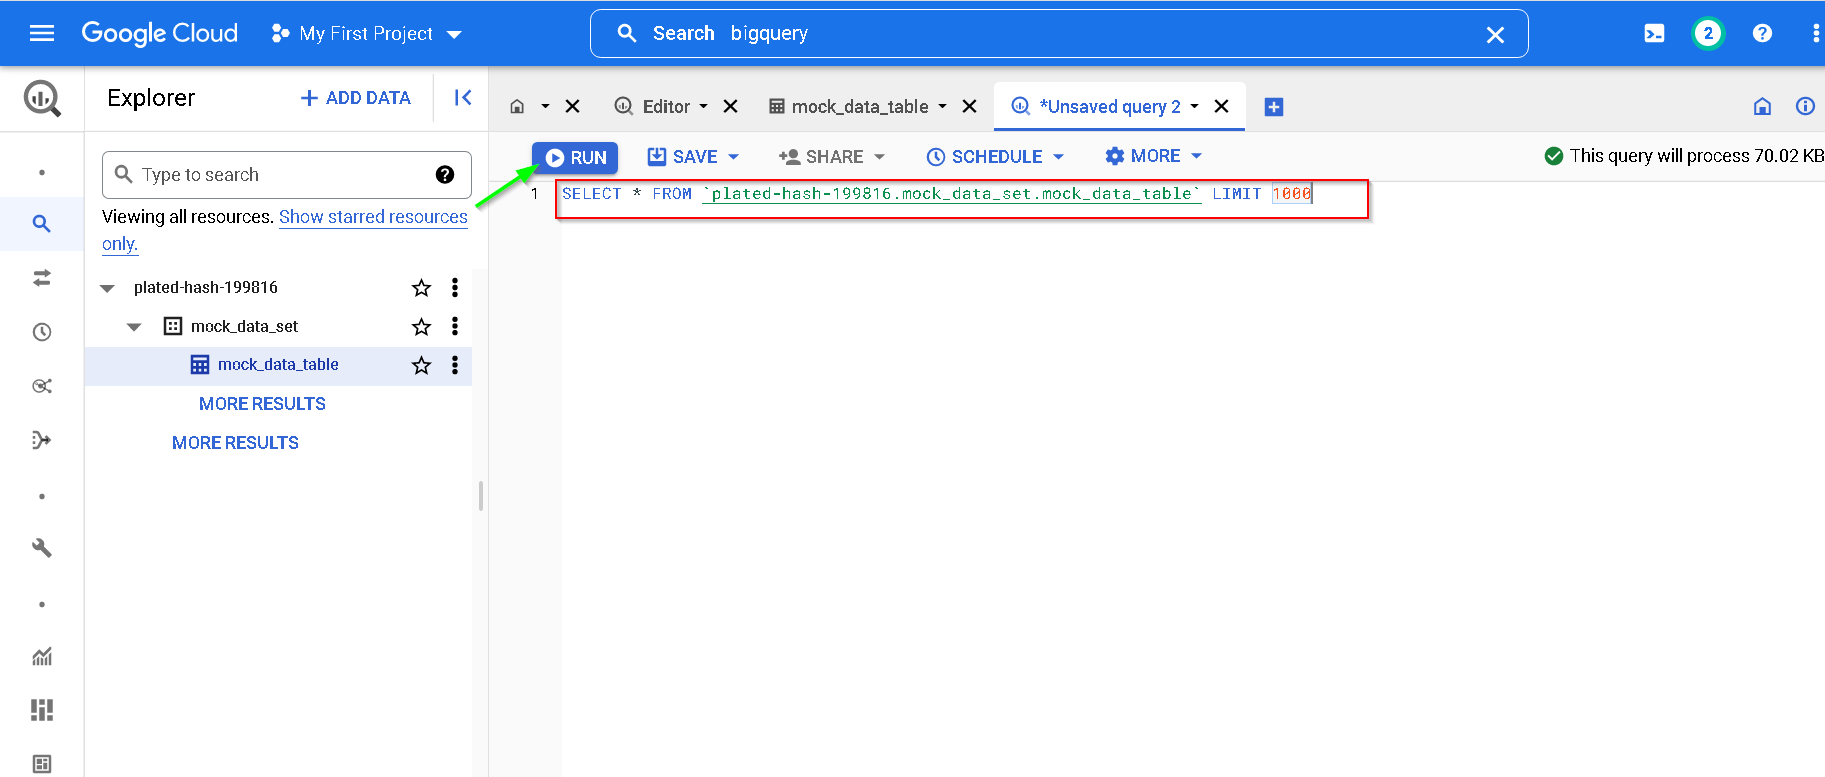
Goto GCP Console -> Big Query
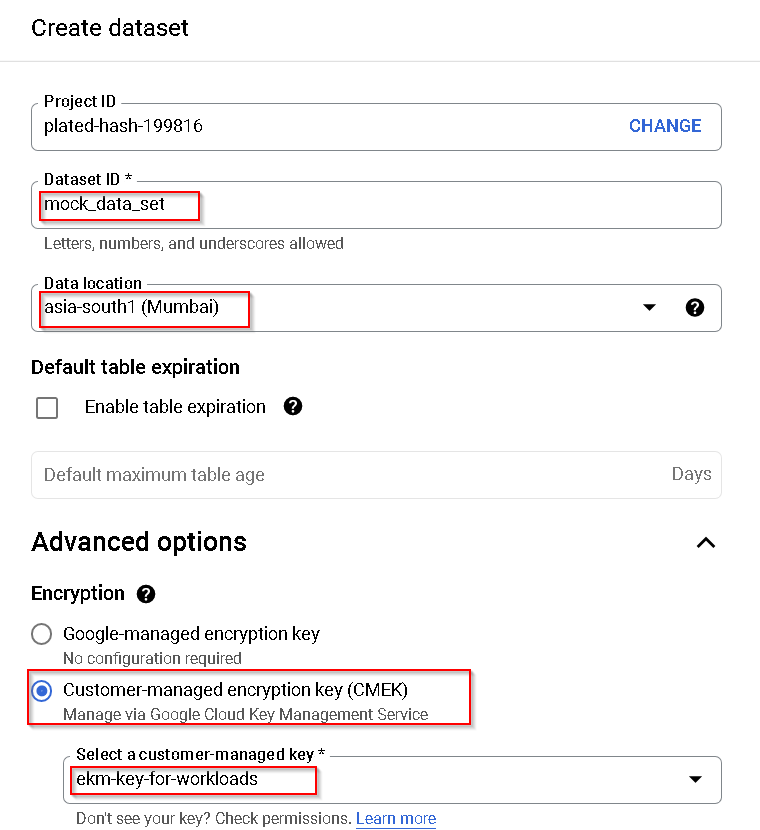
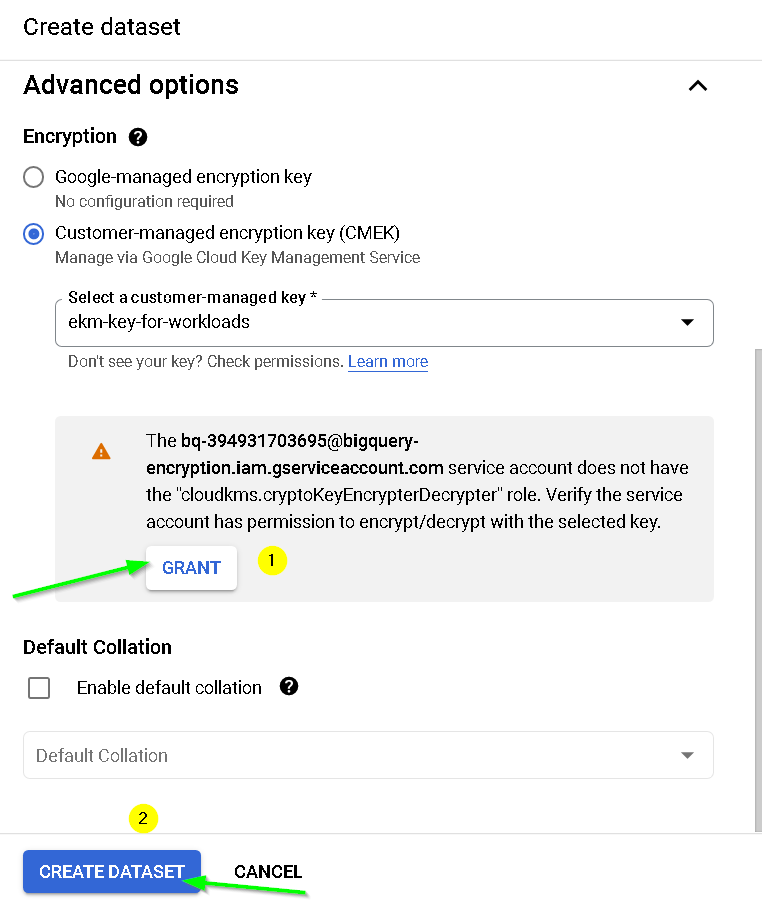
Create dataset
Update as shown. Make sure to use the externally managed key for encryption
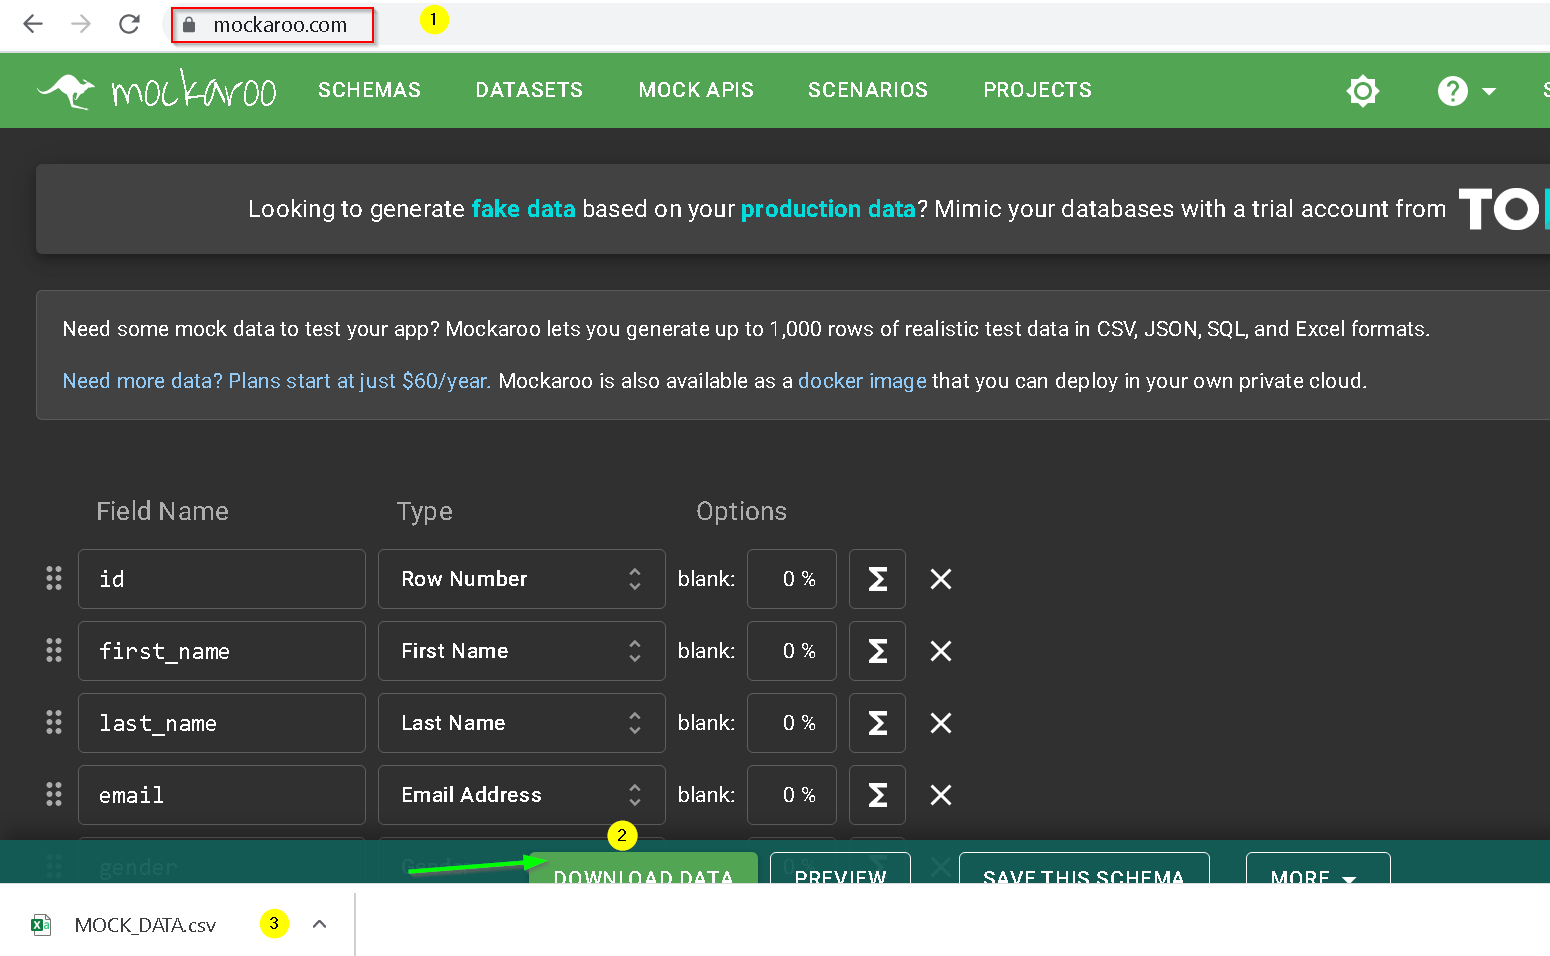
Get mock data from https://mockaroo.com as shown below
Create Table
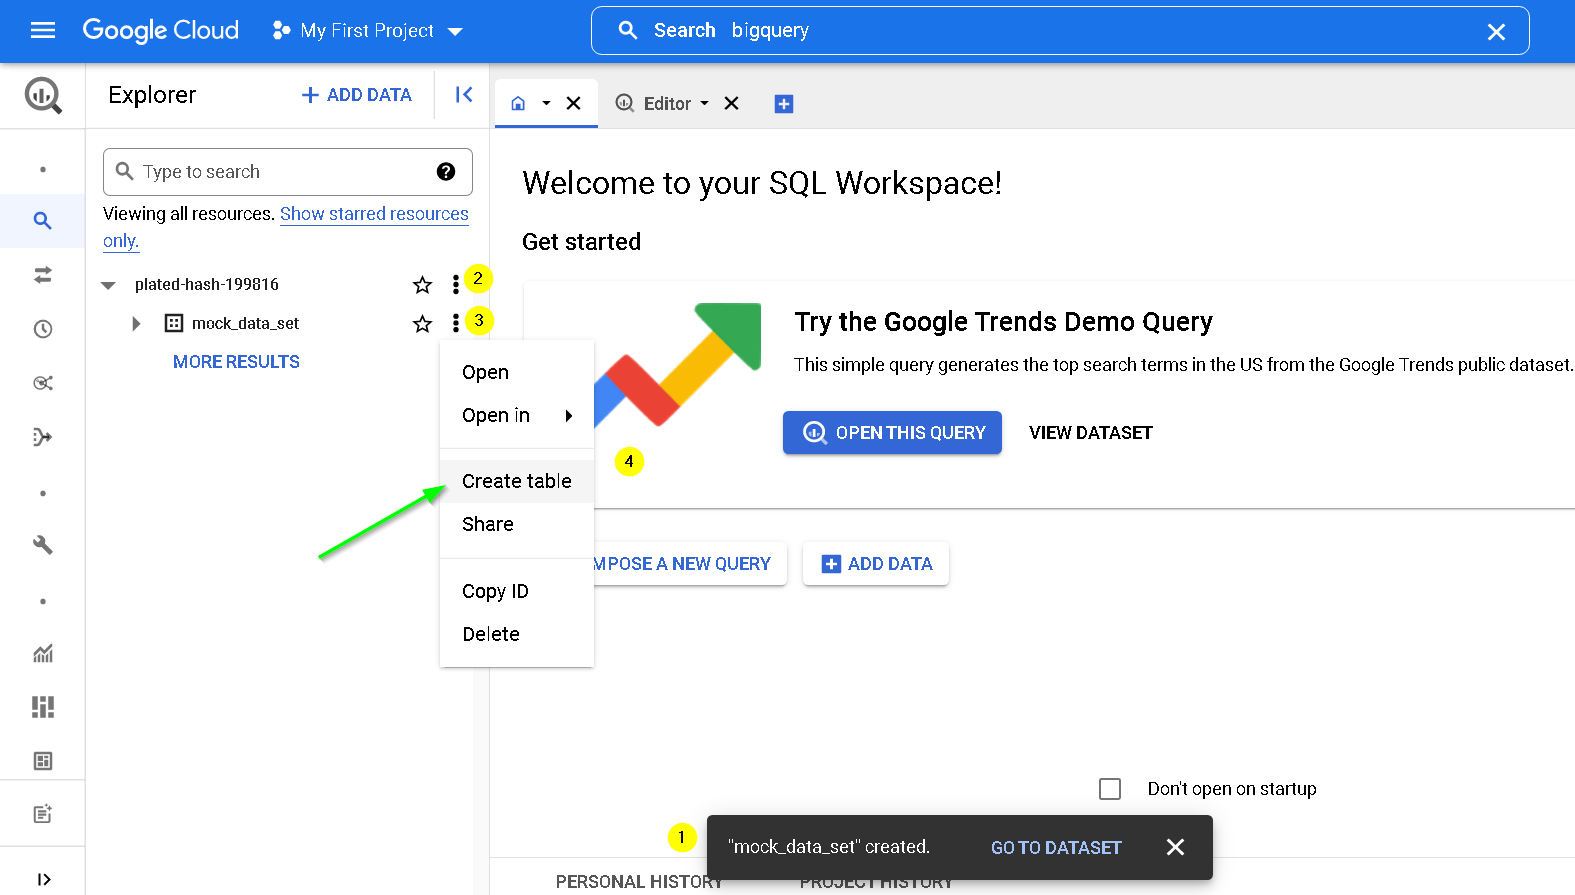
update as shown and also use the mock data csv for slect file field

Click Advanced options
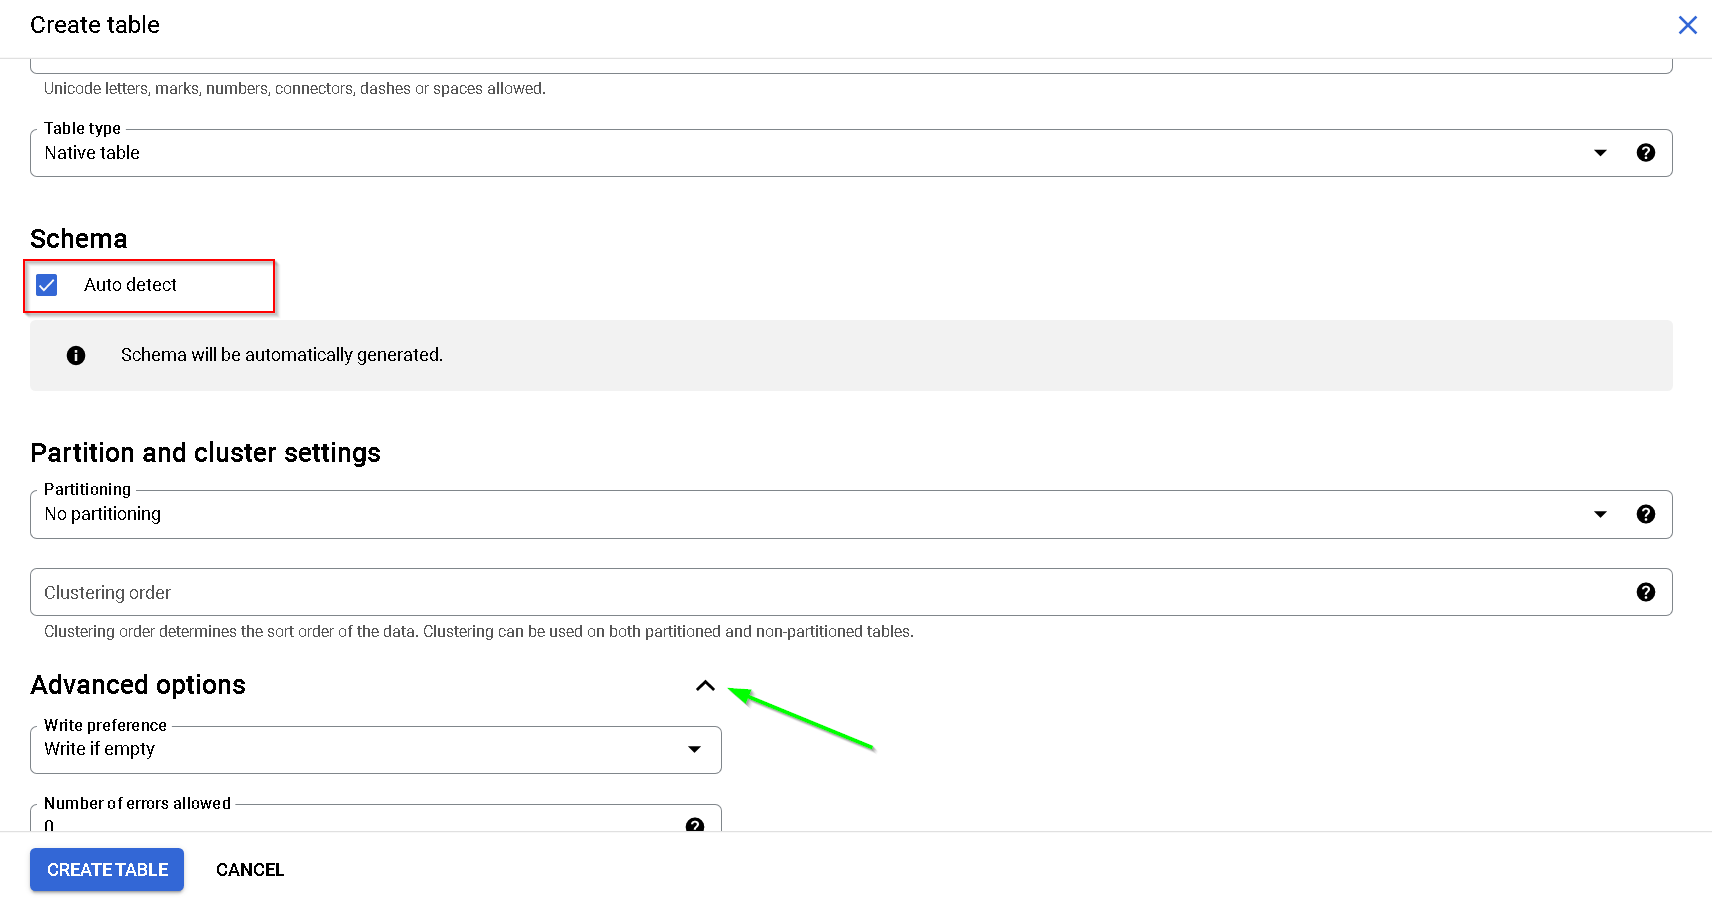
Use the EKM key
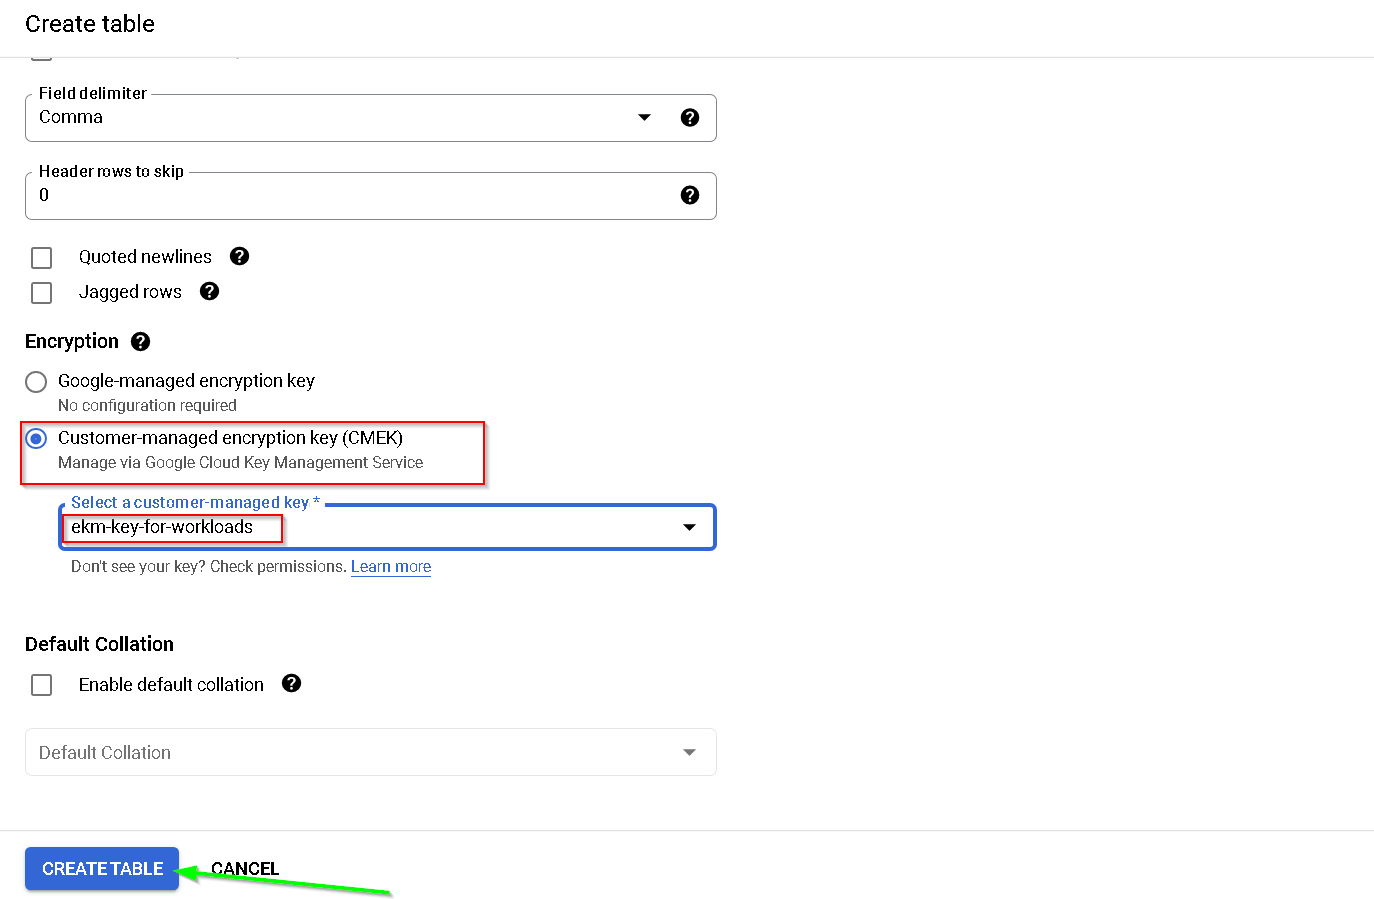
This completes the setup for the demo 1
while following steps are covered in the demo, following screenshots also cover them
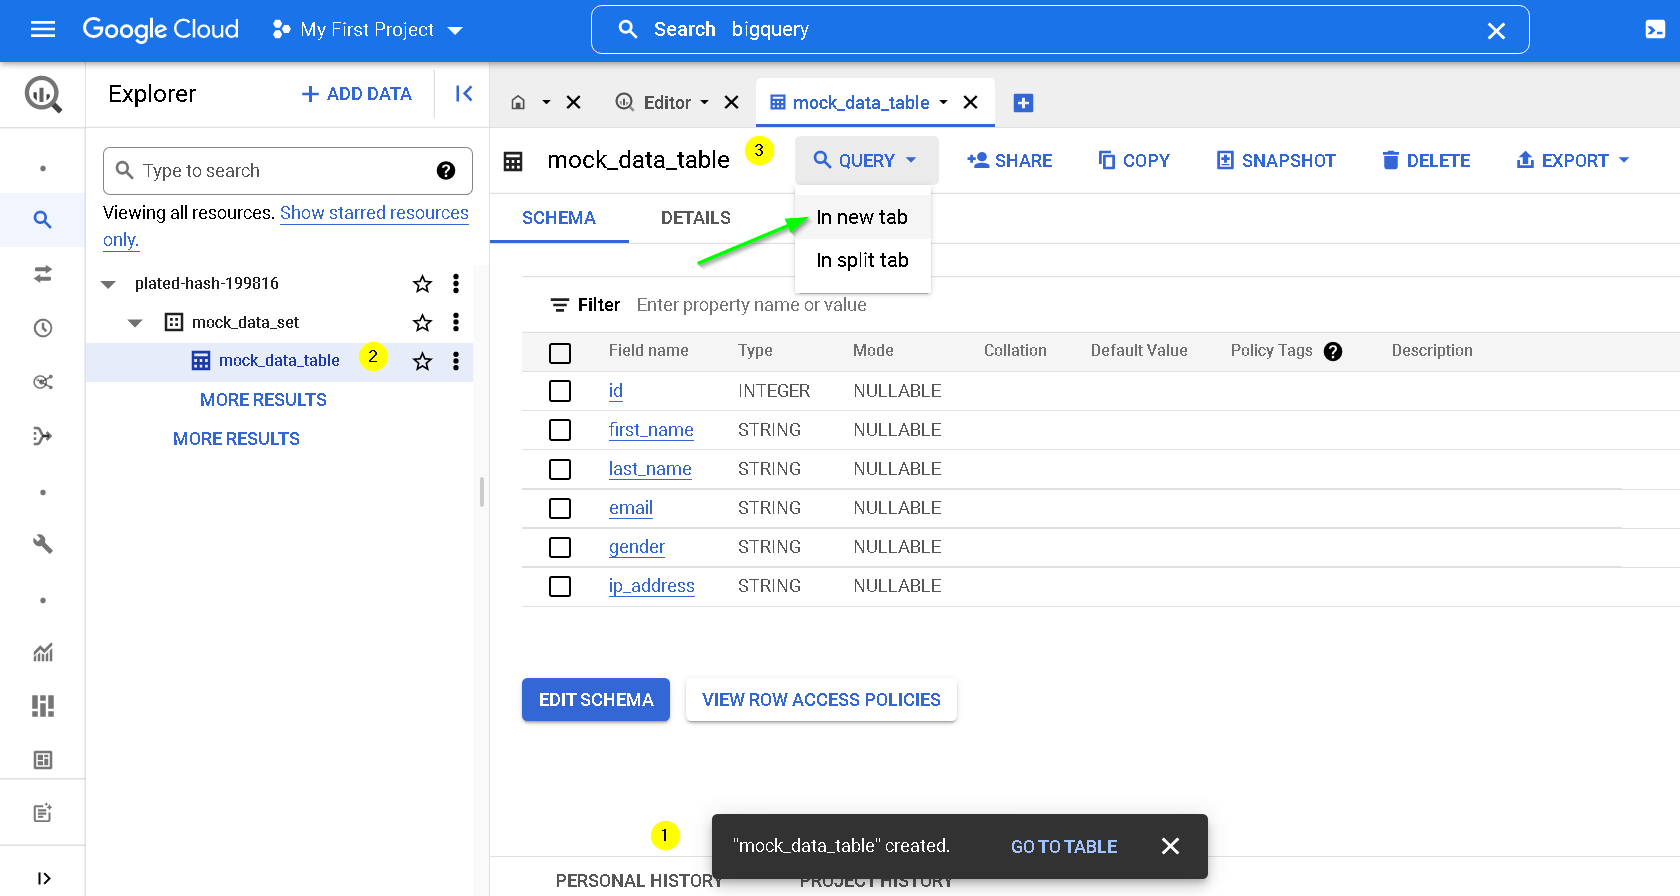
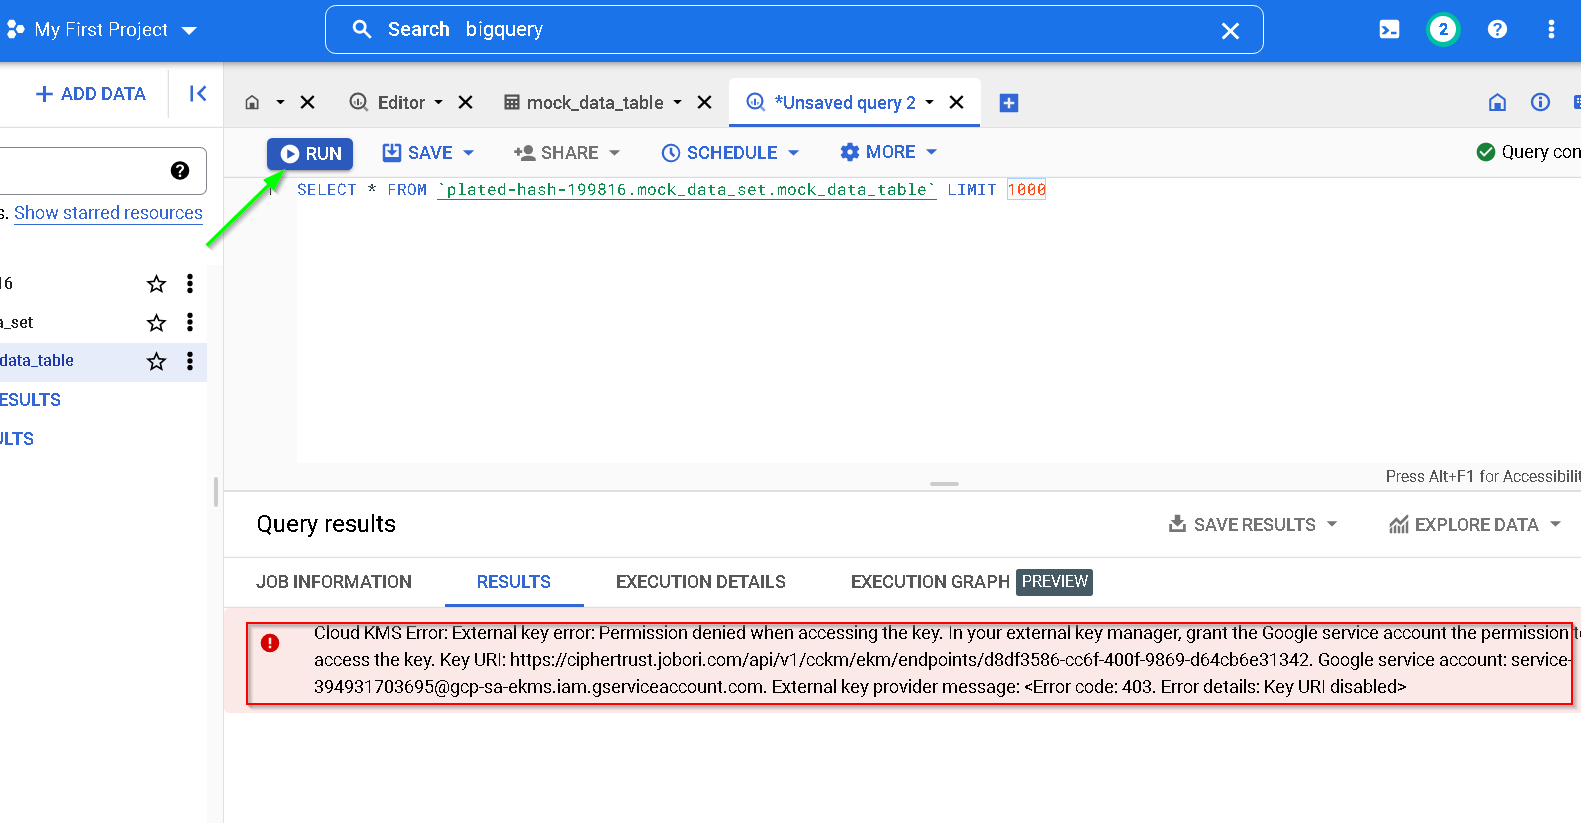
Run Query
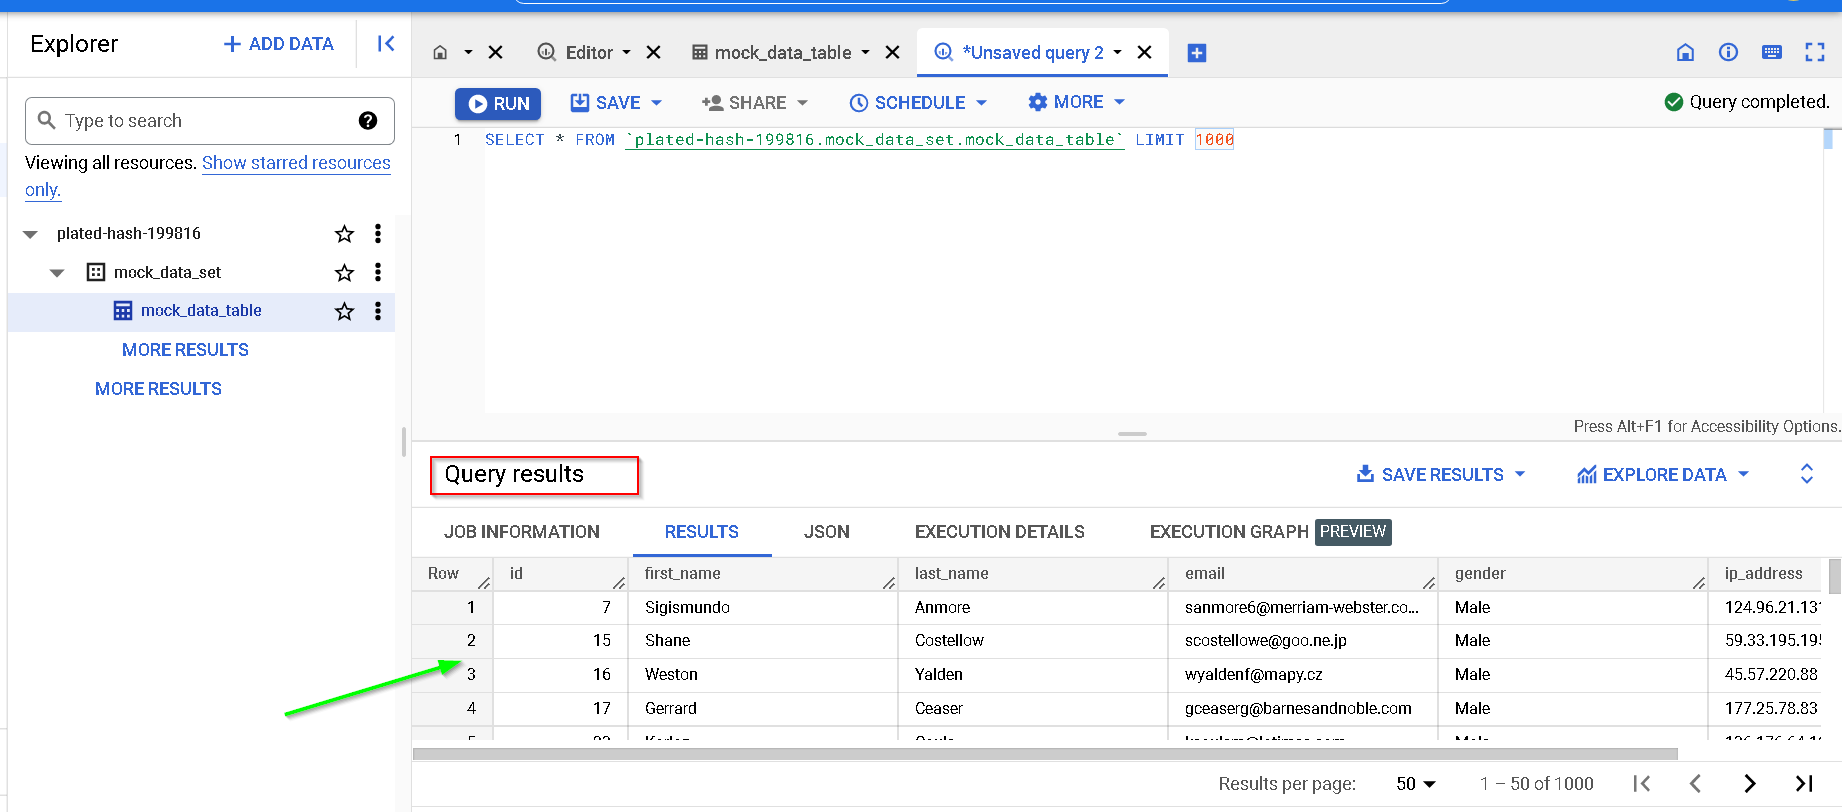
Notice the output
Let’s disable the endpoint and check what happens

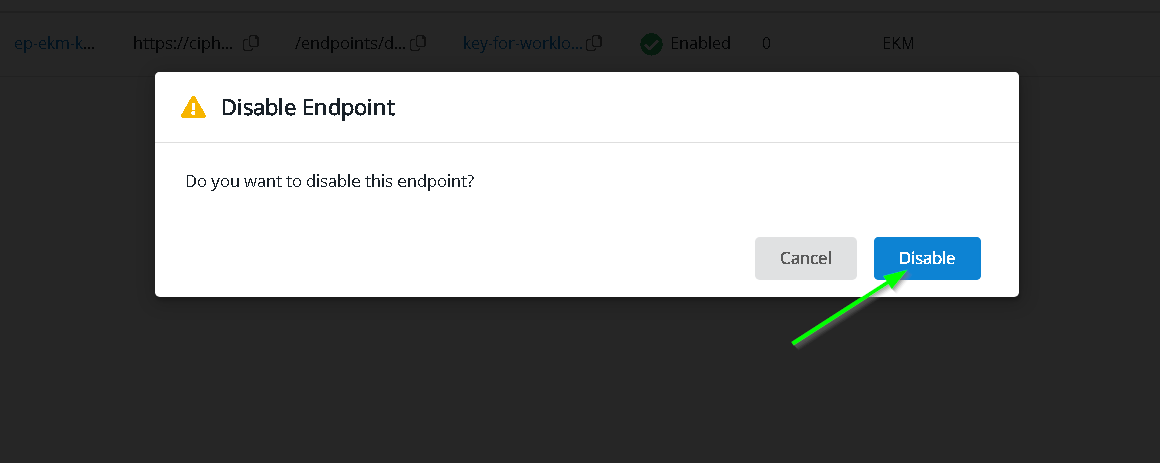
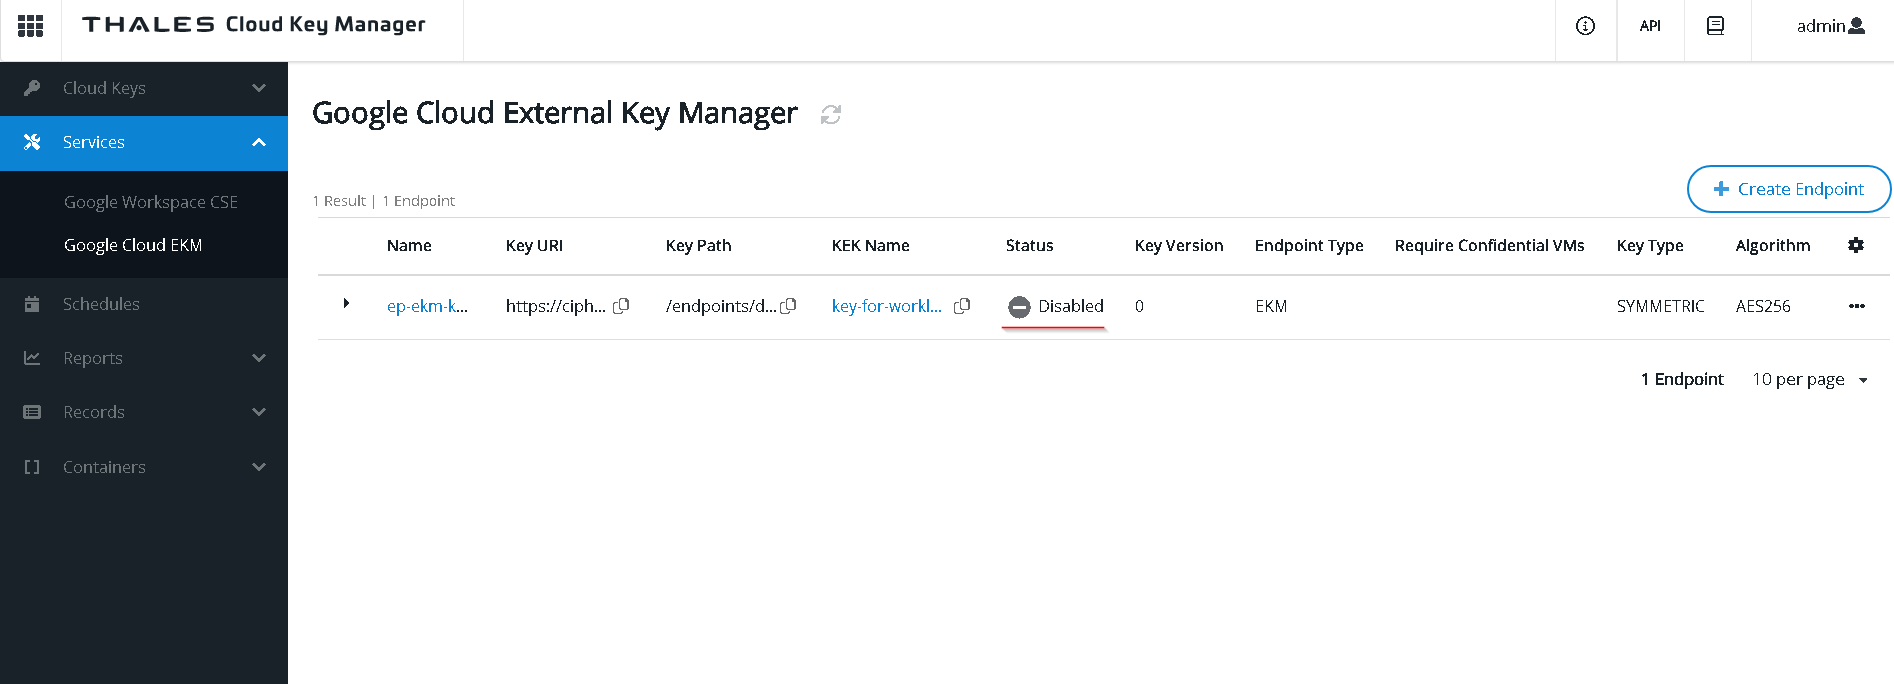
Run the query now. Notice it does not get through. Customer controls the encryption / decryption of the data.
Let’s enable the endpoint again test
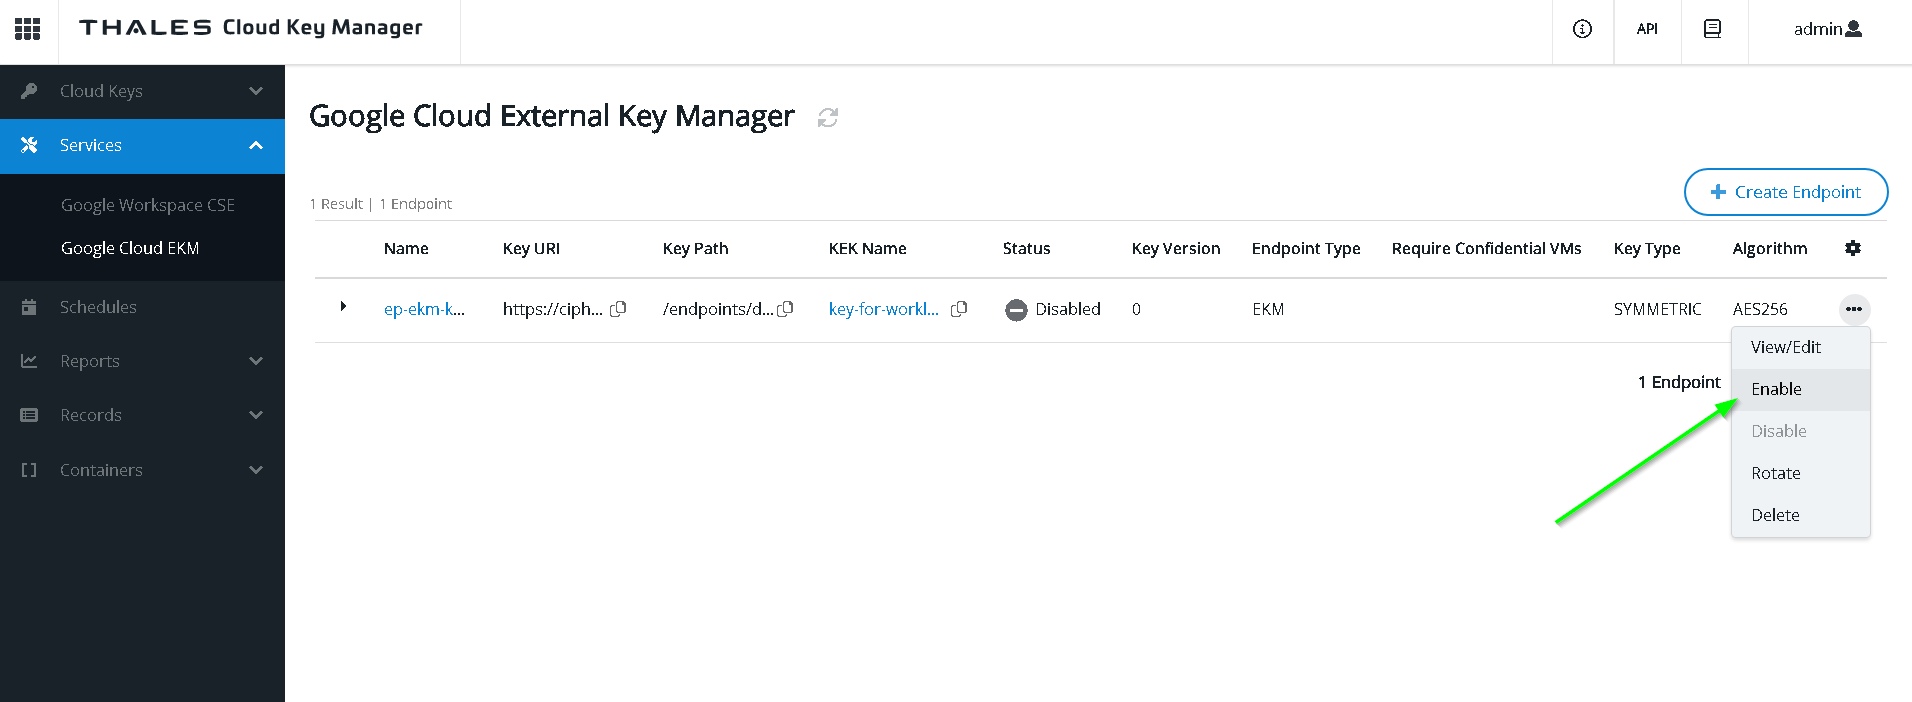
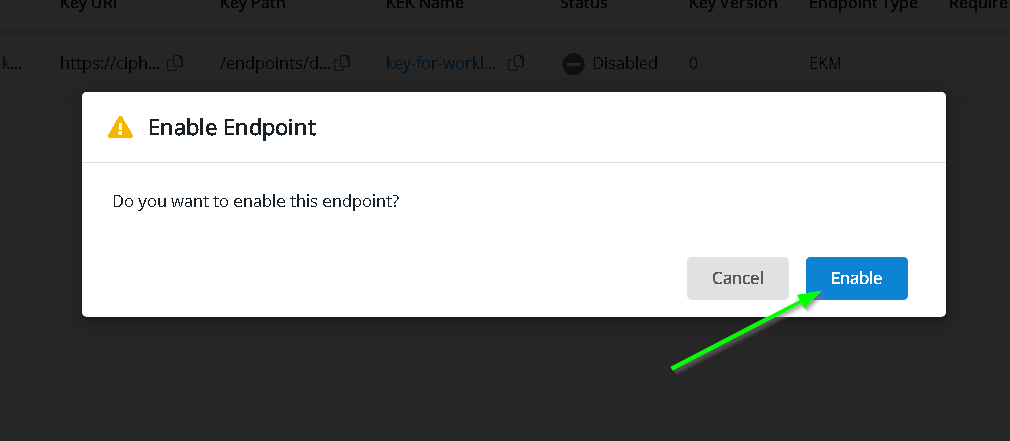
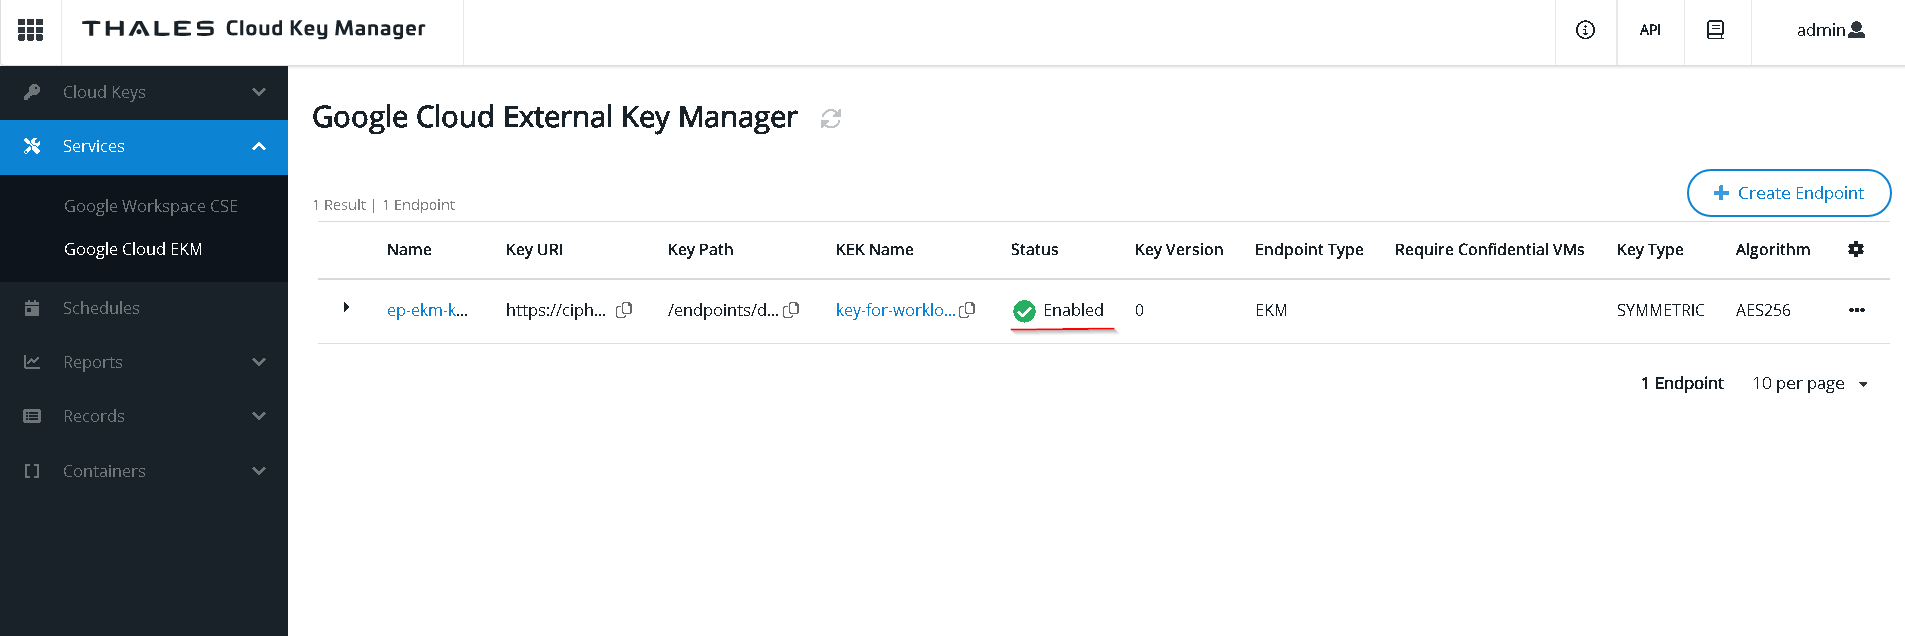
Run the query now and notice the results are shown
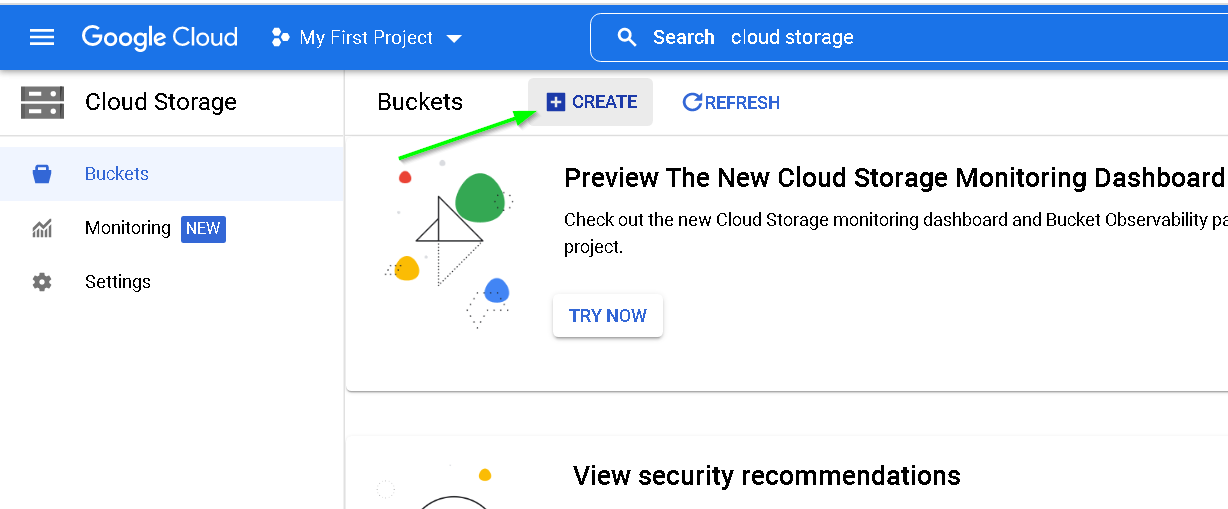
11. Create a Cloud Storage Bucket
Go to GCP Console -> Cloud Storage
Create Bucket
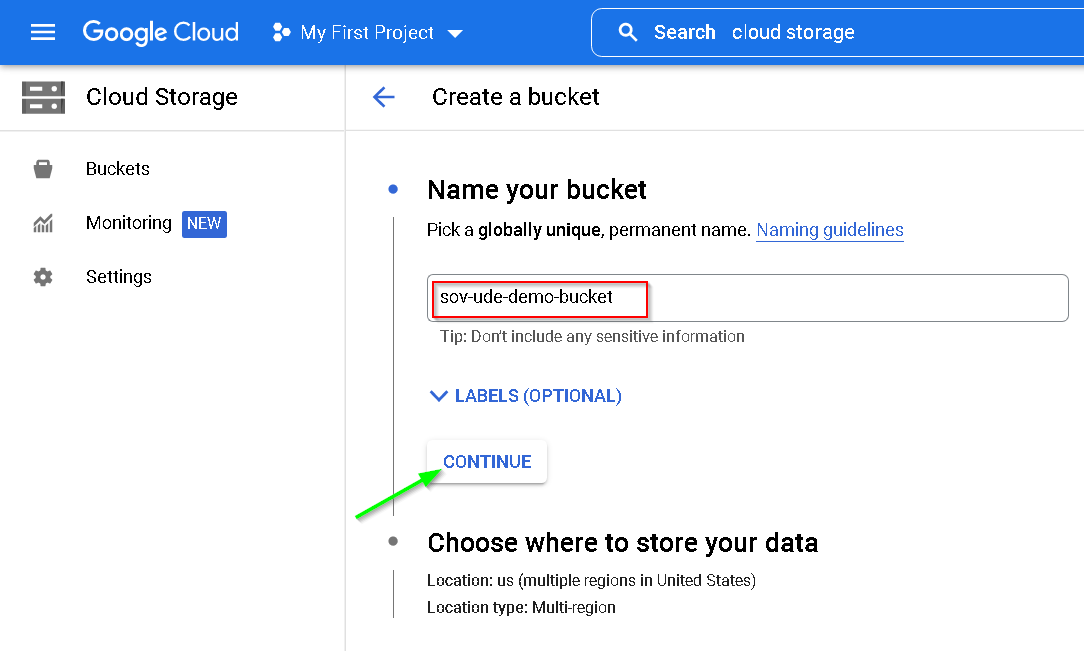
Keeping everything in the same Mumbai region
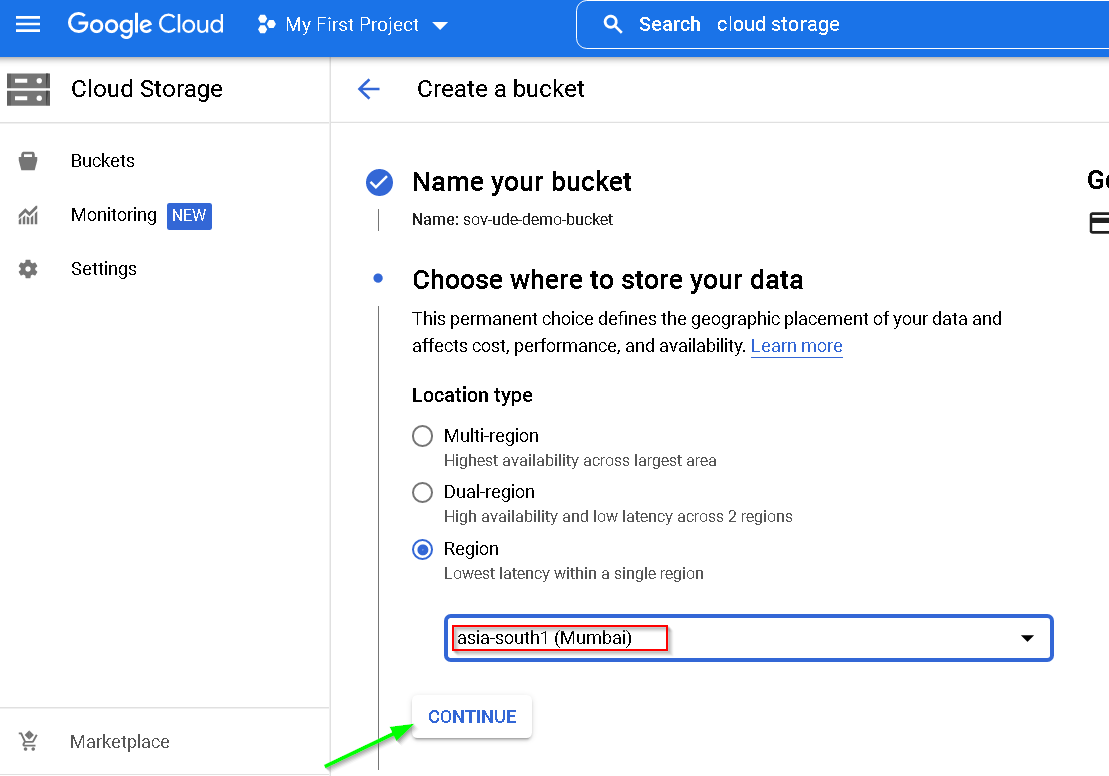
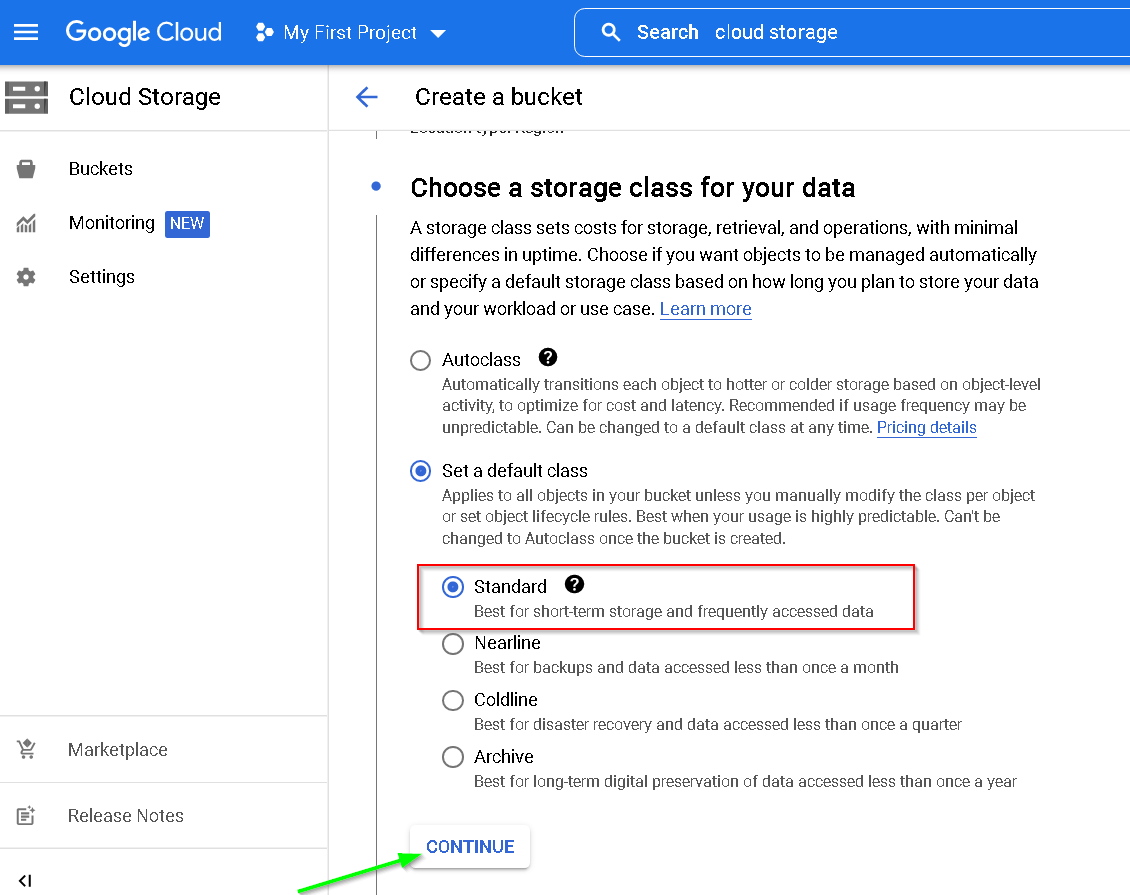
Create
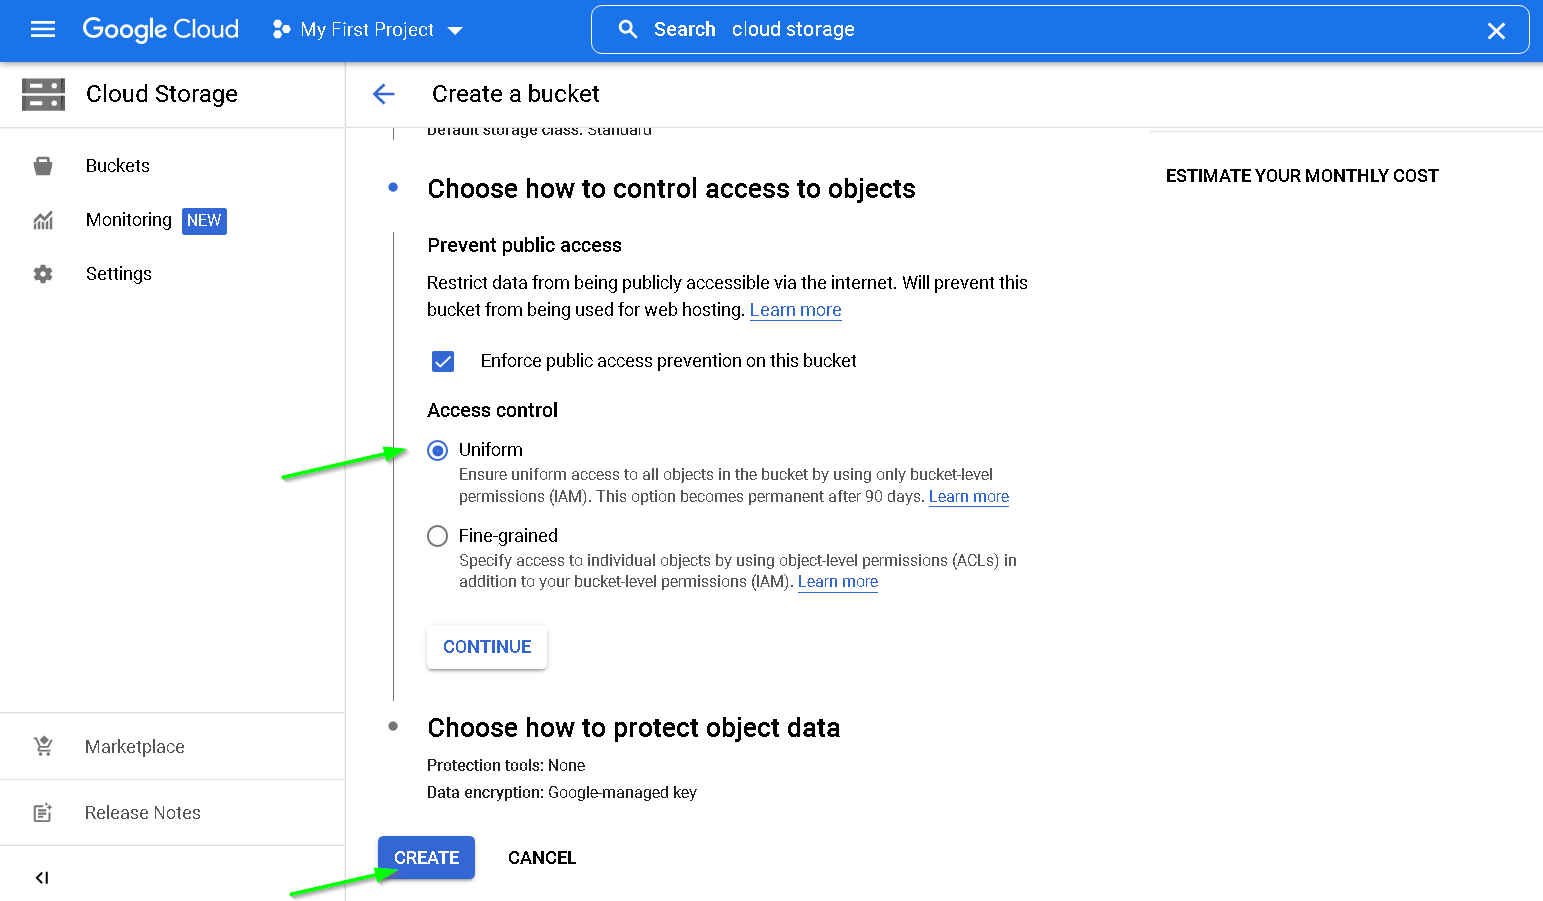
Storage Bucket Created

11. Configuring STET on on prem instance and 2 GCP instances
First on all 3 instances run following command
# creates .config folder along with printing the version information
gcloud --version
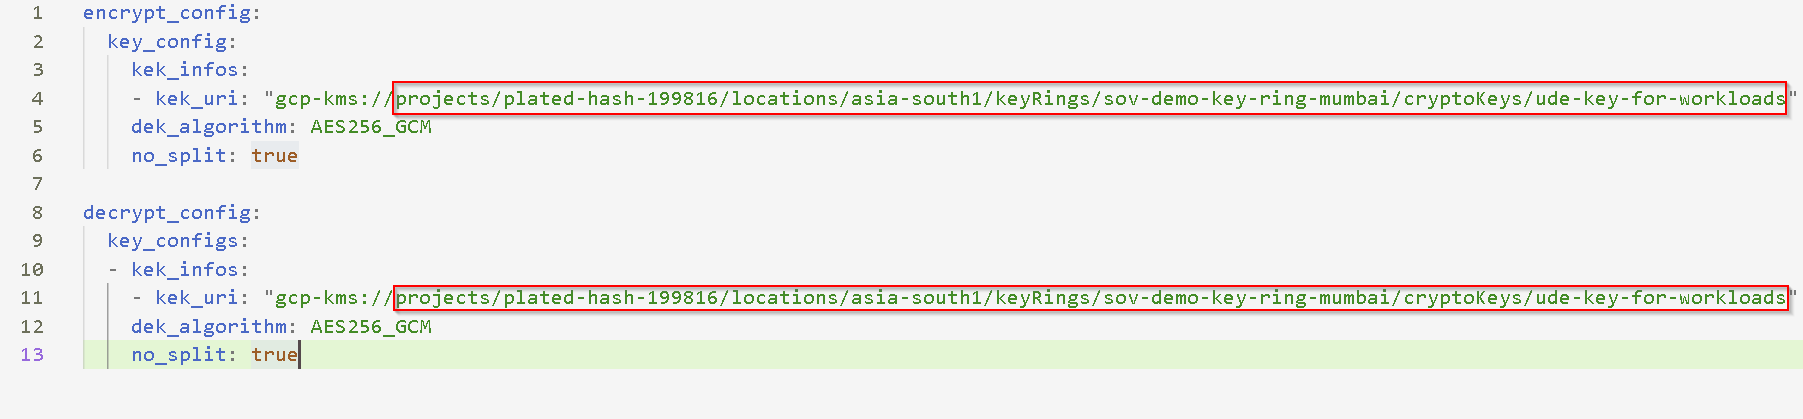
Now update the contents of following yaml content and then save it into .config/stet.yaml on all three instances
encrypt_config:
  key_config:
    kek_infos:
    - kek_uri: "gcp-kms://projects/ADD_PROJECT_ID_HERE/locations/ADD_KEY_RING_LOCATION_HERE/keyRings/KEY_RING_NAME_HERE/cryptoKeys/UDE_KEY_NAME_HERE"
    dek_algorithm: AES256_GCM
    no_split: true

decrypt_config:
  key_configs:
  - kek_infos:
    - kek_uri: "gcp-kms://projects/ADD_PROJECT_ID_HERE/locations/ADD_KEY_RING_LOCATION_HERE/keyRings/KEY_RING_NAME_HERE/cryptoKeys/UDE_KEY_NAME_HERE"
    dek_algorithm: AES256_GCM
    no_split: true
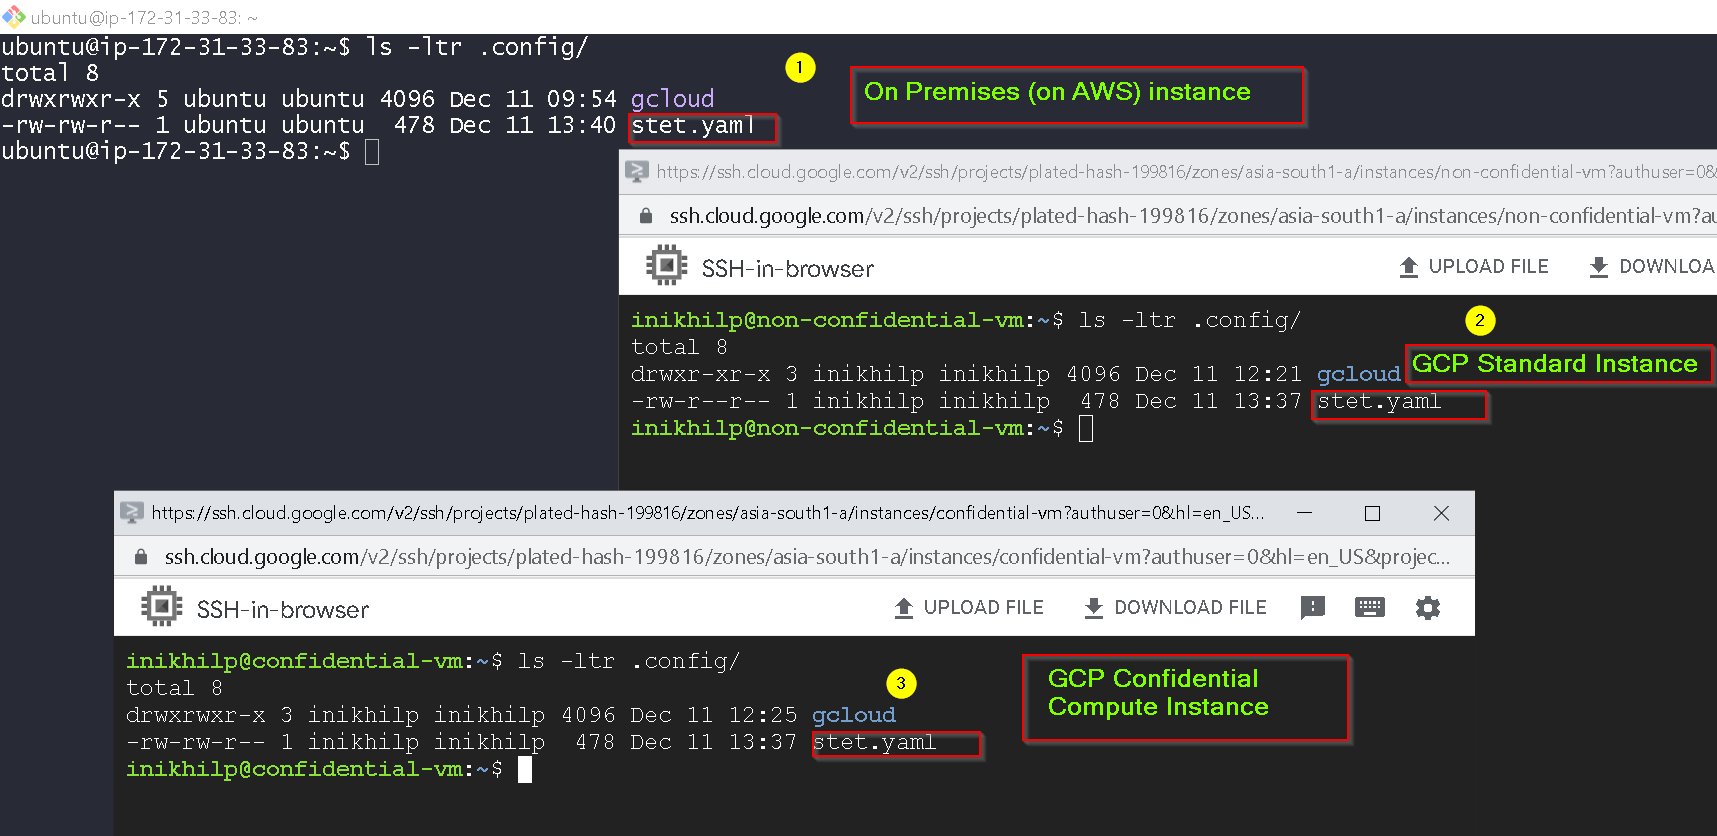
This is how stet.yaml looks in the demo environment
And notice it is updated on all 3 instances
Now upload the data.txt to the on prem instance.

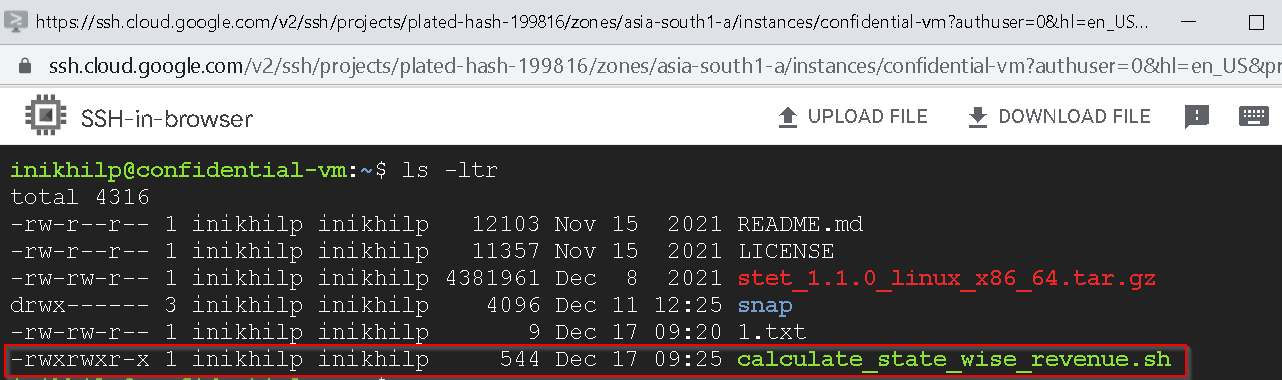
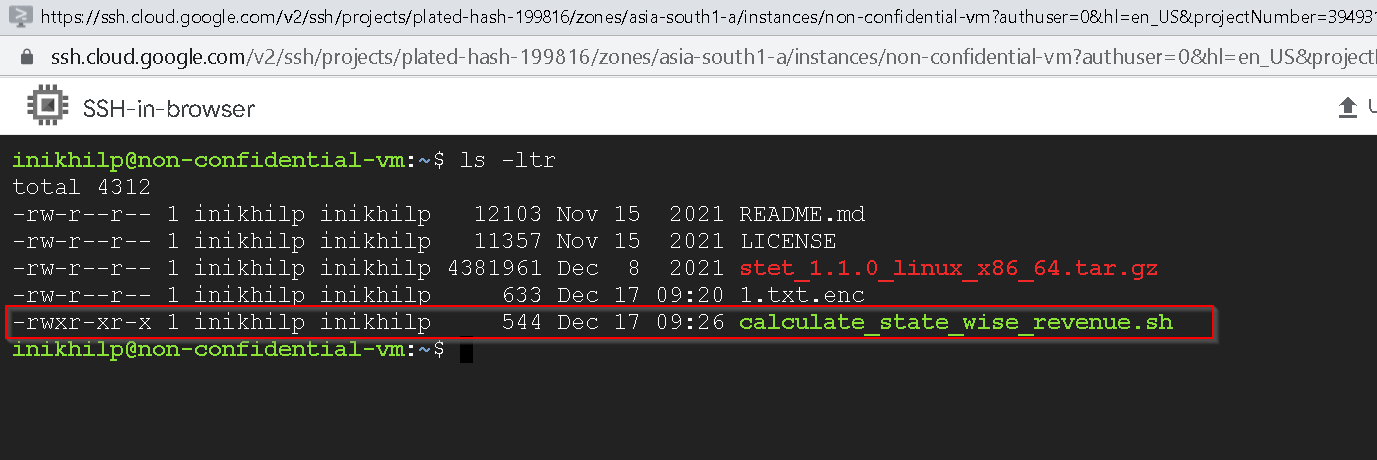
Also upload calculate_state_wise_revenue.sh to both the confidential and non confidential VMs.
💡 Please update the bucket name in the script to match your GCS bucket name
This completes the UDE demo setup.
You can go ahead and check the video demo again.
💡 Please decommission the setup (AWS and GCP VMs and GCP KMS keys) to stop getting charged for the infrastructure once you are done playing with the setup and learning more about data sovereignty.
Conclusion
In this post we created the demo setup for the Data Sovereignty Demo from part 2. Please check out the other posts in this series as well.
Thank you for reading through, Please like 👍, share 🔗 and comment ✍ if you found it useful.
-Nikhil